‹ All Stories

Operation Market Garden - September 17-21, 1944

Arnhem

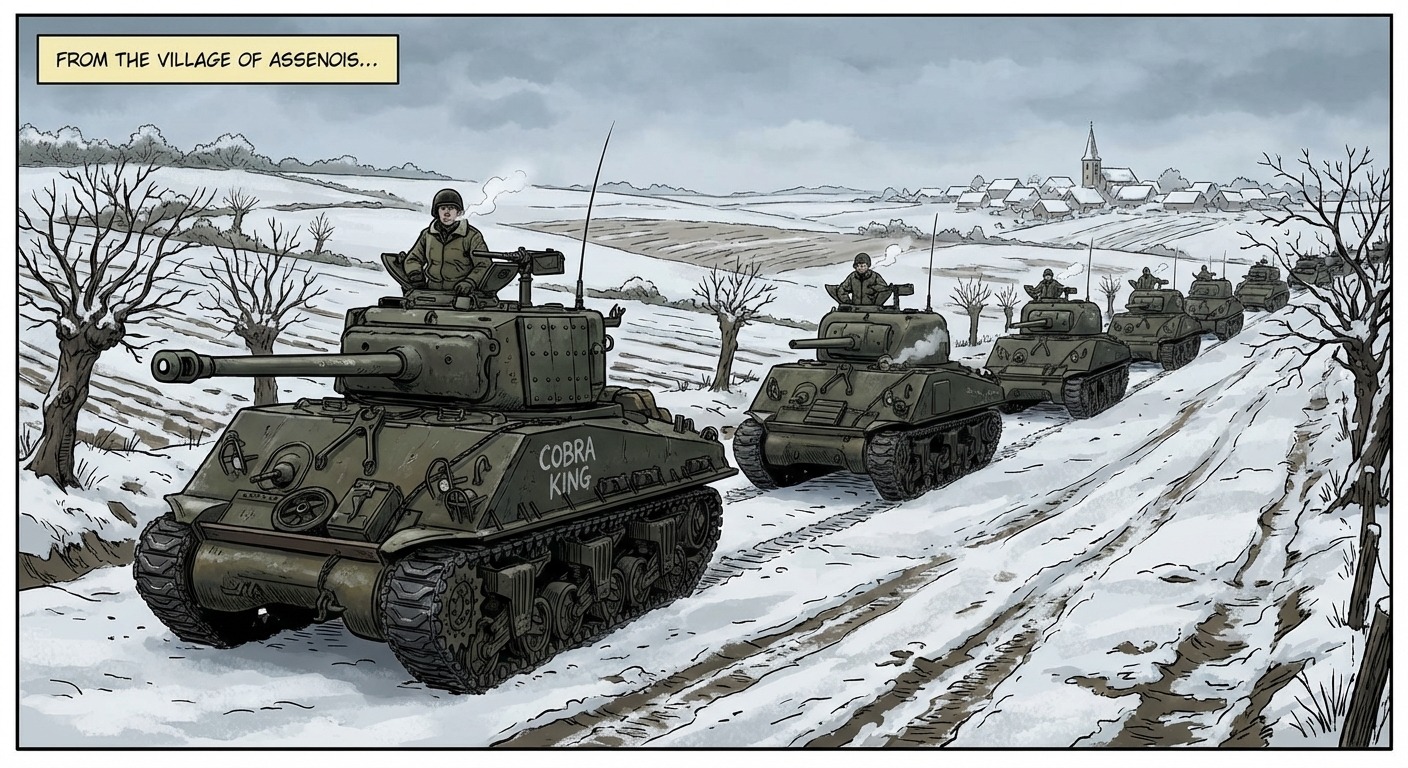
John Frost's paratroopers reached the bridge. The rest of the British 1st Airborne was trapped west of town, the radios failed, German armor closed in, and XXX Corps was still fighting up a single road.

1st AirborneBritish airborne troops dropped west of Arnhem to seize the final Rhine bridge.
2 ParaLt. Col. John Frost's battalion reached the north end of Arnhem road bridge.
XXX CorpsBritish ground forces advanced from the south on a narrow, exposed route.
A Bridge Too FarArnhem became the operation's breaking point and the bridge remained in German hands.

The Road To Arnhem

Market Garden tried to end the war with speed. Airborne divisions would seize a chain of bridges through the Netherlands, while XXX Corps drove north and crossed them before German resistance could solidify. Arnhem was the final and hardest objective: the road bridge over the Lower Rhine.

The British 1st Airborne landed miles from the bridge. Frost's 2nd Battalion pushed through and reached the north end, but other units were slowed, blocked, or pulled into fighting around Oosterbeek. The plan needed distance, timing, radios, and road movement to work perfectly. At Arnhem, none of those stayed perfect for long.

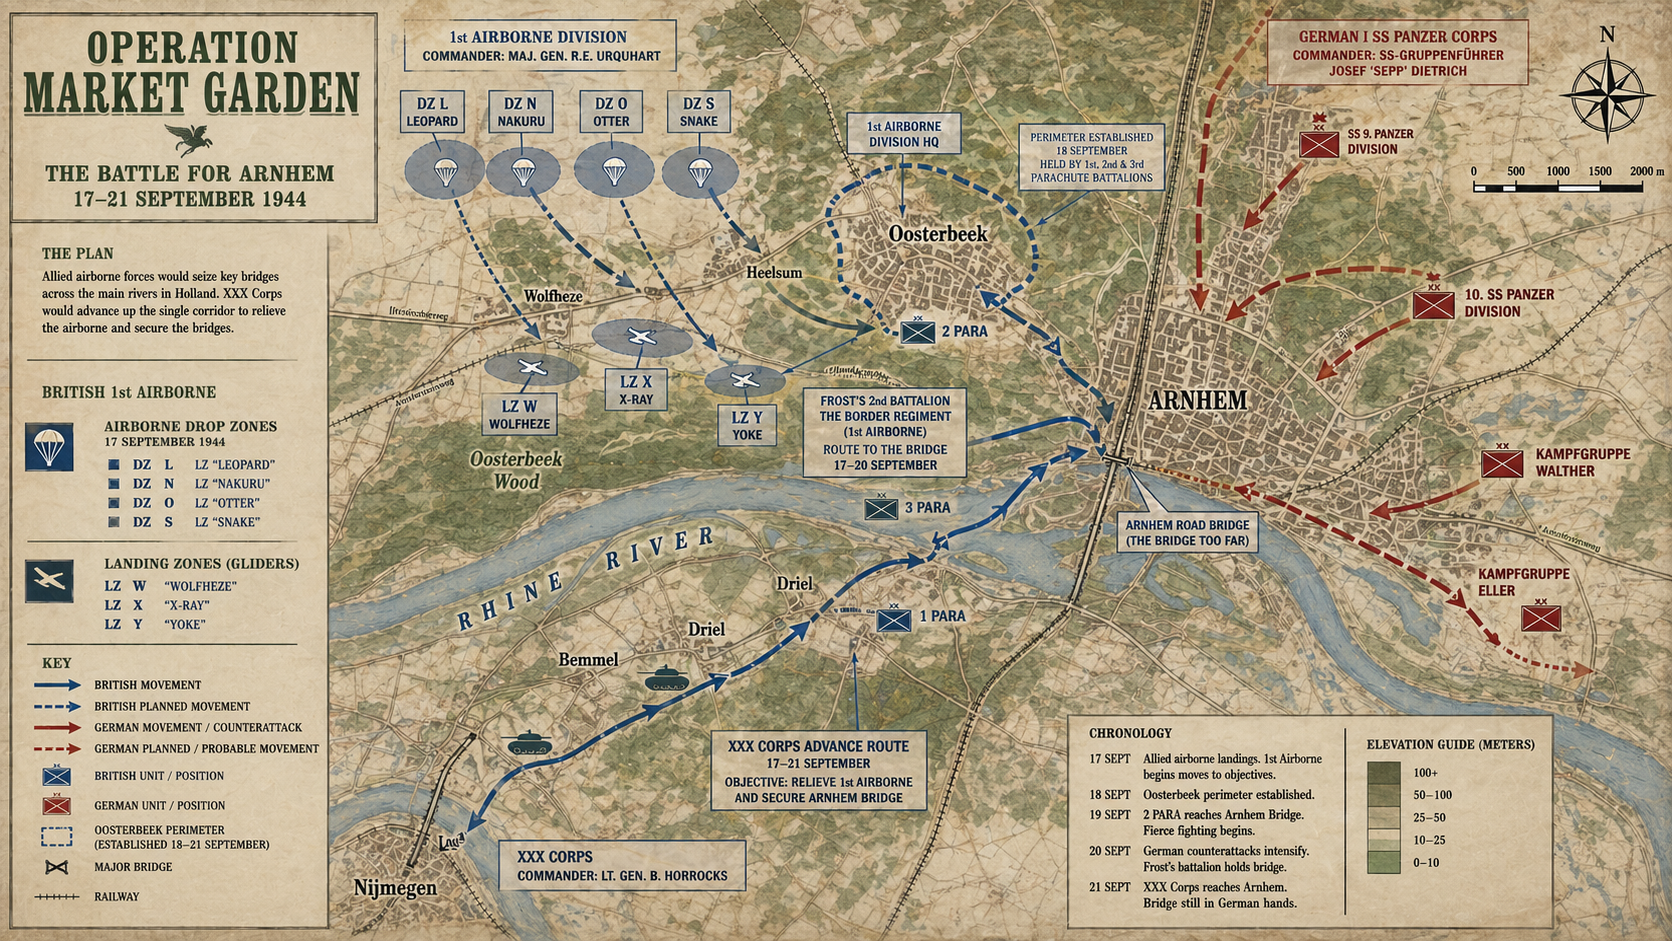
Operation Market Garden Arnhem tactical map
Map of the Arnhem fight: distant drop zones, Frost's route to the bridge, Oosterbeek perimeter, German blocking forces, and XXX Corps pushing north from Nijmegen.

British Airborne Equipment

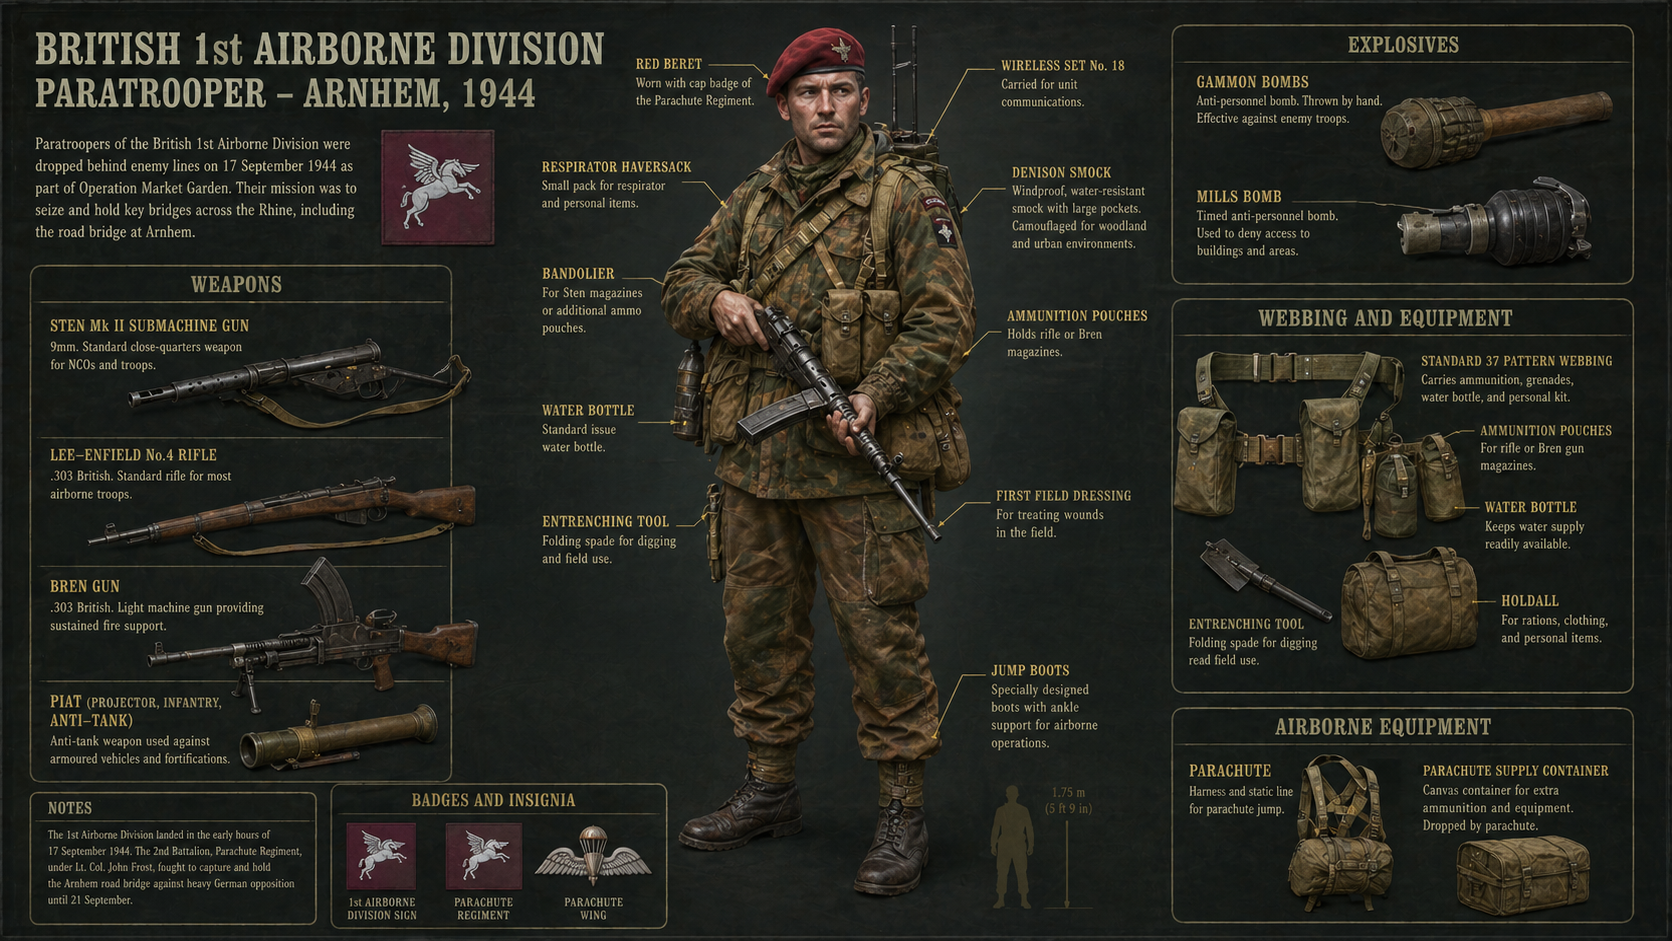
Frost's men fought as airborne infantry: light enough to arrive by parachute or glider, but expected to hold ground against armor until relief arrived. The kit mattered. Stens and rifles handled close fighting, Brens gave sections sustained fire, PIATs were the desperate anti-armor answer, and radios were supposed to hold the operation together.

British 1st Airborne paratrooper equipment at Arnhem
Click to enlarge - British airborne kit at Arnhem: Denison smock, red beret, Sten, Lee-Enfield, Bren, PIAT, Gammon bombs, webbing, radio gear, and parachute supply container.

Hold Until Relief

On September 17, 1944, British paratroopers and glider troops came down west of Arnhem. The drop was orderly, but it gave away time and distance. The bridge was the prize, and Frost's 2nd Battalion moved hard toward it while other battalions ran into German resistance, traffic, confusion, and broken communication.

Frost's men reached the north end of Arnhem road bridge and dug into houses, rubble, and buildings around the approach. They expected relief from the south. Instead, they faced German counterattacks, armored cars, tanks, artillery, and infantry trying to crush the bridgehead before XXX Corps could arrive.

The radios were a disaster. Sets that were supposed to connect the scattered airborne force often failed in the wooded and urban terrain. Commanders could not see the whole fight. Units that needed to coordinate were reduced to runners, fragments of messages, and local initiative.

South of Arnhem, XXX Corps had its own battle. The advance had to move along one main road, vulnerable to mines, wrecks, traffic jams, blown bridges, German rearguards, and counterattacks along the flanks. The plan had imagined fast movement. The road delivered delay.

At the bridge, Frost's perimeter shrank. Ammunition, water, medical supplies, and men ran down. The battalion held far longer than the situation allowed, but relief never reached them. West of town, the remainder of the division formed a defensive pocket around Oosterbeek and was eventually evacuated across the Rhine.

Market Garden captured ground and bridges, but not Arnhem. The failure left the Allies short of a crossing over the Lower Rhine, and the war in northwest Europe continued into 1945.
How Arnhem Slipped Away

1. DropBritish airborne troops land west of Arnhem on September 17.
2. Frost Reaches2nd Battalion gets to the north end of the road bridge.
3. Radios FailBroken communications isolate units and slow coordination.
4. Armor ReactsGerman armored and infantry forces counterattack quickly.
5. Road StallsXXX Corps is delayed by the single-road advance from the south.
6. OosterbeekThe survivors consolidate west of town and evacuate across the Rhine.

The Bridge Was Too Far

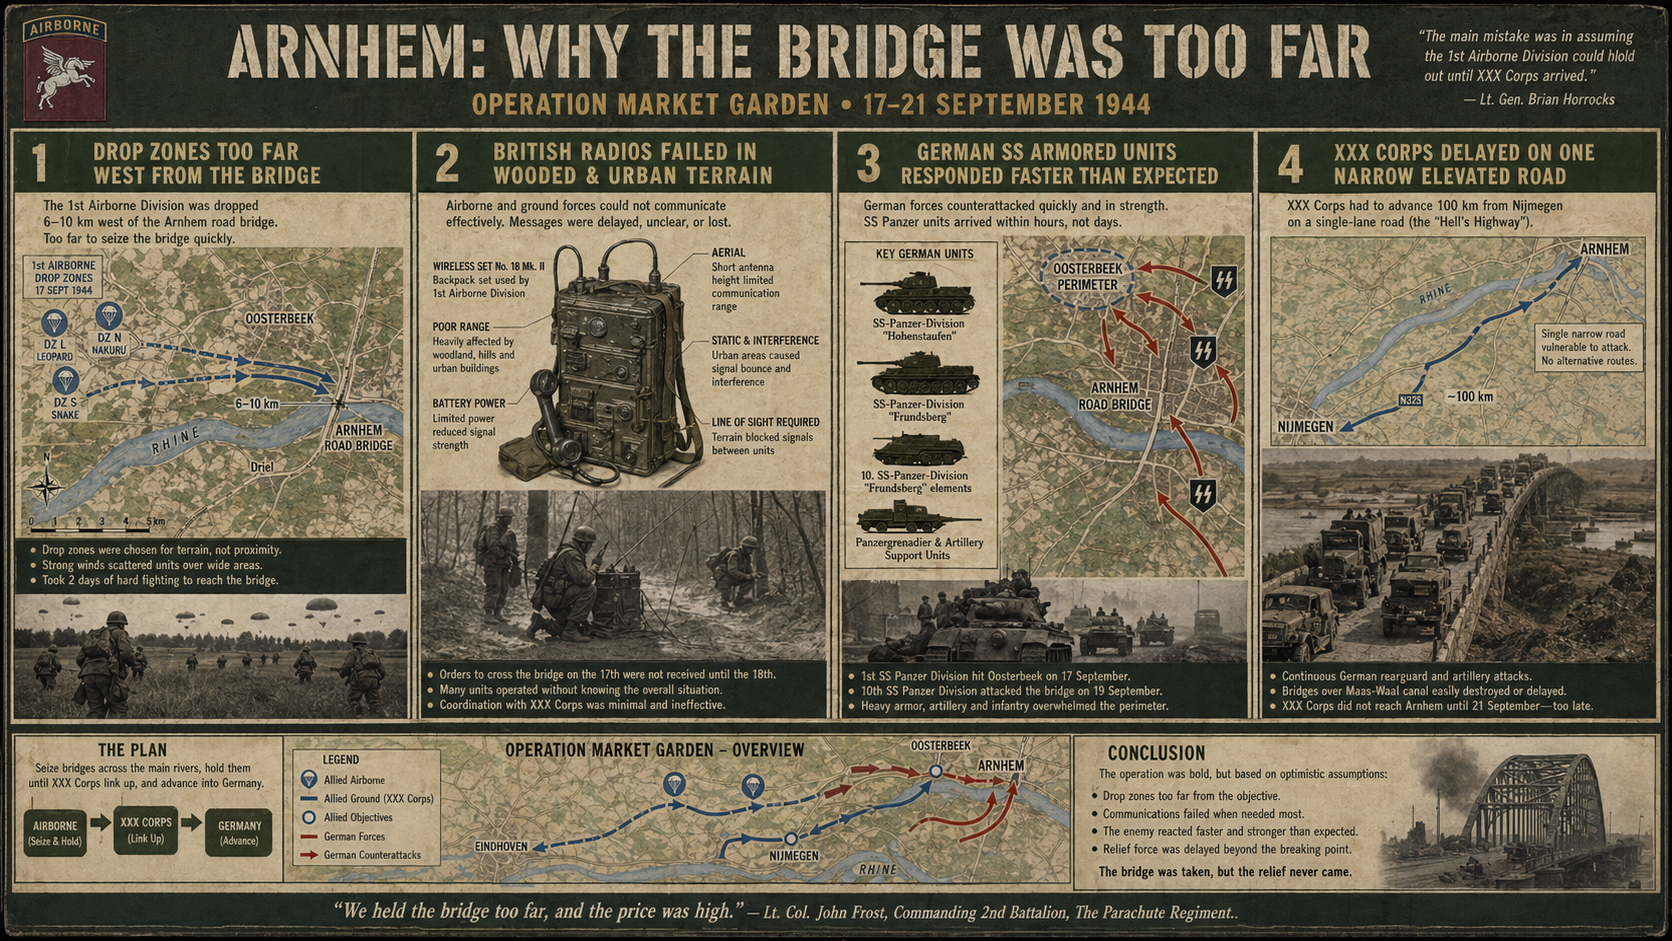
Arnhem was not lost for one reason. It was lost because several weaknesses hit at once: distant landing zones, unreliable radios, stronger German reaction than expected, and a relief column forced to move along one narrow route. Frost's men did not fail to fight. The operation failed to reach them in time.

Arnhem failure breakdown infographic
Breakdown of the core failures: drop zones too far west, radios failing, German SS armored units reacting quickly, and XXX Corps delayed on the elevated road north.

Courage Inside A Bad Equation

Arnhem is remembered because the gap between plan and reality was brutal. The airborne troops held positions that should have collapsed sooner. Frost's battalion made the bridge a battle, not a checkpoint. The Oosterbeek perimeter survived long enough for thousands to escape, but the division was shattered.

The phrase "a bridge too far" became shorthand for overreach. At Arnhem, it meant men who reached the objective, held it under pressure, and waited for a column that could not get there in time.

Reference checks used Imperial War Museums, the National Army Museum, and the National WWII Museum summaries of Operation Market Garden and the Battle of Arnhem.

Imperial War Museums - Operation Market GardenNational Army Museum - Market GardenNational WWII Museum - Operation Market Garden