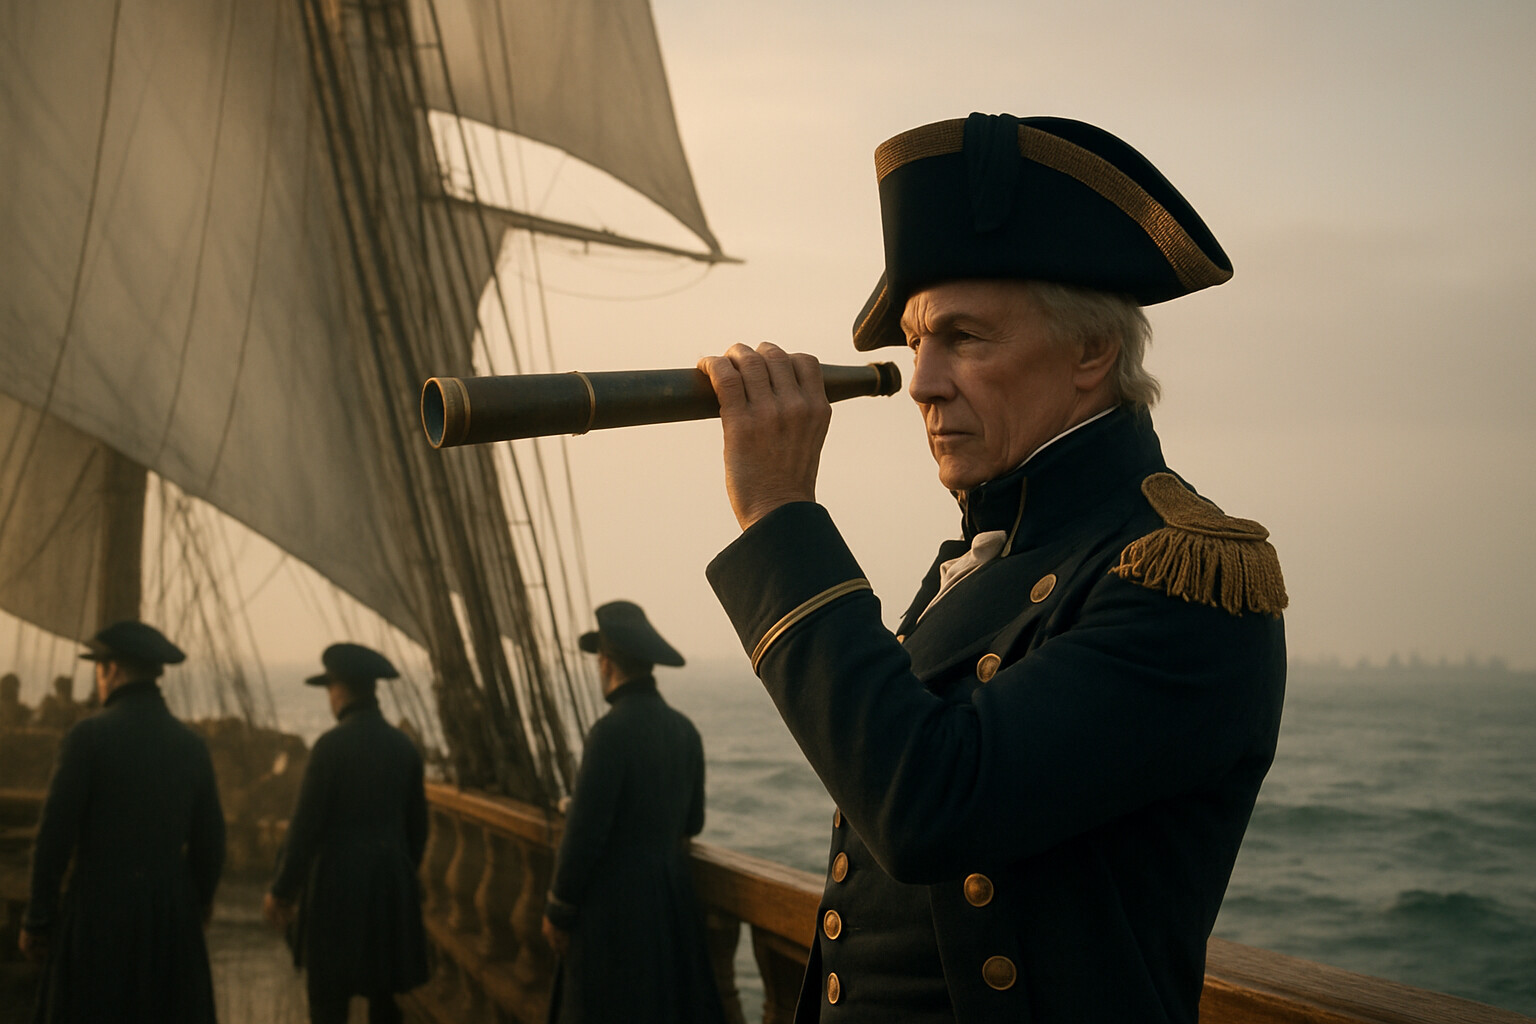
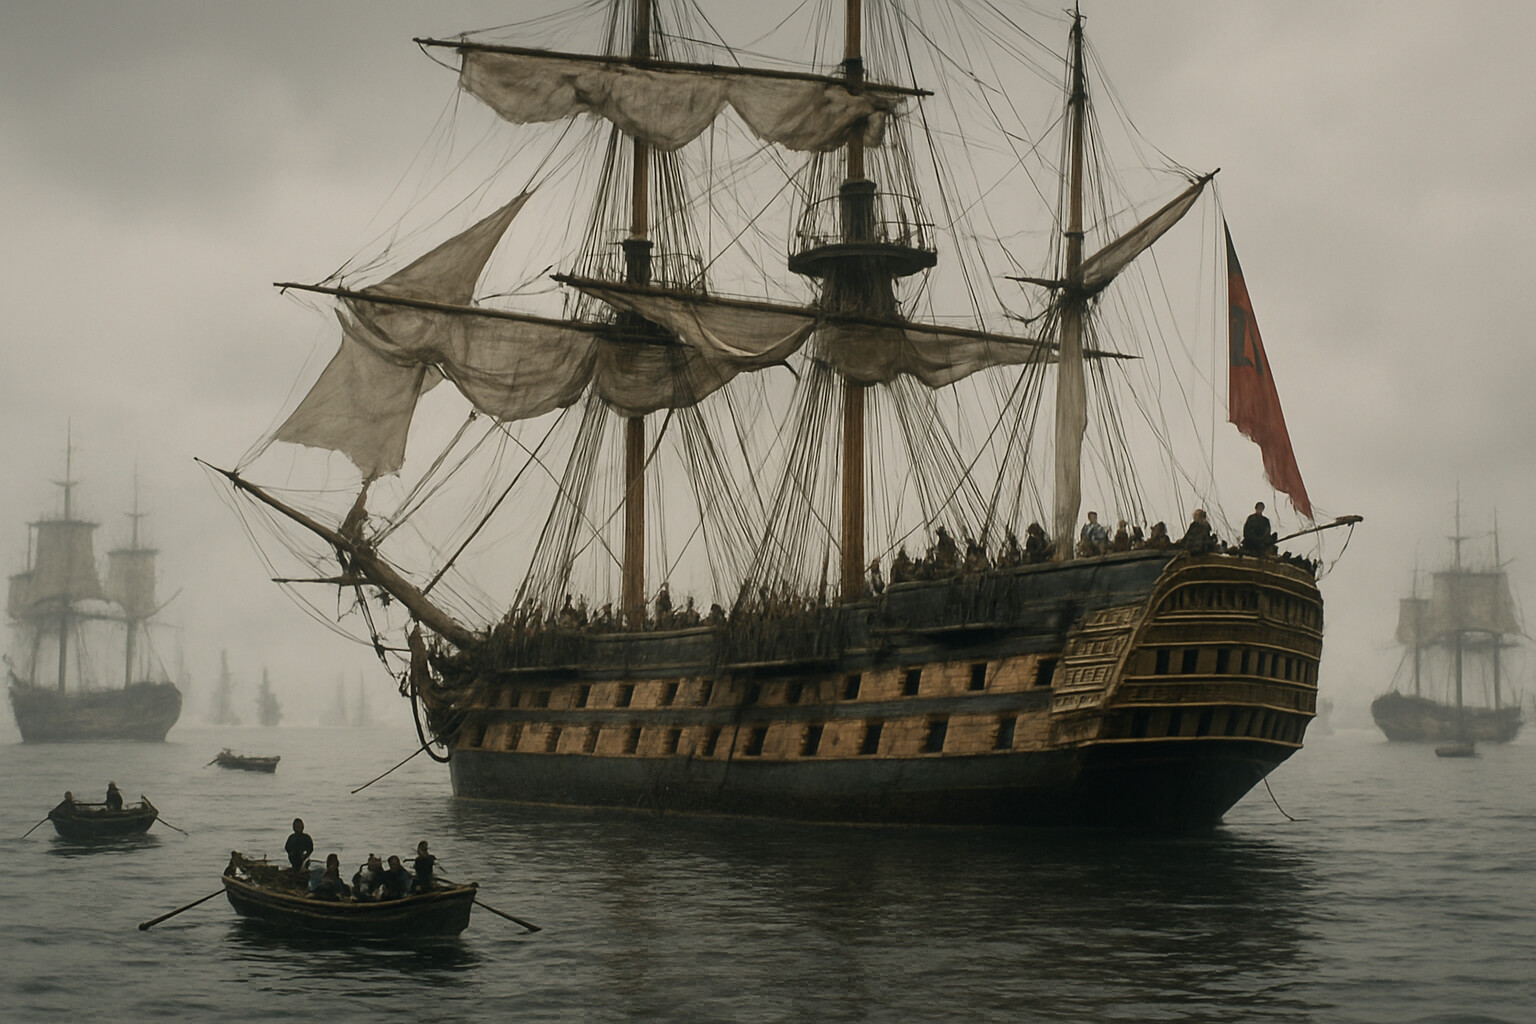
The morning came in pale and without warmth. West of Cape Trafalgar, on the southwestern tip of Spain, a long northwest ground swell rolled through the Atlantic, slow and deep, the kind that persists through a full day and worsens in the dark. The ships moved with it and against it, their hulls pressing through swells that gave back no hurry. Aboard HMS Victory, the 100-gun first-rate ship of the line serving as flagship of the British Mediterranean Fleet, Vice-Admiral Horatio Nelson was already on deck before six in the morning. Through his telescope he could count the enemy—thirty-three ships of the line stretched in a great, loose crescent between him and Cadiz. His own fleet numbered twenty-seven ships of the line and four frigates.
Nelson had been waiting for this moment for two years.
---
To understand what happened off Cape Trafalgar on 21 October 1805, it helps to understand what brought two great fleets to that particular patch of ocean, and why one admiral was prepared to risk everything on a tactic that broke every convention of naval warfare.
Horatio Nelson was born on 29 September 1758 in Burnham Thorpe, Norfolk, the son of a country rector. He entered the Royal Navy in January 1771 at the age of twelve—a small, frequently unwell child who would grow into one of the most aggressive and tactically inventive flag officers Britain ever produced. By 1797 he had distinguished himself at the Battle of Cape St. Vincent, personally leading a boarding party that captured two Spanish ships of the line, an act so audacious it unsettled even his admirers. At the Battle of the Nile in 1798, he destroyed a French fleet at anchor in Aboukir Bay, annihilating Napoleon's eastern strategy in a single night. At Copenhagen in 1801, facing a Danish fleet supported by shore batteries, he pressed the attack and forced an armistice. The story of him raising a telescope to his blind eye to avoid seeing the signal to discontinue action is widely reported, but the precise words attributed to him in that moment come from accounts written years afterward and should not be treated as verbatim.
By 1805, Nelson carried the marks of those campaigns on his body. He had lost the sight of his right eye at Calvi in 1794. He had lost his right arm above the elbow at Tenerife in 1797. He suffered recurring fevers. He was forty-six years old and in poor health by the standards of a hard sea life. None of this had any visible effect on his energy or his appetite for a fight.
The strategic context in 1805 was urgent. Napoleon Bonaparte had assembled an army—the Grande Armée—along the Channel coast at Boulogne, nominally preparing to invade Britain. For that invasion to have any chance of success, France needed to control the English Channel long enough for troop transports to cross. The Combined Fleet of France and Spain, under French Vice-Admiral Pierre-Charles Villeneuve, was the instrument intended to achieve that control. Throughout 1805 Villeneuve had been drawn into a long, exhausting game of movements and countermovements across the Atlantic and back. By late summer he had retreated into Cadiz, his fleet battered by disease and short of supplies, his officers demoralized, and Napoleon's patience exhausted.
Napoleon had already pivoted east by October—the Grande Armée was marching toward Ulm—but the Combined Fleet still represented a latent threat to British sea communications. The British Admiralty sent Nelson back to the Mediterranean command in September 1805. He joined the fleet off Cadiz on 28 September, the day before his forty-seventh birthday.
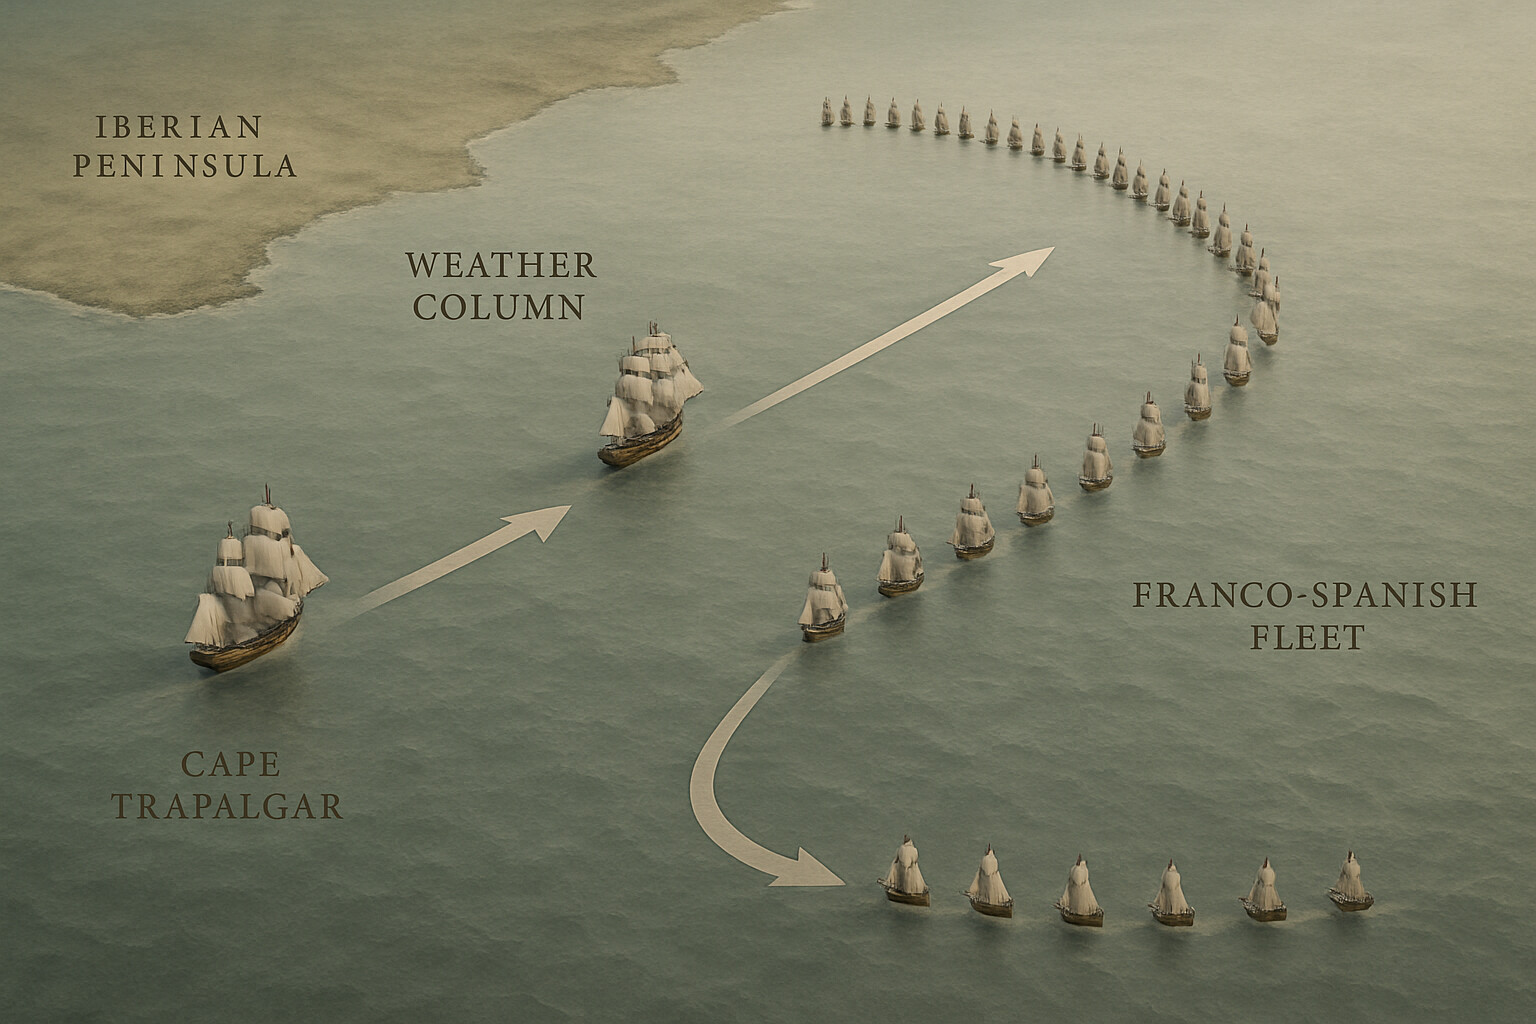
Nelson spent the days before battle refining his plan. He discussed it with his captains at dinners aboard Victory, explaining the concept in enough detail that each man would know what to do even if signals were cut and the flagship destroyed. The plan was unconventional to the point of being shocking on paper. Rather than forming a traditional parallel line of battle and exchanging broadsides with the enemy at a controlled distance, Nelson intended to attack in two perpendicular columns—striking the enemy line at right angles and cutting through it at two points. The lead ships of each column would take terrible punishment during the approach, unable to fire their broadsides until they broke through the line. But once through, the enemy fleet would be split into three sections, unable to support each other, surrounded by British ships fighting at close range where the superior gunnery training of British crews would be decisive.
The concept was not entirely new. Admiral Rodney had broken the French line at the Battle of the Saints in 1782. But Nelson's version was more aggressive, more deliberately violent, and more precisely thought through. In his memorandum to his captains—a document that circulated through the fleet before battle—he described his intent in terms that emphasized controlled aggression and trusted subordinates over rigid centralized signaling. He wanted a close-range melee, because he trusted his captains and crews to fight effectively inside chaos in a way he did not trust the Combined Fleet to do.
Villeneuve finally sortied from Cadiz on 19 October 1805, under orders from Napoleon. The French admiral had no illusions. His fleet was undermanned—many ships were hundreds of men below their rated complement—the Spanish ships were of uneven quality, and the sea conditions were deteriorating. He knew Nelson was waiting. His letters before sailing indicate he expected defeat; his exact words come through French sources and translation and should be read as indicative rather than precisely transcribed.
---
By the morning of 21 October the two fleets had been maneuvering since the 19th, and the encounter was now unavoidable. Villeneuve's Combined Fleet was in a long, ragged line running roughly north to south—or rather a loose crescent, since the formation had never properly dressed in the difficult sea state. Nelson's fleet approached from the west in two columns, Victory leading the weather column to the north, and HMS Royal Sovereign under Vice-Admiral Cuthbert Collingwood leading the lee column to the south.
The approach was agonizingly slow. There was barely enough wind to fill the sails. The ships moved at two knots, sometimes less. The distance to the enemy was measured in hours, not minutes. Nelson's captains and crews understood what was coming: the lead ships would sail into the broadsides of the enemy line for an extended period—perhaps thirty minutes or more—before they could angle to break through and bring their own guns to bear. The men at the bow-chase guns on the closing ships could do almost nothing useful in response. They could only hold their heading and wait.
At some point during the approach—accounts from different ships' logs do not agree on the precise timing—Nelson had the most famous signal in the history of the Royal Navy hoisted to Victory's yards: England expects that every man will do his duty. The word duty was not in the standard signal book and had to be spelled out letter by letter. Reports from the fleet suggest the signal was received with varying reactions, from cheering to something closer to impatience from men who considered it unnecessary. Collingwood's response is reported in memoir literature—he is said to have expressed a preference that Nelson stop signaling, since the men already knew what to do. That remark reaches us through accounts written after the battle and should not be treated as a verbatim transcription.
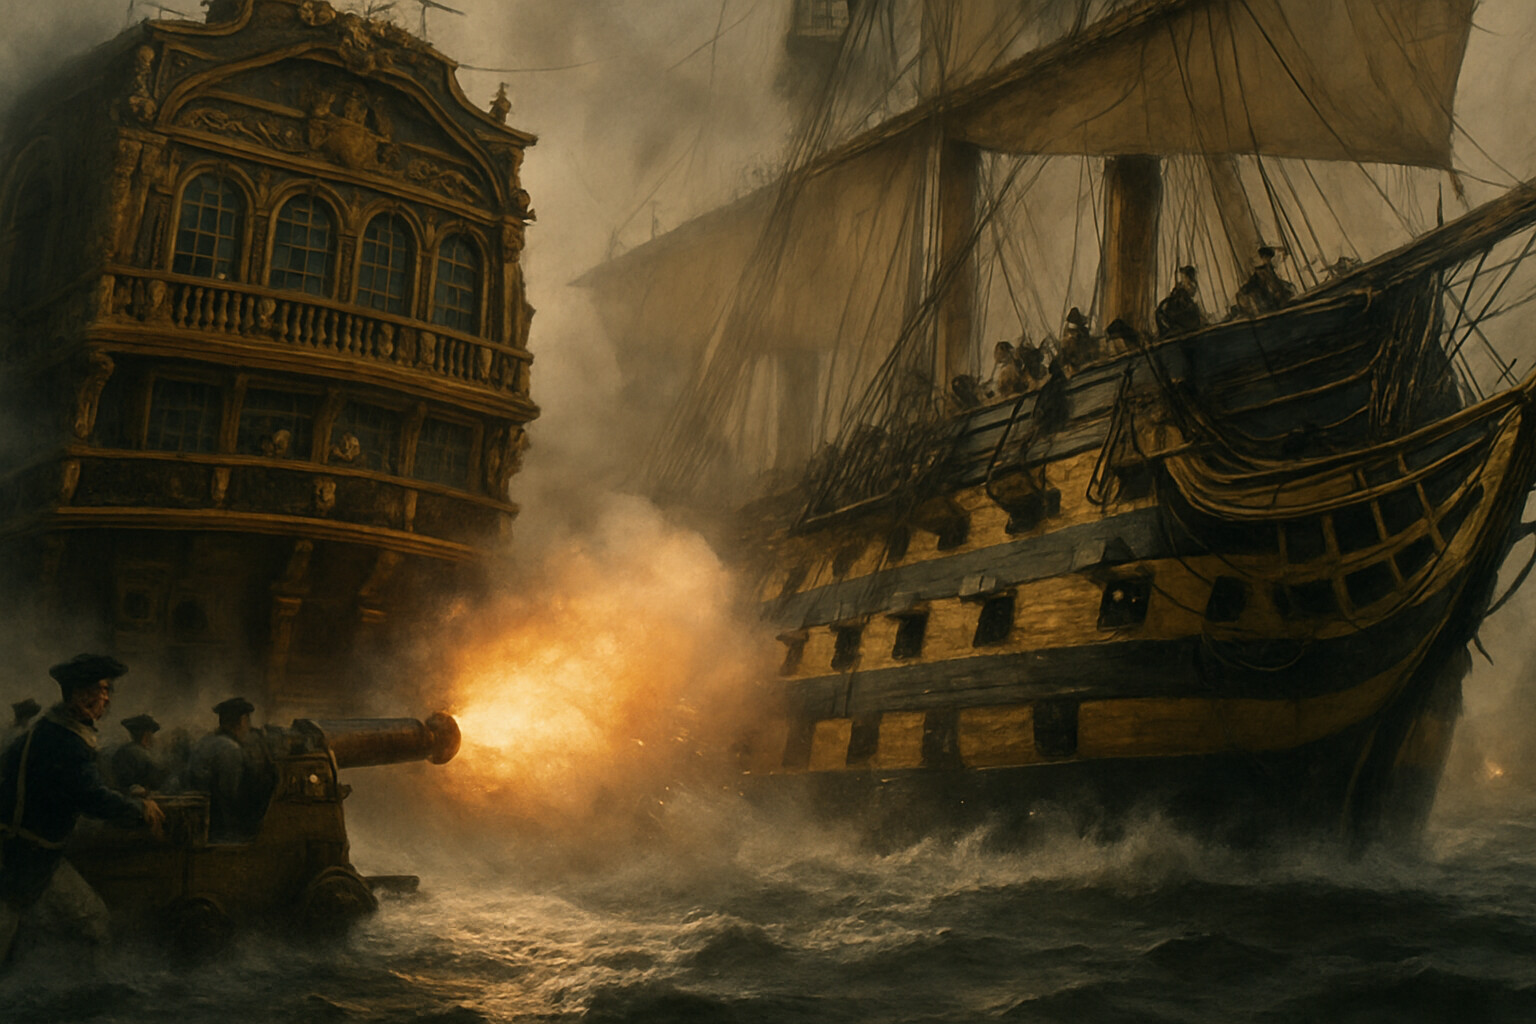
At approximately noon, Royal Sovereign broke through the enemy line, passing under the stern of the Spanish three-decker Santa Ana and firing a raking broadside down her length at point-blank range. In this era of naval combat, a raking broadside—delivered lengthwise along a ship from stern to bow or vice versa—was among the most devastating blows possible. A ship's sides were built to absorb ball; her bow and stern were comparatively weak, and a shot entering along the length of a gun deck could travel the full length of the ship, dismounting guns, killing crews, and causing structural damage that perpendicular fire could not replicate. A single well-placed raking broadside could reduce a ship's fighting capacity dramatically in seconds. Collingwood's flagship bore the concentrated fire of multiple enemy ships before breaking through, but once through, the close-quarters action gave Royal Sovereign's superior gunnery a decisive advantage.
HMS Victory broke through the line minutes later, cutting between the French flagship Bucentaure and the 74-gun Redoutable under Captain Jean-Jacques Lucas. By passing under Bucentaure's stern, Victory fired a devastating raking broadside into the French flagship at near point-blank range. The forecastle carronade—a short, heavy weapon designed for exactly this kind of close-range work—was loaded with a 68-pound round shot and a bag of musket balls and fired into Bucentaure's stern gallery as the flagship crossed her quarter. Contemporary accounts describe the effect as catastrophic; the specific casualty figures cited in some sources for this single discharge should be treated with caution, as the numbers vary and cannot be precisely confirmed. What is consistent across accounts is that Villeneuve's flagship was staggered in the opening moments of the melee, and with her, the Combined Fleet's ability to exercise coordinated command effectively collapsed.
What followed was not a battle in the elegant sense that naval theorists imagined. It was a vicious, grinding melee fought at ranges that were sometimes measured in yards, sometimes in feet. Ships locked together with grappling hooks, or lay so close alongside that guns could not be depressed enough to fire at the waterline—men reported pushing rammers through enemy gunports. The noise exceeded the ability of those who tried later to describe it. The smoke was so dense that officers on some ships could not see their own deck from the quarterdeck rail.
Redoutable, the ship that came to lie against Victory, proved unexpectedly dangerous. Captain Lucas had trained his crew intensively in small arms and had cleared his gun decks to concentrate men in the tops and upper works for exactly this kind of close-range fight. His sharpshooters in the mizzentop and maintop swept Victory's upper deck with musket fire. The weapon involved was likely a naval version of the standard French infantry musket—similar in design and limitations to the British Sea Service musket, accurate only at short ranges but lethal enough at the distances now separating the two hulls, which were sometimes measured in tens of feet rather than hundreds of yards.
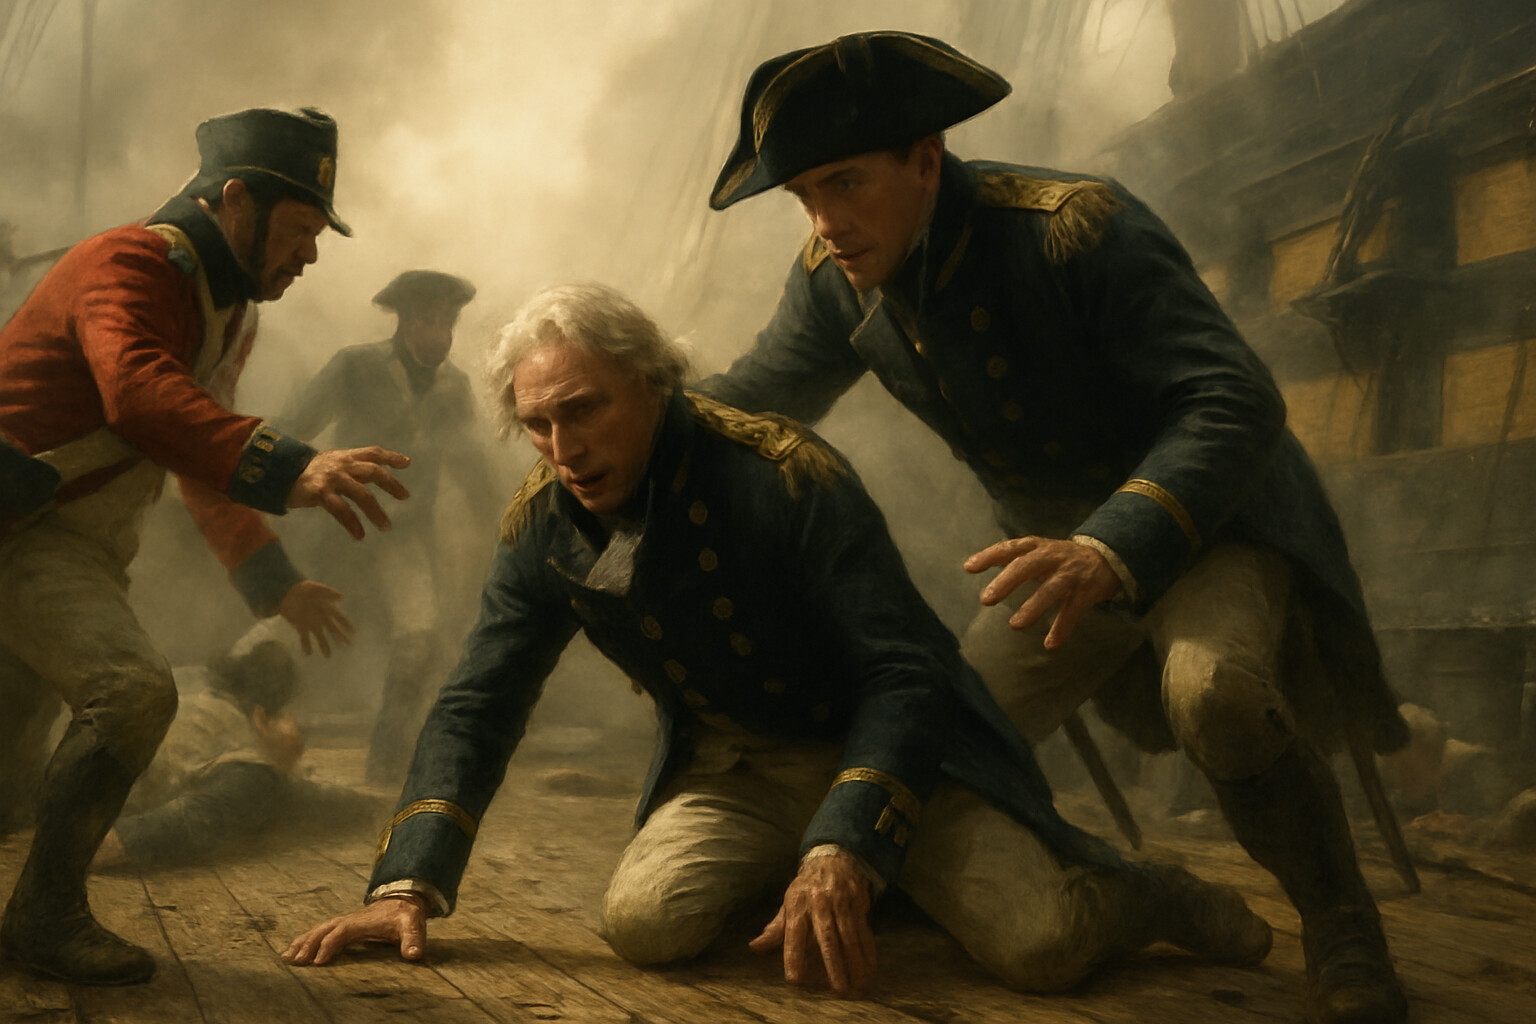
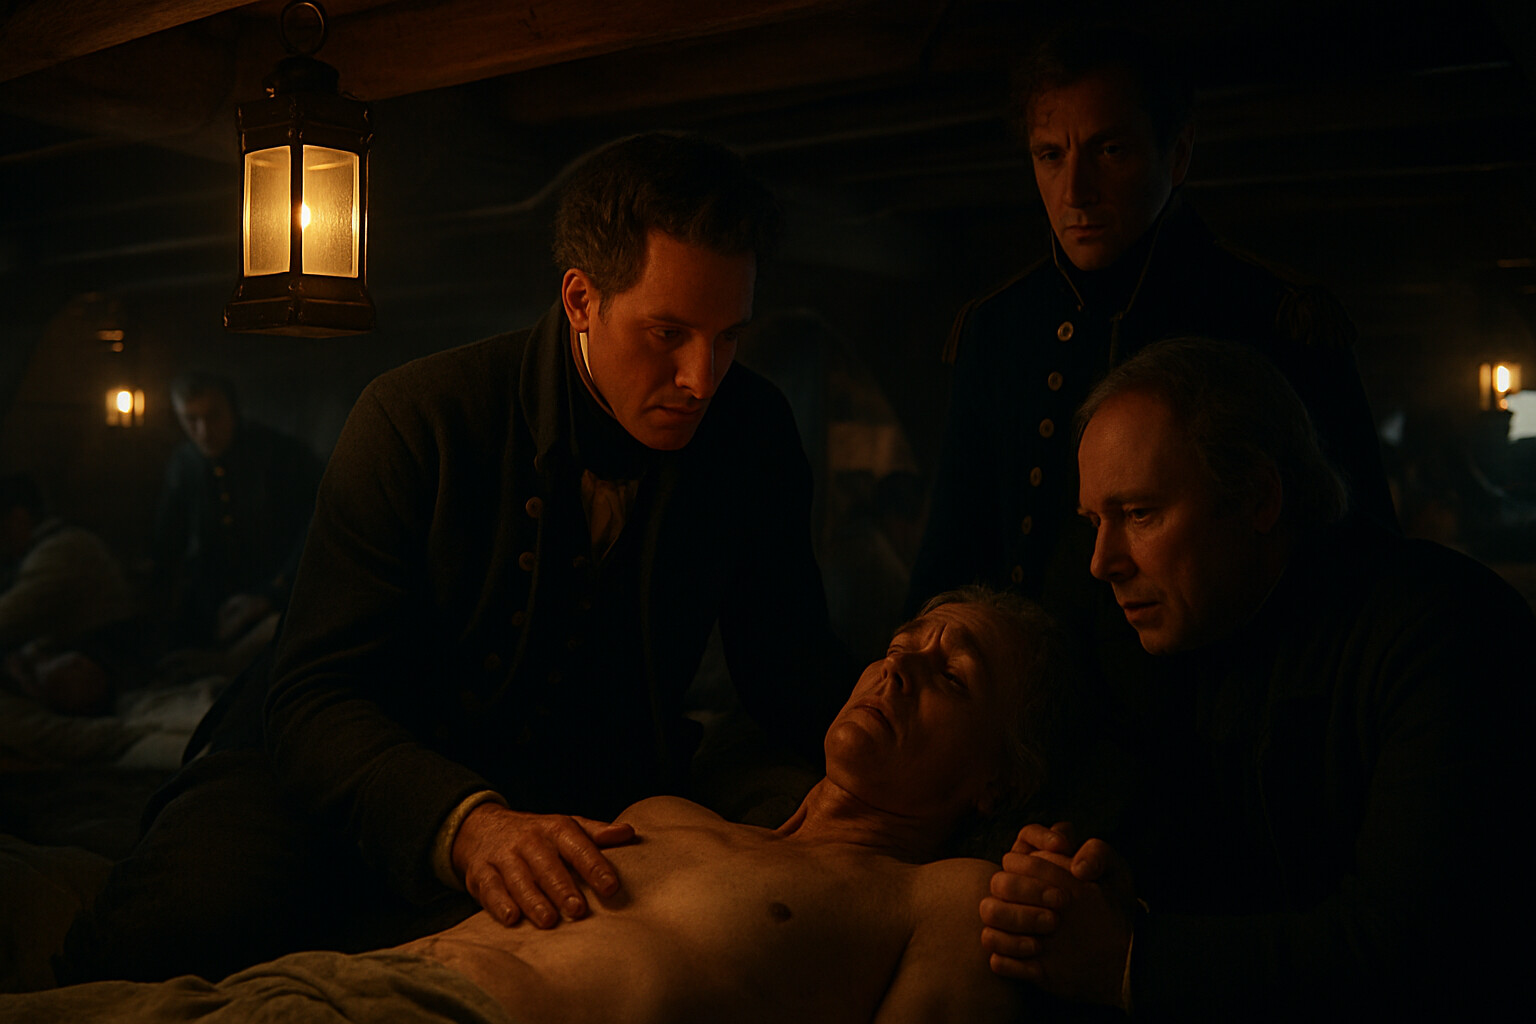
Nelson, walking the quarterdeck with his flag captain Thomas Hardy, was struck by a ball at approximately 1:15 in the afternoon. The shot came from Redoutable's tops, at a distance estimated from ship dimensions and witness accounts at roughly fifty feet—though that figure is a reconstruction, not a measurement taken at the time. The ball entered through the left shoulder near the epaulette, passed through Nelson's left lung, severed his spine, and lodged in the muscles of his back.

He fell to his knees. He was then supported and carried below by members of his crew—accounts name Sergeant-Major of Marines Robert Adair among those who assisted, though the details of exactly who was present in that moment vary across sources. He was taken to the cockpit on the orlop deck, the ship's surgery, where surgeon William Beatty and chaplain Reverend Alexander Scott attended him. He would remain there for the next three and a half hours, alive and conscious through much of that time, as the battle continued above him.
The progress of the action reached him in fragments—through the vibration of the ship's hull as her guns fired, through reports brought down by officers, through the changing character of the noise. Captain Hardy came below twice to give him news. By the time of Hardy's second visit, it was clear the British had won decisively. Fifteen or more enemy ships had struck their colors or been captured, and no British ship had been lost. The accounts of what Nelson and Hardy said to each other during these visits are drawn primarily from Hardy's own later testimony and from Beatty's published narrative and Scott's account. These sources are broadly consistent and are treated by historians as reliable within reasonable limits. Direct quotation of their conversation, however, is not possible with confidence—none of it was transcribed verbatim in the moment, and Beatty's Authentic Narrative, though invaluable, was written after the fact.
Horatio Nelson died at approximately 4:30 in the afternoon of 21 October 1805. He knew before he died that the battle had been won. He did not live to receive a complete accounting of what had been taken.
---
The tactical result was comprehensive. The British fleet, under Nelson and then Collingwood, captured or destroyed eighteen of the thirty-three enemy ships of the line. Not a single British ship was lost in combat, though a number were so badly damaged they could barely be managed in the storm that followed. The Combined Fleet never recovered as a fighting force. Villeneuve was captured aboard Bucentaure when she struck and was repatriated to France. He died in Rennes on 22 April 1806 from multiple stab wounds; the death was officially recorded as suicide, but the circumstances have been disputed by historians, and the question is not settled.
The human cost on both sides was severe. British casualties were approximately 1,666 killed and wounded—all figures should be understood as approximate, as sources vary slightly. Victory herself suffered around 57 killed and 102 wounded. Franco-Spanish casualties were far heavier. Estimates for those engaged in the action run to roughly 4,400 killed and wounded, with further losses when the storm that struck the day after the battle drove damaged prizes onto the shoals near Cadiz. That storm wrecked or sank many of the captured ships. Collingwood, now in command, eventually ordered or accepted the destruction of several prizes that could not be saved—a decision made under desperate conditions and not without controversy among the officers involved.
The strategic consequences unfolded over the following years and decades. Britain's command of the seas was not seriously challenged again for more than a century. The Royal Navy could blockade French ports, protect British trade, supply Wellington's armies in the Peninsula, and project force globally without facing a credible fleet threat. Napoleon could conquer much of Europe on land—he won at Austerlitz just weeks after Trafalgar—but he could never strangle Britain economically or threaten invasion again.
---
Nelson's body was preserved in a cask of spirits for the voyage home. He was given a state funeral in January 1806 at St. Paul's Cathedral and was buried beneath the dome. The grief across the country and the fleet was widespread and, by contemporary accounts, largely genuine. Collingwood, his closest professional colleague in those final years, wrote a series of letters in the aftermath of the battle that convey something of the emotional texture of the loss; those letters are primary sources and should be read as such, not as a settled account of anyone's interior state.
The legacy Nelson left was not only strategic. He had demonstrated a theory of command that prioritized initiative, trust, and clarity of intent over rigid centralized control. His practice of explaining his plans to his captains before battle—setting out his intentions in detail so that each officer could act independently if signals were impossible and the flagship was out of action—was not a new idea in the abstract, but Nelson practiced it more consistently and explained it more explicitly than most flag officers of his era. The influence of that approach on British naval doctrine outlasted the Napoleonic Wars.
The weapons that fought at Trafalgar were, by later standards, primitive—black powder, round shot, slow to load, dependent entirely on wind and weather. But in their own era they were the most powerful force-projection tools in existence, and the men who served them had refined their use to a high art. The British advantage at Trafalgar was not primarily in ship quality—French and Spanish ships were often as large or larger than their counterparts—but in the rate and accuracy of gunnery, the product of years of sea service and sustained drill that the Combined Fleet's enforced time in harbor had denied them. A British gun crew that had maintained regular practice could achieve a firing cycle under two minutes and sustain it; crews denied sea service could manage perhaps one shot in three to four minutes. In a close-quarters melee lasting hours, that difference was decisive.
Cape Trafalgar itself—the name derives from the Arabic Taraf al-Gharb, meaning cape of the west—is today a quiet stretch of low, sandy coastline in southern Spain, marked by a lighthouse built in 1853. The battle was fought roughly ten miles offshore. The sea there in October can be benign in the morning and dangerous by nightfall, as Collingwood's officers discovered trying to save their prizes. The same ground swell that made the day's approach so slow made the night of 21 to 22 October a catastrophe for damaged ships.
For students of military history, Trafalgar repays close study not because it was the most complex battle ever fought at sea—it was not—but because it was so thoroughly the product of one man's accumulated thinking about how naval battles could be won. The plan, the preparation, the selection and briefing of captains, the tactical gamble of the perpendicular approach, the decision to lead the weather column himself in person—all of it reflected Nelson's particular view of what a naval battle should be. He had been shaping that view his entire career.
He died before the guns stopped firing, which was perhaps the only way a man of his temperament was ever going to leave a battle.
---
The record of what happened at Trafalgar is unusually rich. Beatty's Authentic Narrative, Collingwood's dispatches, the logs of individual ships, and detailed accounts compiled shortly afterward from officer testimony provide a layered picture that historians have worked with for more than two centuries. Disputes remain—about the exact sequence of events during the approach, about what Nelson said at specific moments, about the precise origin of the shot that killed him. The broad outline is established beyond reasonable doubt. Where this narrative has drawn on reconstruction or inference, it has attempted to say so. Where accounts come from memoir literature compiled after the battle, they have been treated as valuable but fallible. Trafalgar was not a myth. It was a hard morning's work, and the men who did it left enough of a paper trail that we do not need to invent what we do not know.