The boats touched the shingle before dawn.
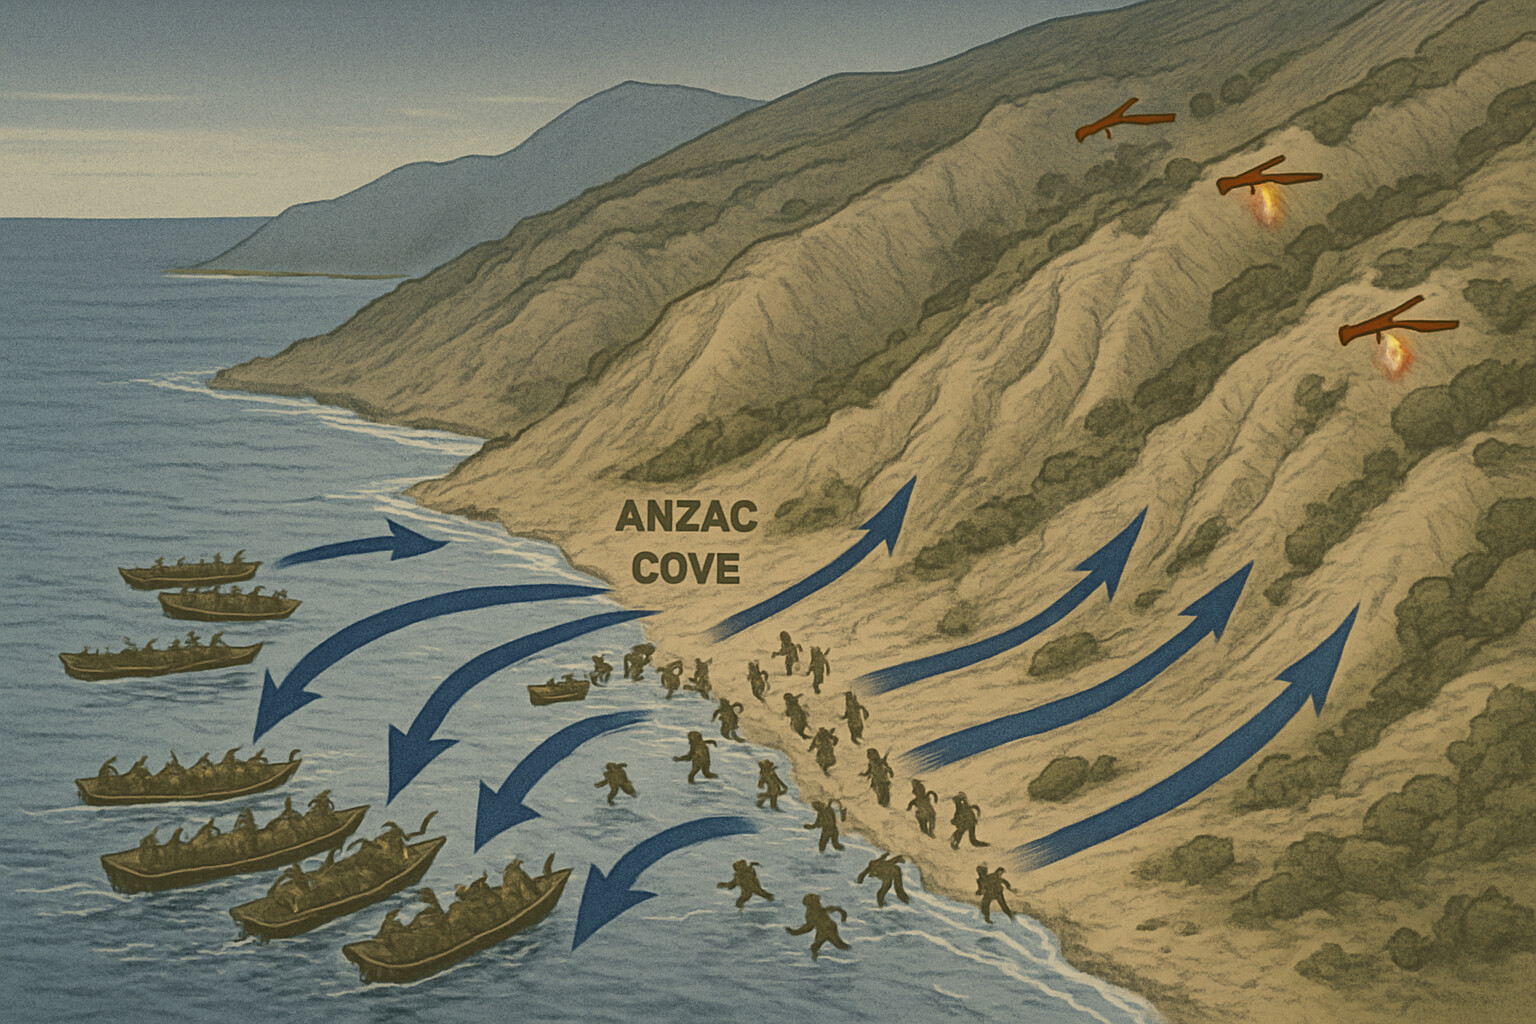
On the morning of 25 April 1915, men of the Australian and New Zealand Army Corps stepped from their cutters into dark water and waded toward a coast they had never seen. Ahead of them in the predawn blackness rose terrain that no staff officer had properly reckoned with: not the gentle slopes of the planned landing beach, but a chaos of ravines and razorback ridges, cliffs and gullies that would come to define an entire generation's understanding of what war could demand and what it could take away. The boats had drifted approximately a mile north of their intended landing point. No order recalled them. They went ashore anyway.
Further south, at the tip of the peninsula, men of the British 29th Division were moving toward a shore defended by barbed wire, prepared earthworks, and machine guns. At V Beach, near the ruined fortress of Sedd-el-Bahr, soldiers clambering from the converted collier SS River Clyde were cut down before they reached dry ground. At W Beach, men of the Lancashire Fusiliers stormed ashore under withering fire. At Y Beach, troops landed almost unopposed but failed to exploit the gap before the opportunity closed.
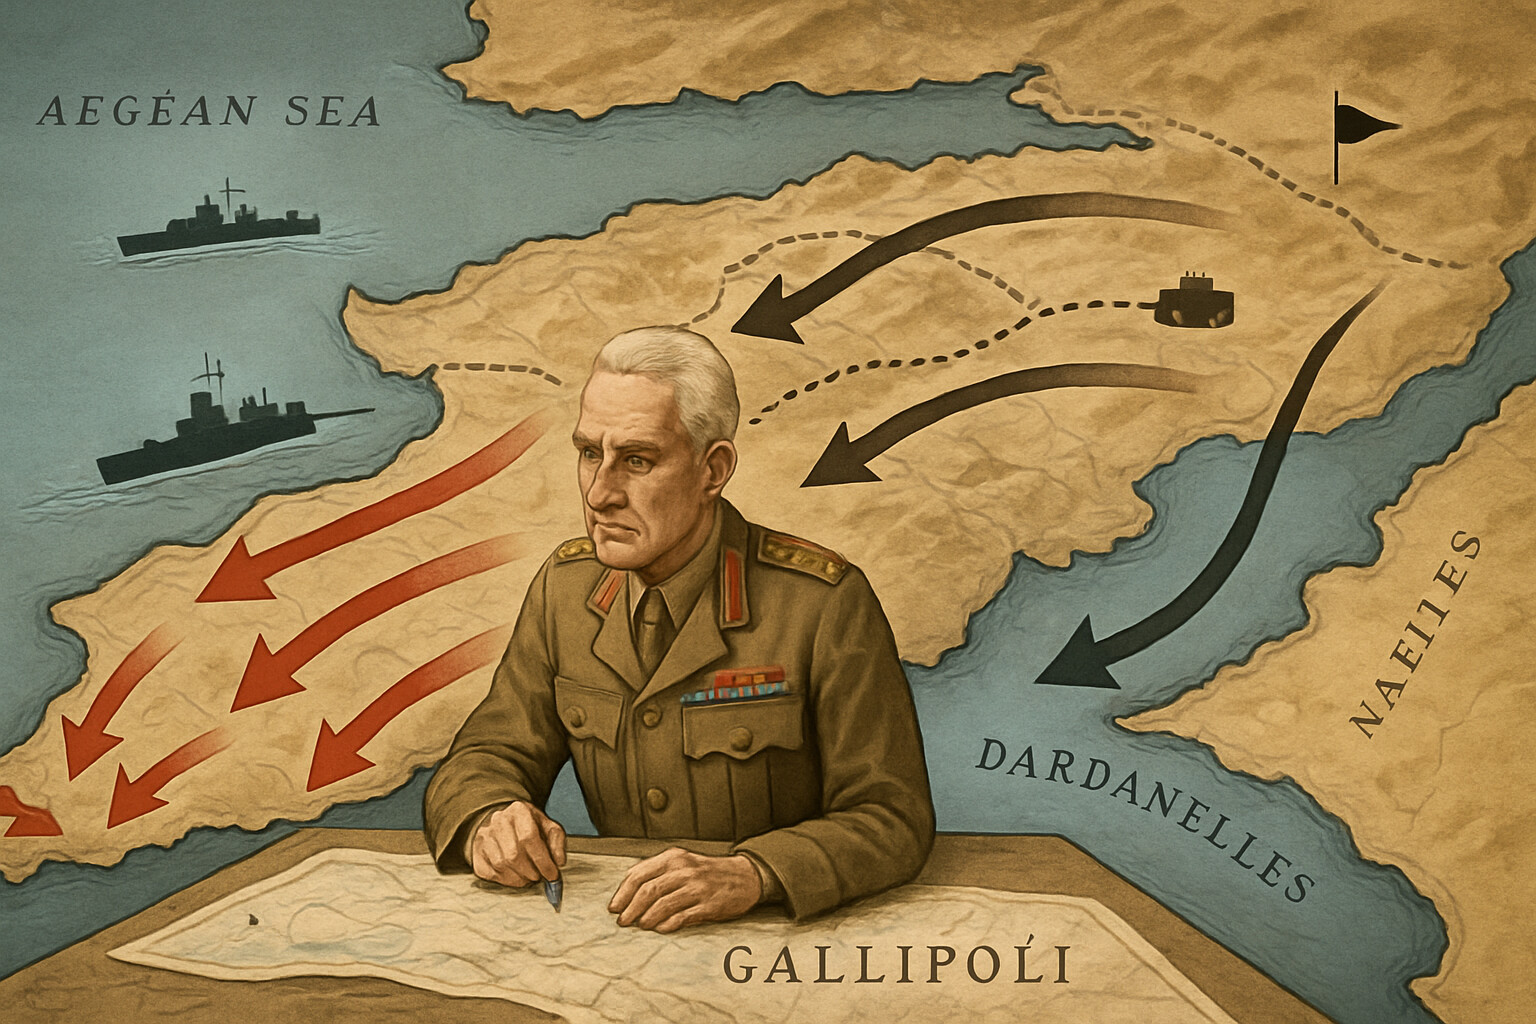
Far offshore, aboard the converted yacht HMS Triad and then the former liner HMS Arcadian, General Sir Ian Hamilton waited for news that would not come clearly for hours. He was sixty-two years old, a career soldier with a record of service across three continents, and he had been handed one of the most complex amphibious operations ever attempted with almost no modern precedent to guide him. The plan had been his to execute but barely his to design. The forces committed were enough to attempt the landing but not enough—as events would prove—to achieve the objectives before the Ottomans reinforced, dug in, and turned Gallipoli into a campaign that neither side would leave without paying an enormous price.
---
To understand what happened on those beaches and above those cliffs, it is necessary to understand why the operation was conceived at all, and why it fell to Ian Hamilton to command it.
By early 1915, the Western Front had already calcified. The German breakthrough of August 1914 had been halted at the Marne, and the subsequent race to the sea had produced a continuous trench line stretching from the English Channel to the Swiss frontier. The war that both sides had expected to end quickly had instead produced industrial-scale killing at Ypres, Neuve Chapelle, and along the Aisne. A strategic alternative was urgently sought.
The Dardanelles Strait—the narrow passage connecting the Aegean Sea to the Sea of Marmara and beyond to Constantinople—represented the most visible opportunity. If the Allies could force that strait, they could threaten the Ottoman capital, potentially knock the Ottoman Empire out of the war entirely, open a year-round supply route to Russia—which was critically short of ammunition—and conceivably draw neutral Balkan states into the Allied camp. First Lord of the Admiralty Winston Churchill was the scheme's most energetic champion, though the idea drew support from several quarters, including Secretary of State for War Lord Kitchener.
The first attempt was purely naval. Between February and March 1915, British and French warships tried to force the straits by gunfire, sweeping the minefields and silencing the Ottoman shore batteries by bombardment. On 18 March, the fleet pressed deep into the straits. That afternoon, the British pre-dreadnought HMS Irresistible struck a mine and sank. The French battleship Bouvet had already gone down earlier in the action. HMS Ocean struck another mine while attempting to assist Irresistible and also sank. The French battleship Gaulois was badly damaged. In a single afternoon, three capital ships were lost and three more seriously damaged. The naval commander, Vice-Admiral John de Robeck, concluded that the fleet could not force the passage alone and that troops would be needed to take the shore batteries and mine-clearing facilities from the land side.
It was at this point that Ian Hamilton entered the story.
Hamilton received his orders from Kitchener on 12 March 1915 with remarkable brevity. He was to command a Mediterranean Expeditionary Force—still being assembled as he traveled toward the theater—and land troops on the Gallipoli Peninsula to support the navy's eventual passage of the straits. The force available to him included the veteran 29th Division, the Australian and New Zealand Army Corps under General William Birdwood, the Royal Naval Division, and a French Corps under General Albert d'Amade. On paper, it was a substantial force. The problem was everything else.
Hamilton had no reliable detailed maps of the peninsula. The hydrographic surveys were incomplete. Intelligence on Ottoman dispositions was thin and sometimes contradictory. His staff was improvised. His logistical arrangements were inadequate: supply ships had been loaded in Egypt without operational planning, meaning equipment was stowed in no usable order and would have to be completely unloaded and reloaded at Alexandria before the operation could begin. That process cost roughly three weeks—three weeks during which the Ottoman defenders, under German General Liman von Sanders, reorganized their forces and improved their defenses.
Hamilton was a product of the British Army's late Victorian tradition. He had been wounded at the Battle of Majuba Hill in 1881, fought in the Second Afghan War, the First Boer War, the Burma campaign, and had commanded forces during the Second Boer War. He had served as an observer during the Russo-Japanese War and had written about what he saw. He was considered by many contemporaries to be among the army's more intellectually nimble senior officers. He was also, by training and by the command doctrine of his era, inclined toward delegation rather than direct intervention in his subordinates' decisions—a characteristic that would, in the coming months, have severe consequences.
---
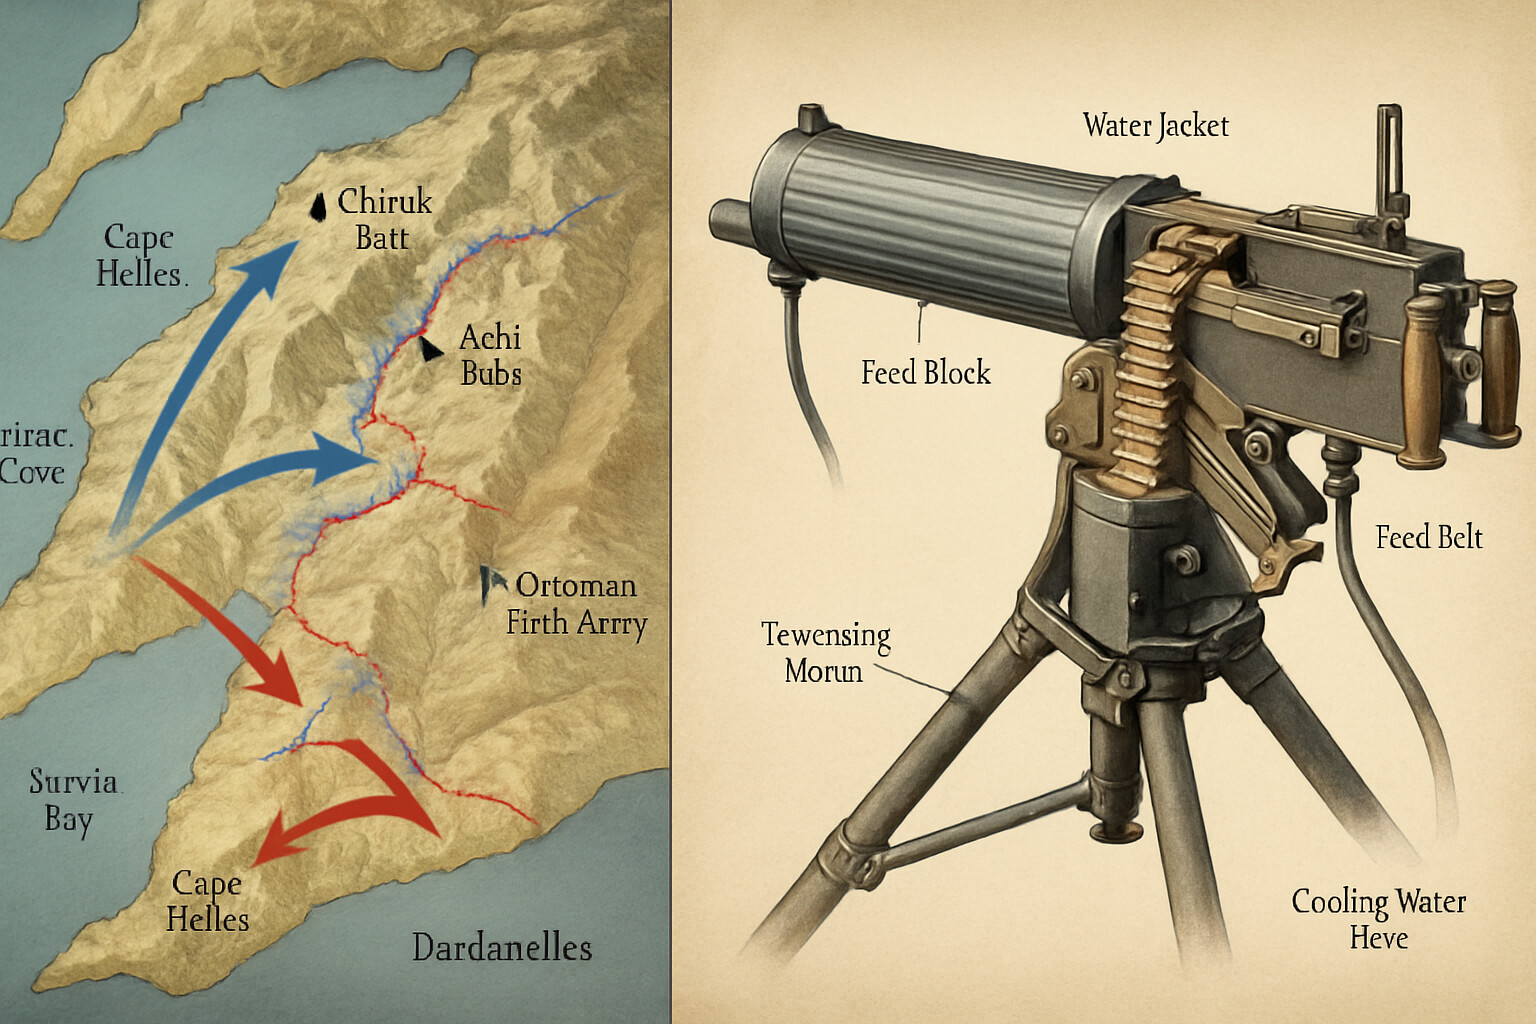
The Gallipoli Peninsula is roughly fifty miles long and between three and twelve miles wide: a narrow spine of high, broken ground jutting into the Aegean between the Dardanelles Strait to the east and the open sea to the west. Its terrain is not merely difficult—it is hostile by nature. The dominant features are a series of ridges and spurs running roughly north to south, separated by steep-sided ravines called deres. The highest ground is Chunuk Bair and Hill 971 (Koja Chemen Tepe) in the north-central sector, and the Achi Baba plateau in the south. Control of these heights would mean observation over the strait and the ability to direct fire onto the Ottoman shore batteries below.
The land is covered in dense scrub—sage, myrtle, and thyme growing from crumbling sandstone and clay. Movement off established paths is exhausting in daylight and nearly impossible at night. Water is scarce. The summer heat is severe. Flies arrive with the first casualties and do not leave.
Hamilton's plan divided his assault across five beaches at the southern tip of the peninsula—designated S, V, W, X, and Y—while the ANZAC Corps would land some fifteen miles to the north, at what would come to be known as Anzac Cove, to cut across the peninsula and prevent Ottoman reinforcement of the tip. A French diversionary landing at Kum Kale on the Asian shore would suppress Ottoman artillery fire during the critical first hours.
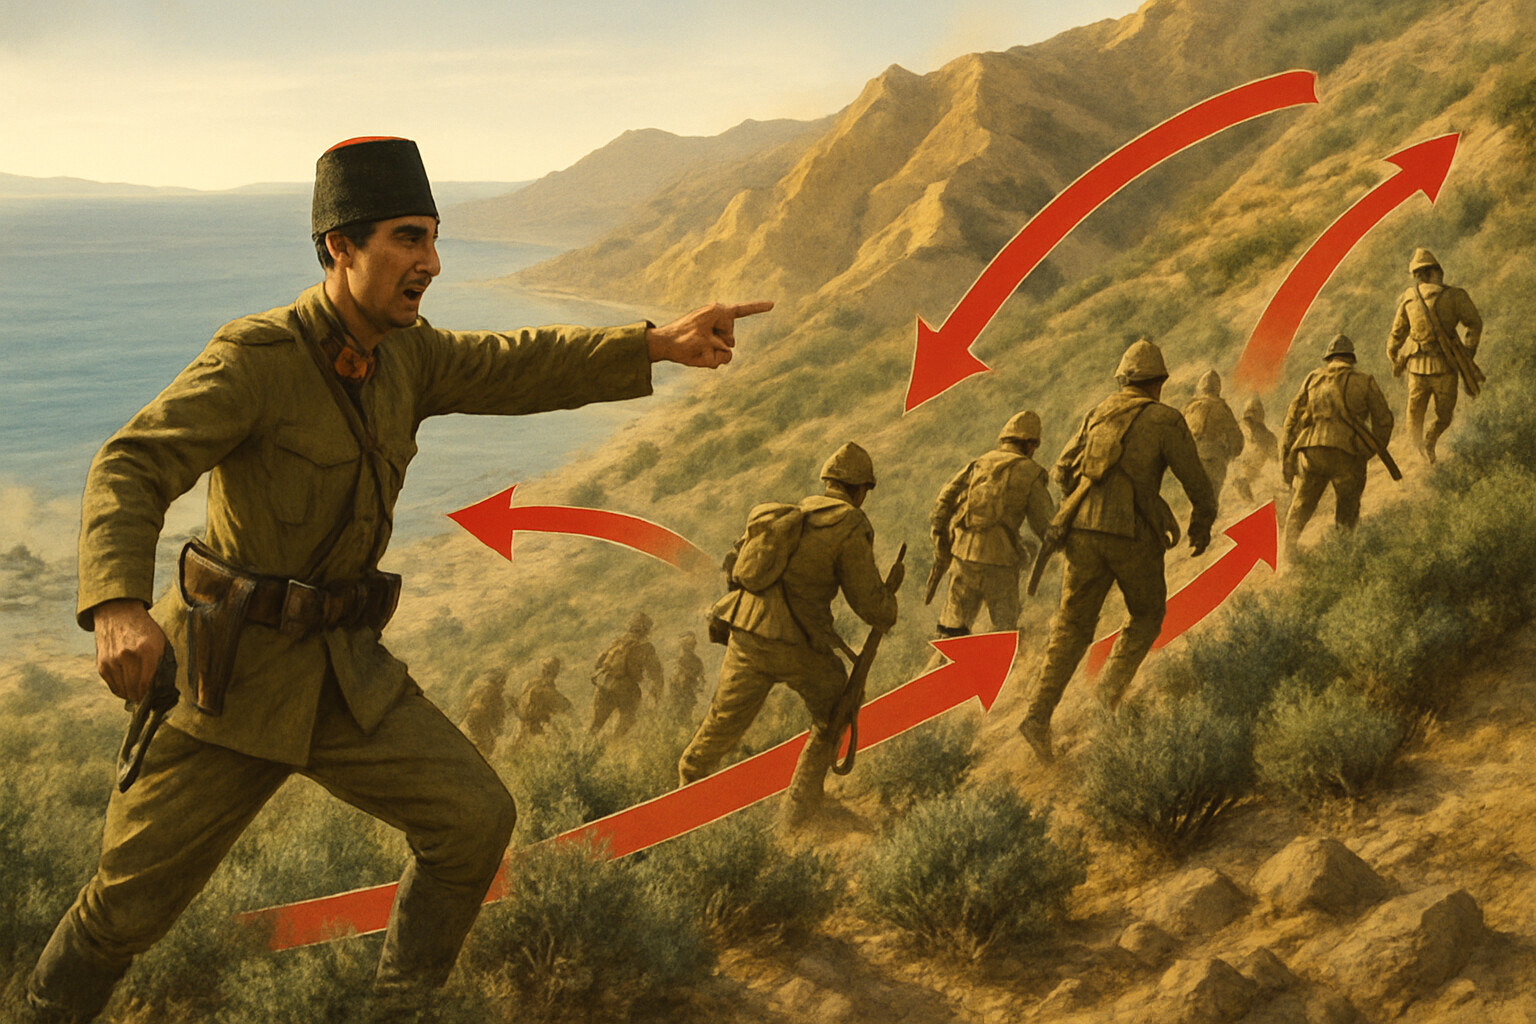
Against him, Liman von Sanders had positioned six divisions across the peninsula and the adjacent Asian shore, having identified the likely landing areas. The defense of the ANZAC sector fell primarily to the 19th Ottoman Division under Lieutenant Colonel Mustafa Kemal—a man whose energy, tactical instinct, and refusal to yield ground would prove decisive in the campaign's first and most critical hours.
---
At Anzac Cove on the morning of 25 April, the story turned almost immediately on the accident of geography.
The intended landing beach for the ANZAC Corps was roughly a mile south of where the boats actually came ashore—an error attributable to drift, darkness, and the confusion of a large amphibious operation conducted without the navigational tools that later generations would take for granted. Instead of a beach with manageable slopes behind it, the Australians and New Zealanders found themselves at the foot of a sheer tangle of ridges. The men who survived the landing and the initial fire climbed up into this terrain with rifles and bayonets, pushing forward on instinct and without clear orders because their officers were as disoriented as they were.
The first Australians to land came from the 3rd Brigade, followed rapidly by the 1st and 2nd Brigades. The Ottoman defenders in this sector were initially thin—a single company on the heights, with the bulk of the 57th Regiment positioned further back. The Australians could see the high ground. Some of them reached it. Small groups of men got as far as the second ridge; according to some unit histories and personal accounts, at least a few elements pushed toward the third, the great ridge running northward to Chunuk Bair, though this detail is not uniformly confirmed across official records and should be treated with caution.
Mustafa Kemal understood before his superiors what was at stake. Without waiting for orders from higher command, he committed his regiment to the ridge on his own judgment, directing them to hold the high ground at whatever cost. The urgency of his decision—and the phrase he reportedly used to convey it to his men—has entered the historical record through multiple sources and translations. The exact original wording is disputed and varies considerably across Turkish and Allied accounts, and no single authoritative source document has been confirmed. The record is clear on the outcome: his regiment fixed the Australians on the forward slopes. By midday the window for a breakthrough had closed. By nightfall both sides were entrenching on ground that neither could fully hold and neither could leave.
At Cape Helles, the southern landings produced a spectrum of outcomes. At Y Beach, the initial landing was nearly unopposed—but the troops, receiving no clear orders to advance and uncertain of their mission, consolidated and waited. By the following day, counterattacking Ottoman forces drove them back to the beach and off it entirely. The opportunity Y Beach briefly represented was never exploited.
At V Beach, the attempt to land troops from the River Clyde—a ship specially modified with gangways and sally-ports to allow rapid debarkation—ran into disciplined Ottoman machine-gun fire from the old fort and surrounding earthworks. The men who came off the River Clyde's gangways were killed in numbers so concentrated that contemporary accounts describe the water turning visibly red. The beach was not taken until nightfall, when Ottoman resistance slackened.
W Beach and X Beach produced hard fighting but successful lodgments. At W Beach, the 1st Battalion Lancashire Fusiliers stormed ashore under machine-gun and rifle fire, suffering severe casualties in the water and on the wire before driving the defenders back and seizing the beach. Six Victoria Crosses were subsequently awarded to the Lancashire Fusiliers for the action—enough for the engagement to carry the informal designation of 'Six VCs before Breakfast' in British military memory. The phrase compresses the timeline of the awards relative to the landing itself; the popular name is historically noted as part tradition rather than a precise factual description.
---
The first week established the pattern for everything that followed.
At Cape Helles, the 29th Division pushed inland toward Achi Baba with the support of the French Corps. The initial advance covered several miles, but Achi Baba—the plateau dominating the entire southern sector—was never taken. Hamilton's forces made four major attempts to carry it: the First and Second Battles of Krithia in late April and early May, a third attempt in early June, and further operations into the summer. None succeeded. The Ottomans reinforced rapidly, dug deeply, and held. The ground between the Allied lines and Achi Baba became a killing ground of trenches, ravines, and open approaches swept by artillery and machine-gun fire.
At Anzac, the beachhead compressed into a perimeter roughly a mile deep and two miles wide, hemmed in on all sides by ridges held by Ottoman forces. The Anzac sector functioned as its own self-contained siege, with the additional burden that the terrain made even survival inside the perimeter difficult. Ottoman snipers worked the dead ground between the trench lines. Artillery landed in the gullies where reserve troops rested. The beach itself—where supplies came ashore and wounded men were evacuated—was under intermittent shellfire day and night.
Hamilton, observing from his headquarters aboard ship and later ashore, understood by late May that the campaign was stalled. He requested reinforcements from Kitchener. He received some—including the 52nd (Lowland) Division and Territorial Force units—but not enough, and not quickly enough to rebuild the operational momentum that the first weeks had consumed.
The weapons of the Gallipoli stalemate were the same weapons that were killing men on the Western Front, deployed in even more unfavorable terrain. The Lee-Enfield rifle gave each man a reliable bolt-action weapon capable of aimed fire to several hundred yards—but accuracy was of limited use when the enemy was entrenched on the reverse slope of a ridge and invisible. The Vickers machine gun could provide sustained suppressive fire, but it required crew, cooling water, and stable ground from which it could be employed—all of them scarce in the compressed Anzac perimeter.

Artillery was a persistent problem throughout the campaign. Hamilton's forces had insufficient heavy guns, insufficient ammunition, and terrain that made observation and registration of fire extraordinarily difficult. The howitzers needed to drop shells into Ottoman trenches on reverse slopes were scarce. The shells available were often shrapnel rather than high-explosive—effective against men in the open, nearly useless against men behind earthworks. Naval guns offshore provided substantial firepower but were difficult to coordinate precisely with infantry movement, particularly when the opposing lines were close together.
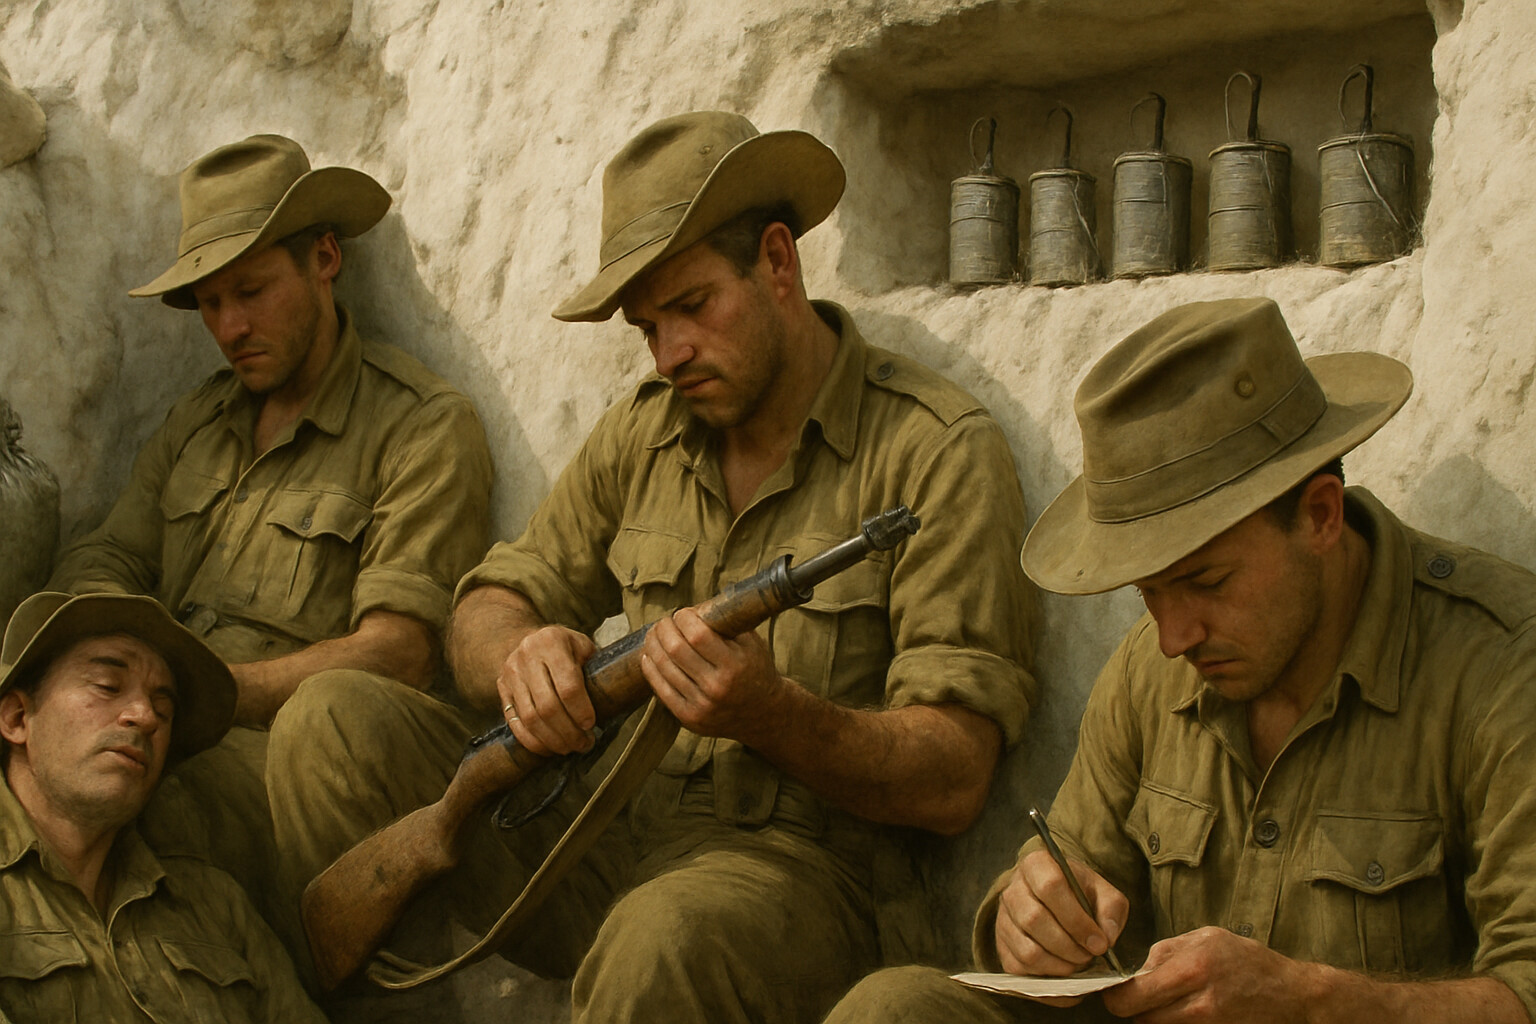
Both sides used grenades extensively in the close-quarter trench fighting. Ottoman troops threw bomb-type devices; British and ANZAC troops found themselves critically short of manufactured grenades and improvised replacements—jam tins packed with explosive, scrap metal, and a lit fuse. Crude, sometimes unreliable, but effective in the narrow confines of a contested trench.
The Ottoman infantry of 1915, despite being under-equipped in some respects, was fighting on ground it had prepared and understood. Ottoman artillery, supported by German technical expertise, registered accurately on the compressed Allied positions and did so with regularity throughout the campaign.
---
The August Offensive was Hamilton's last major attempt to break the deadlock.
Conceived over the summer and launched beginning 6 August 1915, the plan was the most ambitious of the campaign. At Anzac, a major force would break out from the perimeter and drive north and east to seize the high ground of Sari Bair—Chunuk Bair and Hill 971—the objective since the first morning. Simultaneously, a new landing at Suvla Bay, just north of the Anzac perimeter, would be made by the newly arrived IX Corps under Lieutenant General Sir Frederick Stopford, to secure the bay as a supply base and push inland to support the Anzac breakout. Diversionary attacks at Cape Helles and along the Anzac front would fix Ottoman forces and prevent reinforcement.
The Sari Bair assault was a feat of planning and physical endurance. The attacking force—including New Zealand, Australian, British, Gurkha, and Maori troops—marched through the night along routes that were barely paths, through terrain that disoriented experienced soldiers, aiming to reach the high ground before dawn. The approach marches fell behind schedule, partly because of the terrain and partly because coordinating multiple columns in darkness proved harder in practice than on paper. Chunuk Bair was not taken on schedule. When New Zealand troops of the Wellington Infantry Regiment reached positions on the summit on the morning of 8 August, they found themselves there under intense fire and without the support they needed.
For a period of hours, those soldiers held part of the summit of Chunuk Bair and looked down on the strait below. It was the closest the Gallipoli campaign came to achieving its strategic objective. Ottoman counterattacks, organized and led personally by Mustafa Kemal, drove them off the summit by 10 August. The ground was never retaken.
At Suvla Bay, IX Corps landed against relatively light opposition. The beach was lightly defended. The ground inland was open. During a critical window on 7 and 8 August, the opportunity existed to push forward and secure the heights overlooking both the bay and the Anzac sector. That opportunity was not taken. Stopford, operating under orders that historians have argued were insufficiently precise, allowed his troops to consolidate in the lower ground while Ottoman forces moved up to occupy the commanding hills. Hamilton, aware of developments and constrained by his disposition not to override corps commanders directly, did not intervene until the moment had passed.
The responsibility for the Suvla failure—whether it rests primarily at Hamilton's headquarters, with Stopford, with the operational orders, or with the accumulated physical and institutional constraints on the force—has not been resolved to universal satisfaction and remains a subject of serious historical debate.
Hamilton was recalled to London in October 1915. He was succeeded by General Sir Charles Monro, who recommended evacuation. The withdrawal—carried out in two phases, from Anzac and Suvla in December 1915 and from Cape Helles in January 1916—was the most operationally successful part of the entire campaign. Conducted with meticulous planning and strict noise discipline, the withdrawal of approximately 83,000 men from three beachheads under the eyes of the enemy was accomplished without a single combat fatality. The figure of 83,000 is drawn from standard secondary sources and should be confirmed against the British and Dominion official histories before it is treated as definitive.
The bitterest irony of Gallipoli, noted by participants and historians alike, is that the operation requiring the most skill was the one that ended the campaign in failure.
---
The cost of the Gallipoli campaign was enormous.
British and Dominion forces suffered approximately 205,000 casualties of all types across the campaign—killed, wounded, missing, and evacuated sick. French forces suffered an estimated 47,000 casualties. Ottoman casualties are estimated at roughly 250,000 to 300,000, though Ottoman records are incomplete and estimates vary considerably across sources. All figures should be treated as approximations; the precise counts remain subjects of ongoing historical research.
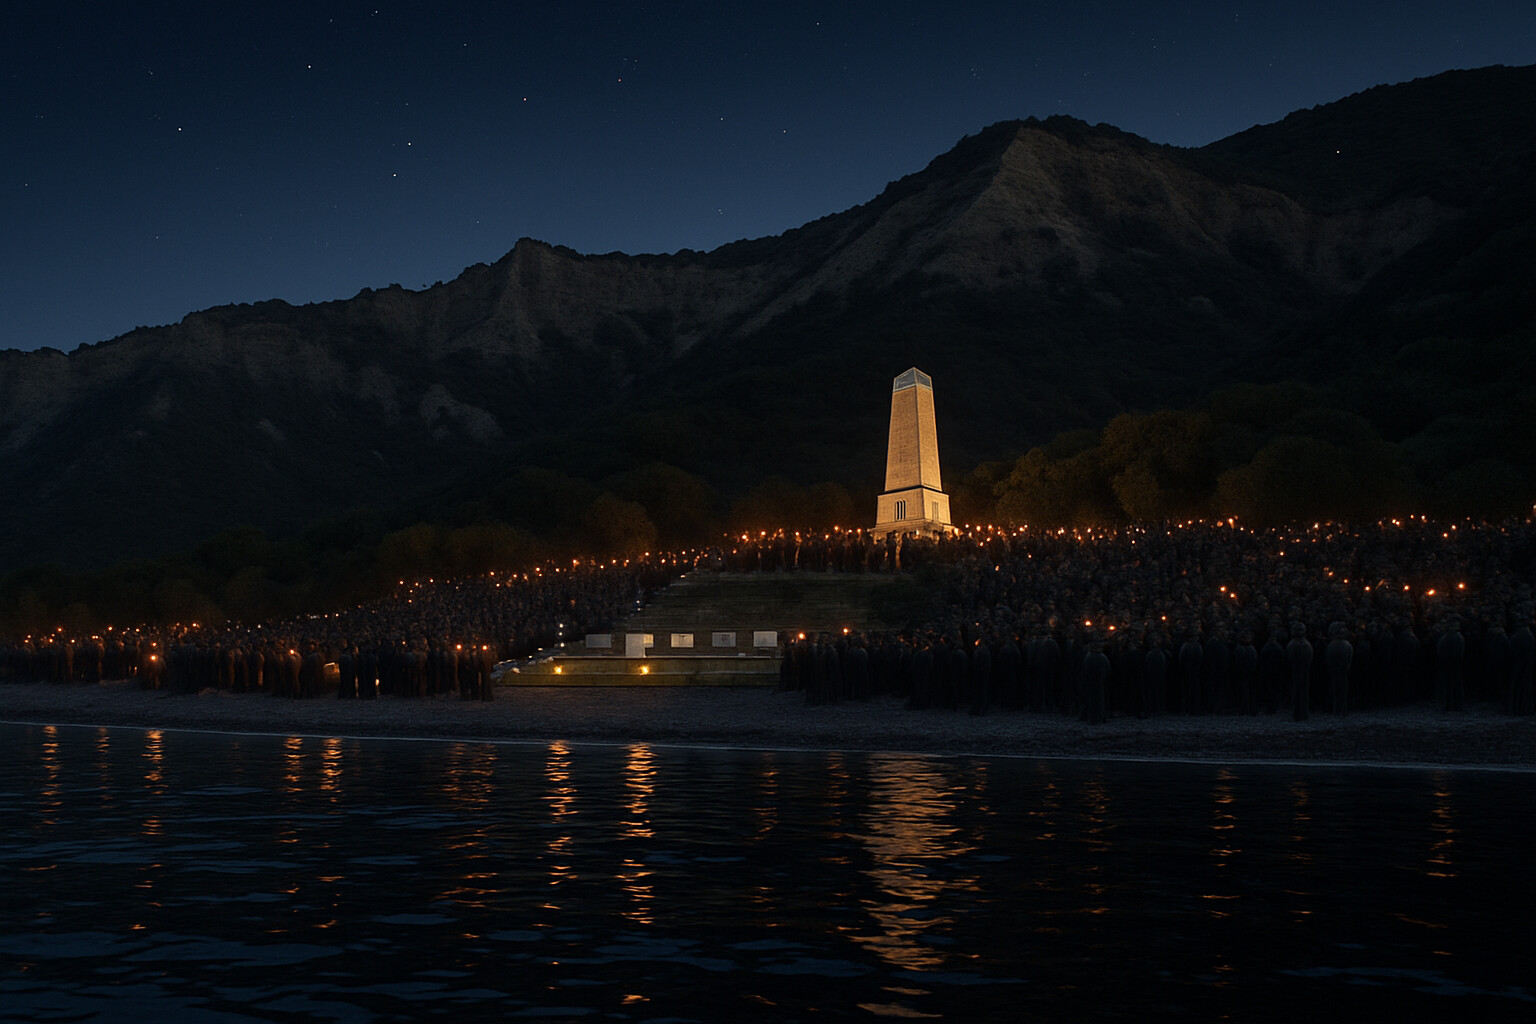
The young men who died at Gallipoli came from nearly every part of the British Empire. Australians and New Zealanders had crossed an ocean to fight in a campaign that became a foundational event in both nations' histories—an act of collective sacrifice on which national identity has been built and rebuilt ever since. ANZAC Day, commemorated on 25 April each year, draws the largest ceremonial attendances in both Australia and New Zealand and has, if anything, grown in cultural significance with the passage of time.
In Britain, the campaign's memory was more complicated. It became associated—often reductively—with individual reputations rather than understood as a product of the structural limitations of Allied power in early 1915: the shortage of ships, the scarcity of heavy artillery and high-explosive shell, the incomplete maps, the improvised staffs, the absence of any established doctrine for large-scale amphibious operations against defended beaches. Hamilton spent years defending his conduct of the campaign, producing his Gallipoli Diary in 1920 and subsequent writings arguing the operation had been starved of the resources it needed. His contemporaries and subsequent historians have not reached a consensus on how much of the failure was institutional and how much rested at his door.
Mustafa Kemal's defense of the peninsula established his reputation in Turkey as the war's defining military figure. His role in containing the Allied landings in 1915—and particularly his insistence on holding the high ground at the Sari Bair ridge with his division's full strength—was central to the outcome. After the war's end and the dissolution of the Ottoman Empire, he organized the Turkish National Movement, led the Turkish War of Independence, and became the founding president of the Republic of Turkey, taking the surname Atatürk—Father of the Turks—granted by the Turkish Grand National Assembly in 1934. His address to the Allied fallen at Gallipoli—a message whose sentiment has been incorporated into official Turkish commemoration and is inscribed at Anzac Cove—placed the dead of the campaign within Turkish memory as well as Allied memory. The exact original wording of that address and the precise date of its first utterance are noted as disputed in some historical sources; the sentiment it expresses is considered authentic.
Hamilton lived until 1947, long enough to see the Second World War fought and concluded. He never held another major command after his recall from Gallipoli.
---
The campaign's strategic failure does not diminish what the men who fought it endured or what they achieved within the circumstances they were placed in.
The Lancashire Fusiliers who crossed W Beach on 25 April did so knowing exactly what the wire and the machine guns meant. The Australians who climbed the ridges above Anzac Cove in the first light did so without reliable maps or adequate supporting fire, on terrain no training exercise had replicated. The New Zealanders who reached the summit of Chunuk Bair on the morning of 8 August, after a night march through ravines that their guides had barely navigated, looked down at what the campaign had been designed to achieve—and held it for hours before the weight of Ottoman counterattack drove them off.
The soldiers who endured the summer in the Anzac perimeter—water rationed severely at the worst periods, sleeping in dugouts carved into the white chalk of the cliffs, waiting for the next bombardment or the next trench raid—did so without the collapse of discipline or cohesion that such conditions might produce. Their letters home, many of which survive in national archives in Australia, New Zealand, and Britain, describe the landscape, the heat, the flies, the sound of the strait at night, and the routines of survival in matter-of-fact language. They recorded what was around them without reaching for drama.
The Gallipoli campaign is remembered differently depending on where you stand: as a military catastrophe in one account, as a crucible of national identity in another, as a case study in operational planning failure in a third. All of these readings contain truth. None is the whole story.
What the records establish, and what the ground itself confirms, is that the peninsula did not fall—that the cliffs above the beaches held the attacking force in place for eight months, that the cost of those months was paid in young men from several continents, and that the results of that payment were something less than what had been promised and something more than nothing, depending on where you stand when you ask the question.
On 25 April every year, in the pre-dawn darkness, people gather at Anzac Cove. The water is usually calm. The stars are still visible when the ceremony begins. The sun comes up over the ridgeline that the first men climbed more than a century ago, and for a few minutes the geography of the place is exactly what it was: steep, dark, tangled, and indifferent to the people who arrived there and gave it a name it still carries.