HomeStoriesWeaponsBattlesPeopleWarbirdsAbout
All Stories

The Hill That Broke a Kingdom: William at Hastings, 14 October 1066

Date: 1066 Location: Hastings, England Unit: Norman cavalry and archers
~21 minutes min read
Cold open: Duke William of Normandy on horseback at dawn, silhouetted against a gray October sky, looking uphill toward the Saxon shield wall on Senlac Ridge. His knights cluster behind him. The ridge above is dense with men, shields, and the glint of axes.

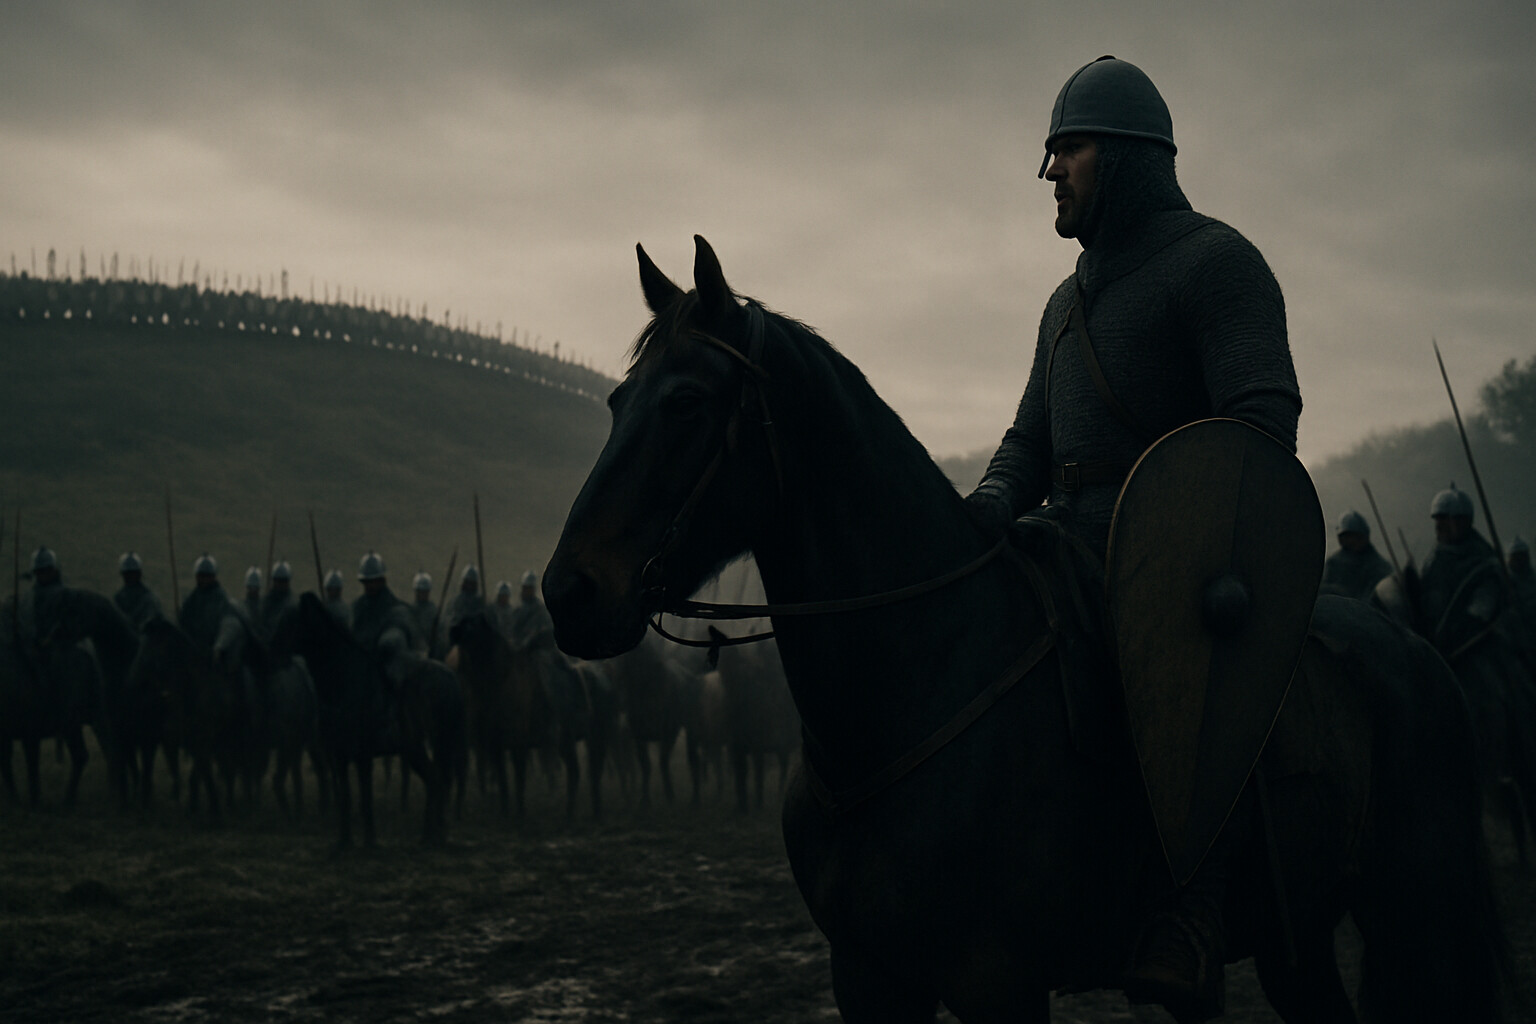
The morning mist had not yet lifted from the Sussex downs when the Norman trumpets sounded. It was the fourteenth of October, 1066, and somewhere ahead on a ridge the English called Senlac, roughly seven thousand men stood shoulder to shoulder behind a wall of interlocked shields, spears, and axes. They had marched south through the night and through exhaustion, and now they waited.

What they faced was not a simple charge. It was something more dangerous: a commander who had spent months thinking through this precise problem, who had crossed a sea to get here, and who controlled three different kinds of soldiers — archers, infantry, and cavalry — with enough discipline to use them in sequence. Duke William of Normandy had staked his dynasty, his reputation, and his life on this single day. The shield wall was the only thing standing between him and everything he believed was his.

---

William was approximately thirty-eight years old in the autumn of 1066. He had been Duke of Normandy since childhood: his father, Robert I, died while returning from a pilgrimage to Jerusalem in 1035, leaving the duchy to an illegitimate son who spent his early years surviving assassination attempts, baronial revolts, and the murderous instability that follows a contested succession. He learned early that authority had to be enforced and that loyalty was a transactional arrangement. By adulthood he was a competent commander, a ruthless administrator, and a man accustomed to being underestimated.

His claim to England rested on a web of relationships and promises that was, at minimum, plausible — though the weight of the evidence behind it depended entirely on which sources one accepted. Edward the Confessor, king of England from 1042 to January 1066, had spent much of his long exile in Normandy and was said by Norman sources to have designated William as his heir, probably around 1051. English sources do not confirm this. The Bayeux Tapestry — the most detailed near-contemporary visual record of the conquest, though commissioned from a Norman perspective — depicts Harold Godwinson, England's most powerful earl, swearing an oath on holy relics to support William's claim, probably in 1064. Harold denied the oath's relevance, or its binding force, after he accepted the English crown in January 1066, the day after Edward died.

William's response was methodical. Through the spring and summer of 1066 he assembled an invasion fleet and an army drawn from across northern France: Norman knights, Breton cavalry for his left wing, Flemish and French auxiliaries. Contemporary sources vary on numbers; modern historians generally estimate the Norman force at somewhere between seven and twelve thousand men, with perhaps two to three thousand cavalry, a substantial body of infantry, and a contingent of archers and crossbowmen. The Bayeux Tapestry shows all three troop types clearly. William also secured a papal blessing from Alexander II, which gave his enterprise the moral framing of a just war — a significant piece of diplomatic cover in an age when religious legitimacy carried real political weight. On the night of 27 to 28 September 1066, he crossed the Channel.

Battle map view: the Senlac Ridge position from above, showing the Saxon shield wall along the ridge crest, the Norman three-division formation in the valley below, and the topographic advantage of Harold's chosen ground.

He landed at Pevensey unopposed. Harold was four days' march north of York.

---

King Harold II had spent September fighting a completely different war. Harald Hardrada of Norway had landed in the north with a substantial fleet, moving on York. Harold gathered his forces, marched north at brutal speed, and on 25 September — nineteen days before Hastings — fought and won one of the most complete English victories in living memory at Stamford Bridge, east of York. Hardrada was killed. The Norwegian threat was finished.

Then the messengers arrived from the south.

Harold's decision to march immediately, without resting and rebuilding his forces, has been debated by historians for nearly a thousand years. He reached London around 6 October, paused briefly to gather additional men, and then pushed south toward Hastings despite what later sources — of uncertain reliability — record as counsel to wait and let William exhaust himself raiding the countryside. Harold may have had pressing reasons to move: William was burning Sussex villages that formed part of Harold's personal estates, and a king who allowed his own lands to be ravaged without answer was a king losing authority in real time. He may also have believed that the army he had was sufficient, and that holding initiative mattered more than rest.

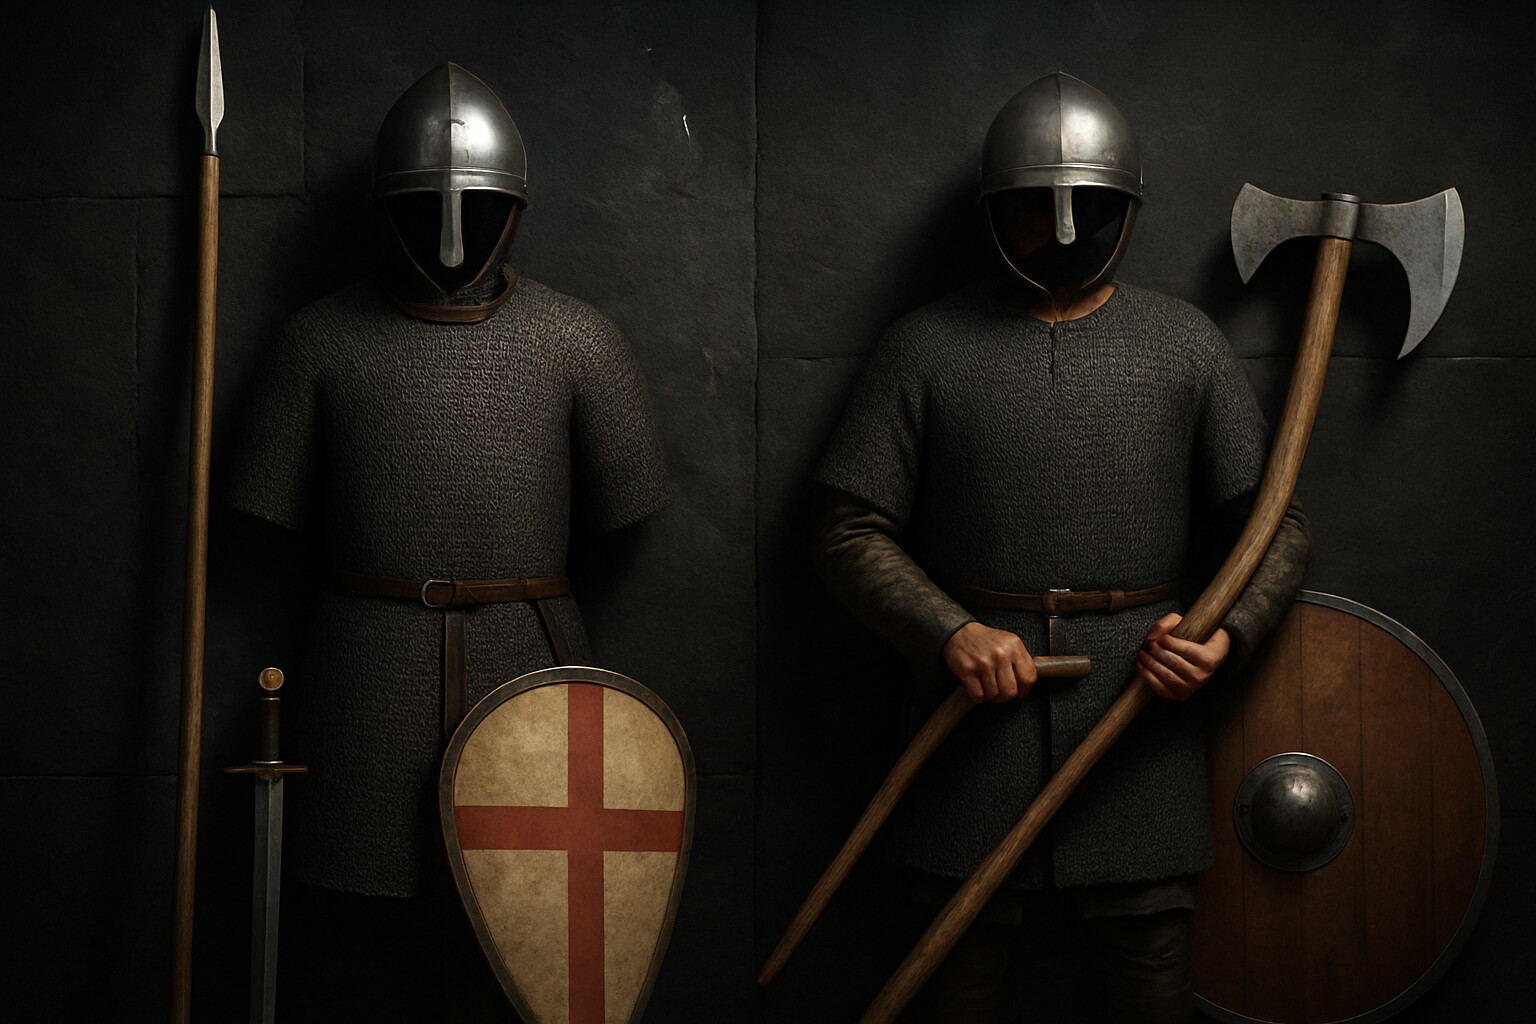
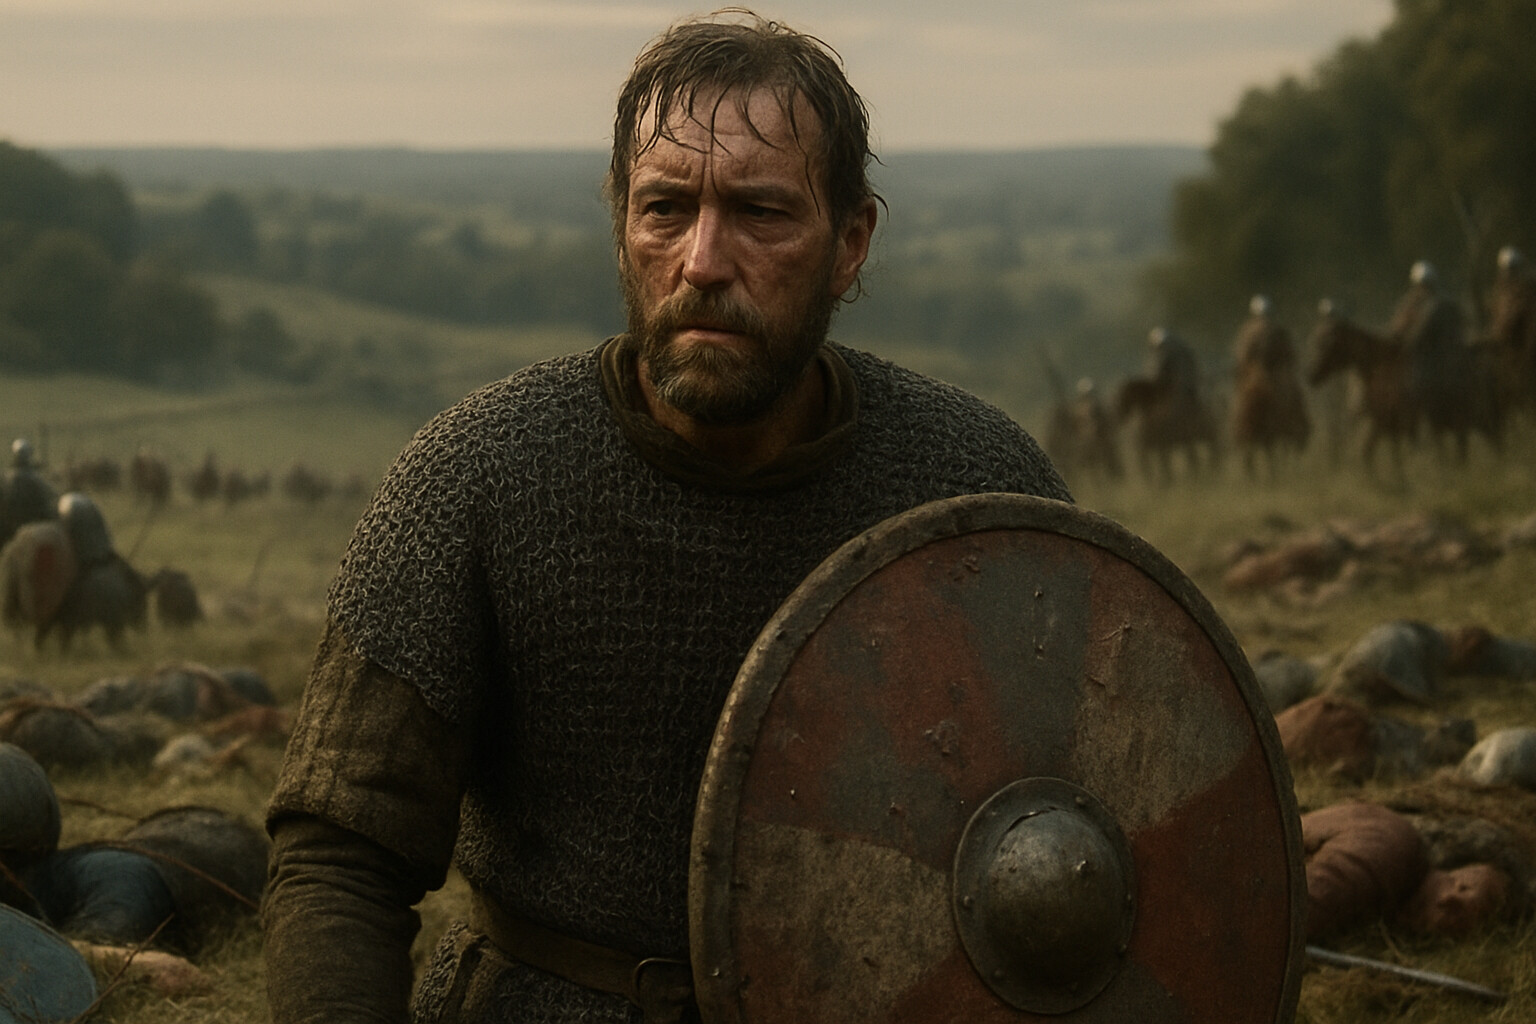
His huscarls — the professional household troops who formed the iron core of any Anglo-Saxon army — were among the finest infantry fighters in northern Europe. Armed with the two-handed Danish war axe and the long round shield, trained to hold formation under sustained pressure, they had just destroyed a Viking army at Stamford Bridge. Harold brought with them the fyrd: the shire levies of England, men of varying quality and equipment but considerable numbers. He positioned them on the ridge above the valley of the Brede, a commanding piece of ground that would force any attacker to advance uphill across open slopes.

Equipment breakdown panel: a detailed flat-lay or standing display of the contrasting equipment of a Norman knight and an Anglo-Saxon huscarl side by side — showing kite shield, mail hauberk, conical helmet, lance, and sword on the left versus round shield, Dane axe, and simpler gear on the right.

William's scouts located Harold's position on the evening of 13 October. William prepared his army during the night. He had confession heard for his men — the papal banner was displayed — and in the morning he moved.

---

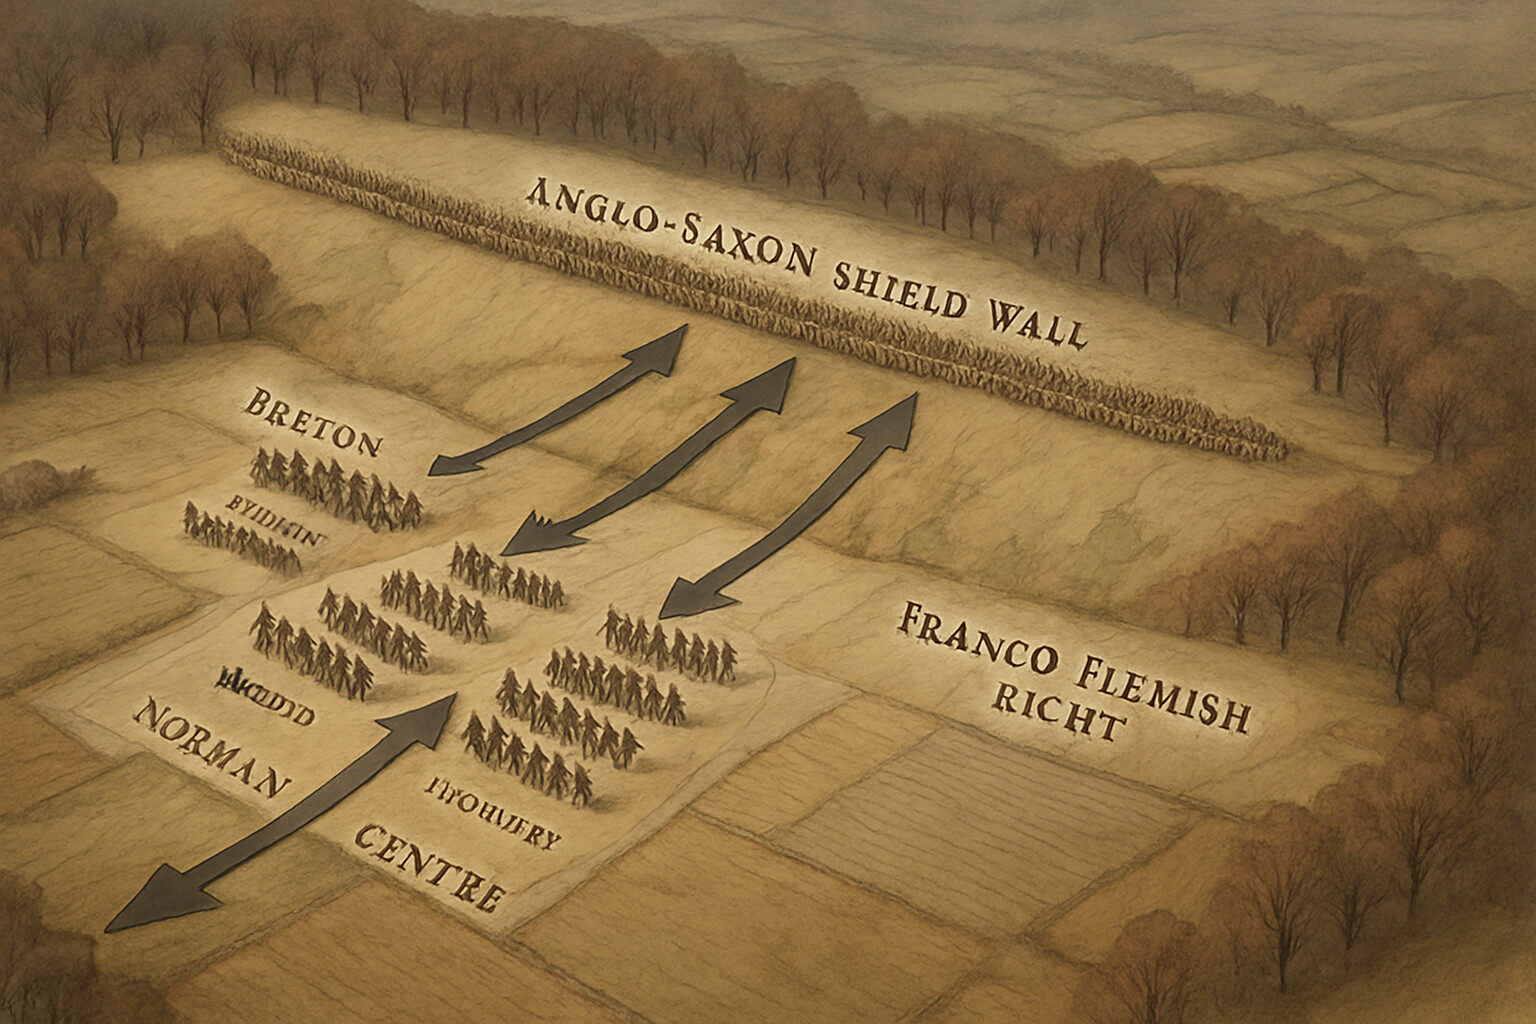
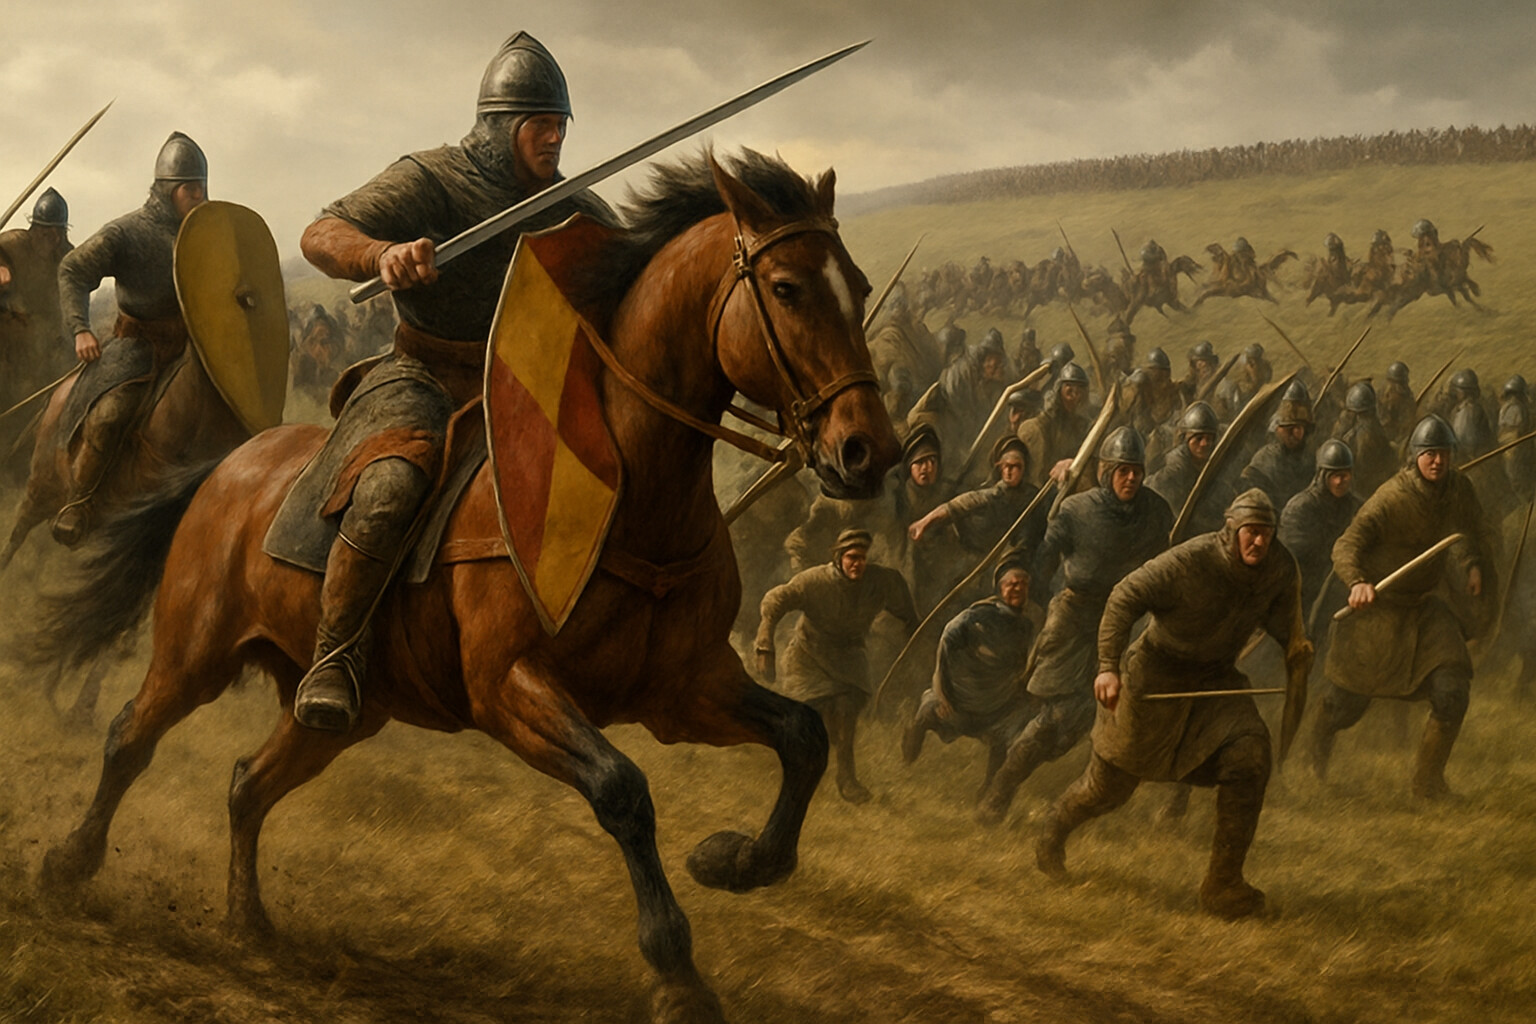
The Norman army advanced in three divisions arranged roughly left to right: Breton cavalry on the left under Count Alan Rufus, Normans in the center under William himself, and Franco-Flemish auxiliaries on the right. Archers led the initial assault. Behind them came infantry spearmen. Cavalry waited in the third echelon.

The Norman archers carried self-bows of yew or elm — short composite bows, in the modern descriptive sense — with a maximum range of roughly 150 to 200 yards and an effective suppressive range against a shielded formation considerably shorter. The Bayeux Tapestry depicts them clearly: light equipment, loose formation, no shields. Crossbows were present in the Norman force as well, though to what degree remains uncertain from the sources; William of Poitiers mentions archers without clearly distinguishing between bow types.

The problem the archers faced immediately was geometric. The Saxon shield wall stood on the ridge crest. Arrows fired uphill on a comparatively flat trajectory struck shields and were often recovered and returned. The Bayeux Tapestry shows arrows embedded in the ground before the Saxon line, suggesting that a high proportion of fire was intercepted in the early exchanges. The shield wall was performing exactly as designed.

Norman infantry advanced next and met a ferocious response. The huscarls on the Saxon front line were armed with the Dane axe — a weapon with a blade roughly twelve to fifteen inches across, mounted on a shaft four to five feet long, capable of shearing through a horse's leg, a knight's shield arm, or an armored man's torso in a single blow. A Saxon huscarl swinging a Dane axe on ground of his own choosing was extraordinarily dangerous to any soldier within reach. Contemporary sources record that horses were cut down, shields were split, and the Norman infantry advance stalled against the wall.

Action scene: Norman cavalry charging uphill toward the Saxon shield wall. Horses at full gallop, lances leveled, the riders braced in stirrups. The shield wall ahead is a solid mass of overlapping round shields and spear points. A Saxon huscarl is visible swinging a Dane axe at an approaching horse.

William then committed his cavalry.

---

The Norman knight of 1066 was the product of a military culture that had been developing heavy cavalry tactics for roughly a century. He rode a destrier — a war horse bred for stamina and aggression — and was equipped with a kite-shaped shield, a conical iron helmet with a nasal bar, and a hauberk of riveted iron mail that fell to the knee and covered the upper arms. The hauberk alone weighed approximately twenty to thirty pounds; full equipment load for a mounted knight could approach fifty pounds, though the saddle bore most of that weight on the move.

The stirrup was central to the system. The adoption of the stirrup by Frankish cavalry in the eighth and ninth centuries — the subject of significant scholarly debate since Lynn White Jr.'s 1962 study — gave a rider a stable platform from which to brace against the impact of a lance strike rather than being driven backward off his horse. Whether or not one accepts the full scope of White's argument about the stirrup reshaping medieval society, the practical effect at Hastings was clear: Norman cavalry could deliver a lance charge with enough transferred momentum to be genuinely dangerous, and could sustain repeated passes rather than committing everything to a single irreversible charge.

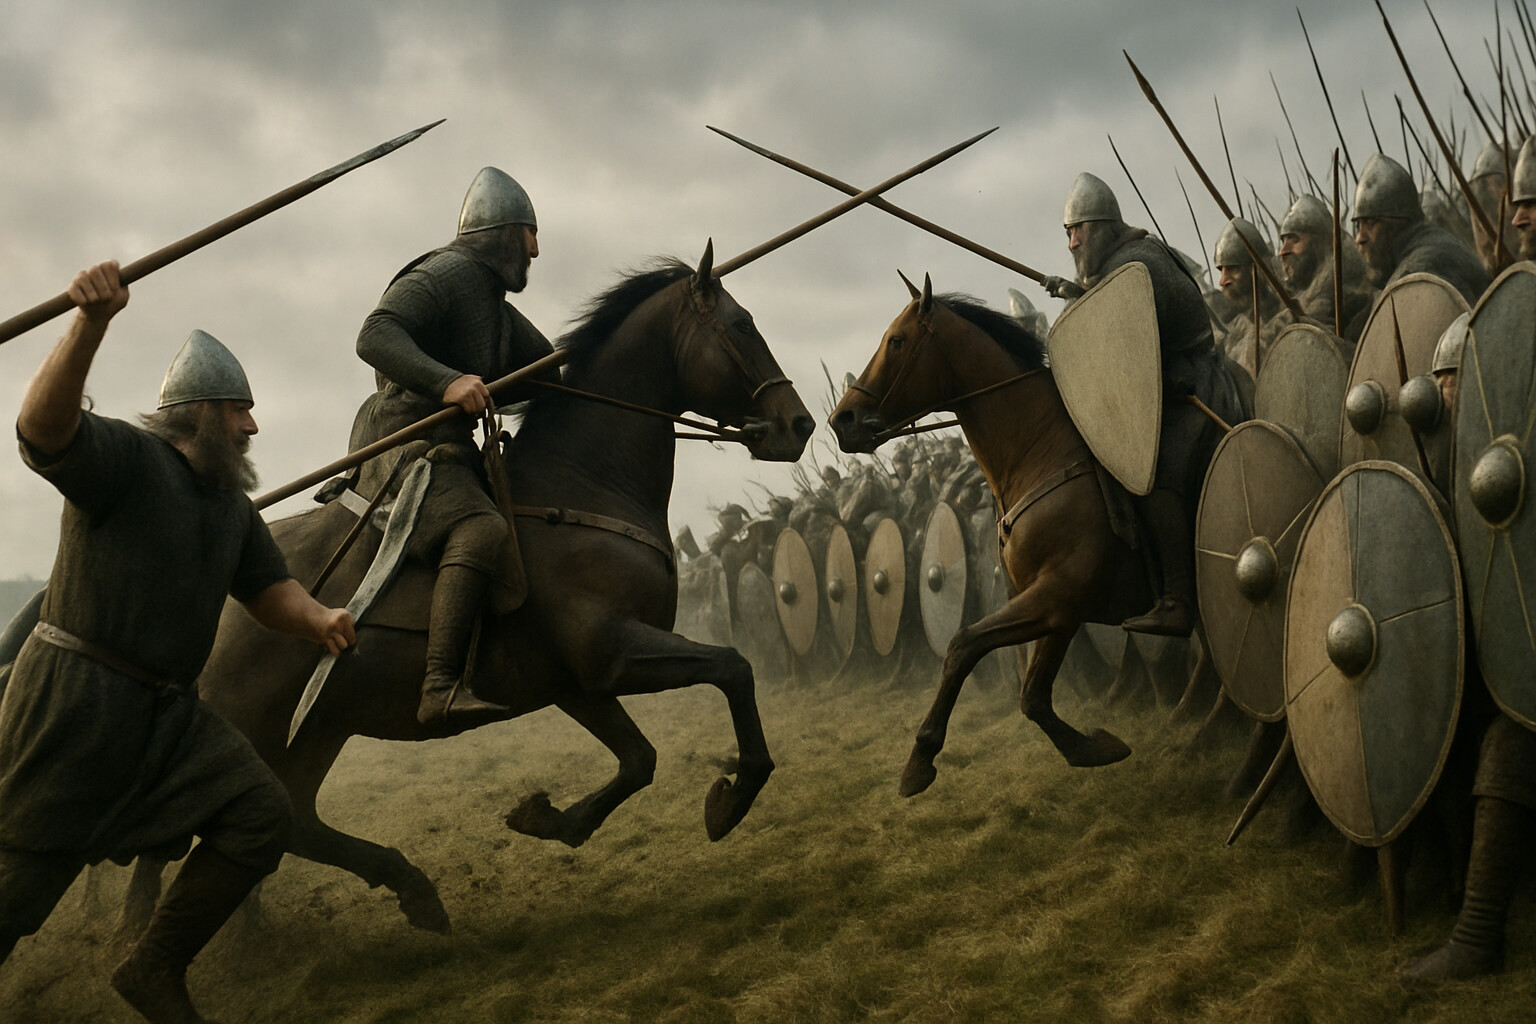
But repeated passes against an unbroken shield wall were expensive. The Saxons had spears and those axes. Horses shied from the wall of shields. Knights who came too close and were unhorsed died. The cavalry assault achieved local penetrations at points, ground forward in some places, and failed to break the line as a whole. At some point during the morning — the sources do not agree on precise timing — a portion of the Norman line gave way. Whether from genuine rout psychology or deliberate tactical decision, the left wing, primarily Breton cavalry, broke and retreated downhill.

A section of the Saxon line broke formation and pursued.

The feigned retreat: Norman cavalry fleeing downhill, appearing to rout, while Saxon fyrdmen break formation and pursue them in disorder. In the background, other Norman cavalry are wheeling to turn and cut off the pursuers.

This is one of the most studied moments in medieval military history. What happened next is not seriously disputed: William reformed cavalry, turned it, and cut down the pursuing Saxons in the open ground below the ridge. The Bayeux Tapestry depicts this action with unusual clarity. What remains unresolved is whether the initial flight was accidental — genuine panic or local collapse — or a deliberate feigned retreat, a cavalry tactic well attested in Norman and Byzantine military practice.

William of Poitiers, writing within years of the battle from inside the Norman court, describes two feigned retreats and presents them as deliberate, successful maneuvers. Later chroniclers follow this account. Modern military historians have noted that a truly deliberate feigned retreat is extraordinarily difficult to execute under battlefield stress: cavalry must flee, maintain enough cohesion to respond to command, and turn to fight again while being chased. Critics of the deliberate-feint reading argue that what happened was real panic, subsequently exploited by better-controlled units.

The answer probably lies somewhere between those positions. Norman cavalry of 1066 were trained soldiers who had practiced ruse tactics. A partial rout that more disciplined units recognized and converted into a killing action is consistent with both readings. What matters for the outcome is that it worked: the Saxon line was shorter. The men who came down the hill did not go back up.

---

The afternoon brought attrition. Harold's line contracted as casualties mounted, but the remaining huscarls and fyrdmen held. The ridge was narrower now, the shield wall tighter. A tighter wall, paradoxically, may have been harder to break by cavalry alone: fewer exposed flanks, less room for penetration.

William changed his approach. According to William of Poitiers and the narrative embedded in the Bayeux Tapestry — which must be read as a commissioned Norman document with an interest in presenting William's generalship favorably — William ordered his archers to elevate their angle of fire. Rather than shooting into the shield wall on a level or rising trajectory, they fired at a higher angle, sending arrows in a plunging arc over the tops of the shields to fall on the men standing behind the front rank. The change converted the shield wall from an intercepting barrier into partial cover: the men the archers could not see were now the men the arrows could reach.

Intimate human moment: an exhausted Anglo-Saxon huscarl in the late afternoon, shield raised, surrounded by the dead on the ridge. His face shows the physical strain of hours of combat. The Norman lines are visible in the valley below, reforming for another push.

This is the context associated with the most famous and most disputed moment of the battle: an arrow striking Harold in or near the eye. The Bayeux Tapestry shows a figure pulling an arrow from his face beneath a Latin inscription identifying Harold. Medieval and early modern chroniclers generally accepted this account. Modern historians have raised several questions: whether the figure with the arrow is actually Harold or a nearby soldier; whether the wound from the arrow was the killing blow or whether Harold was subsequently cut down by cavalry in the final collapse; whether both accounts record separate parts of the same sequence. Some sources describe Harold being hacked down by horsemen in the battle's final moments; others focus on the arrow alone. The likeliest reading, given the range of accounts, is that an arrow strike staggered or felled Harold and that cavalry then finished the attack — but that reconstruction cannot be confirmed from surviving evidence and should be read as inference.

What is not in dispute: Harold died at Hastings. The Saxon standard fell. When the king died, the remaining organized resistance collapsed. The huscarls who had not broken fought to the last around Harold's position — a site that corresponds roughly to where Battle Abbey's high altar would later be built, the location traditionally identified as where he fell, though this is tradition rather than archaeological fact. Fleeing Saxons were pursued into the darkening countryside. A rearguard action in ground later called the Malfosse — the evil ditch, a location that has never been definitively identified geographically — cost the Normans additional casualties when pursuing cavalry rode into broken ground in the failing light. But the battle itself was already decided.

Harold Godwinson was dead. The Anglo-Saxon political order that had governed England for six centuries was gone.

---

The cost of the battle on both sides is genuinely unknown. No reliable contemporary casualty figures exist. Modern estimates for the Norman force suggest substantial losses, particularly among cavalry in the repeated charges against the shield wall; some historians have inferred losses approaching a quarter of the Norman army, though this is inference drawn from indirect evidence, not record. Saxon casualties were severe enough to destroy organized English military resistance in the immediate aftermath, though not so complete as to prevent revolts in the years that followed.

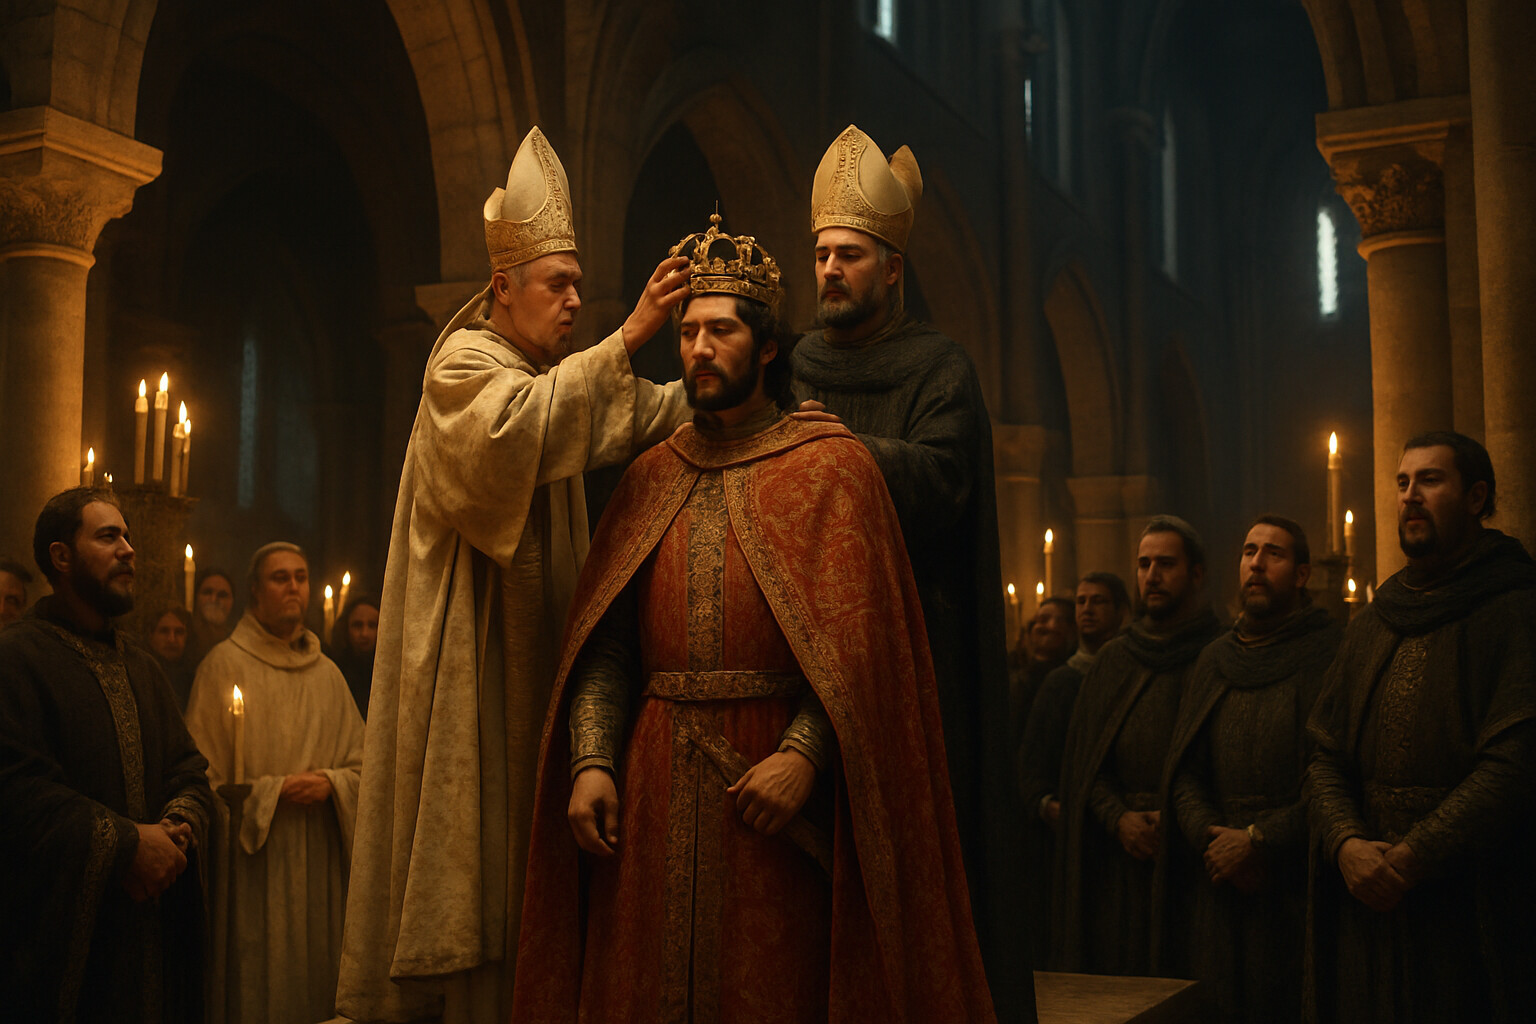
William moved from Hastings to Dover, then Canterbury, then toward London. When London submitted — which it did after further military pressure and the surrender of Edgar Ætheling, the surviving Anglo-Saxon claimant — William was crowned King of England at Westminster Abbey on Christmas Day, 1066, by the Archbishop of York. According to later chroniclers, the ceremony was disrupted when acclamation from inside the church caused Norman guards outside to believe trouble had started and they set fire to nearby buildings. The details of this account may be embellished in the retelling; the coronation itself is not in doubt.

Aftermath and legacy: William's coronation at Westminster Abbey on Christmas Day 1066 — the moment the battle's outcome was formalized. The new king in ceremonial dress, the Abbey interior illuminated by candles, bishops and Norman lords in attendance. The transfer of a kingdom rendered as a visual capstone.

William was king. The rest of his reign — he died in September 1087, from injuries sustained at the siege of Mantes — was spent consolidating what Hastings had made possible: the redistribution of English land to Norman and French followers, the construction of castles across the country, the systematic replacement of the Anglo-Saxon ecclesiastical and administrative hierarchy, and the imposition of a new language of power that would spend two centuries mixing with Old English to produce what became, eventually, the English language as it is now spoken.

The Domesday Book of 1086, commissioned by William to assess the taxable resources of his kingdom, is one of the most remarkable administrative documents in medieval European history. It is also a record of how completely the English aristocracy was displaced. The men who had held land in the England before Hastings were largely gone — dead, dispossessed, or reduced to tenants of the men who had replaced them. Norman names filled the columns where Saxon names had been.

---

What makes Hastings worth studying is not only what it decided but how it was decided. William won because he combined arms effectively, maintained discipline under pressure, converted a crisis — the broken left wing — into an opportunity, and adapted his tactics in the afternoon when the morning's approach had proved insufficient. Harold's position was strong, his men were capable, and the outcome was not predetermined by any inherent Norman superiority.

The Saxon shield wall was a legitimate tactical system that had beaten a Viking army at Stamford Bridge nineteen days earlier. It failed at Hastings for specific, recoverable reasons: the army was tired and may have been understrength after the rapid march south; once Norman archers achieved plunging trajectories in the afternoon the wall could no longer protect the men standing behind it; and — critically — sections broke formation to pursue what appeared to be a retreating enemy. Discipline failed at the moment discipline was most required.

The sources for all of this require careful handling. The Bayeux Tapestry, created within roughly twenty years of the battle, is the most detailed visual record and contains genuine historical information, but it is a commissioned Norman document and presents events from a Norman point of view. William of Poitiers wrote his Gesta Guillelmi within years of the battle from inside the Norman court. The Anglo-Saxon Chronicle, which survives in multiple manuscript versions, offers English perspectives that are often terse or incomplete for this period. Later chronicles — Orderic Vitalis, writing in the early twelfth century; William of Malmesbury, roughly contemporary with Orderic — add significant detail but at increasing temporal distance from the events. The Carmen de Hastingae Proelio, an account in verse attributed to Guy of Amiens, is a potentially valuable source, but its dating and authorship have been challenged by scholars including R. H. C. Davis, and it cannot be used without acknowledging those uncertainties.

No source is neutral. Every account was written by someone with a reason to tell the story in a particular way. The work of reading these accounts is to triangulate between them, note where they agree, mark where they diverge, and be honest about what the evidence cannot settle.

What the evidence does settle is this: on the fourteenth of October, 1066, a ridge in Sussex held the fate of England, and by nightfall it was decided. The world that existed when the sun rose that morning — with an Anglo-Saxon king, an Anglo-Saxon aristocracy, an Anglo-Saxon church hierarchy, and an Anglo-Saxon language of governance — was gone before the sun set. What came after took centuries to absorb and was never fully absorbed. England today speaks a language, bears surnames, inherits legal traditions, and carries architectural habits that trace a continuous line back to the men who stood on that ridge and the man who broke them.

The Abbey of Battle stands now on the ground where Harold is said to have fallen. Visitors walk the site in all weathers. The ridge is shorter than it looks in reconstructions, the slope less dramatic than the story demands. But stand at the crest on a gray October morning and look down toward where the Norman line would have formed, and the geometry of the problem is immediate: a wall of men, shields locked, axes ready, holding the high ground. Seven thousand men. No way around. The only way through was the shield wall.

William found a way through. That fact shaped the next thousand years.

Norman Composite Short Bow

The primary ranged weapon of the Norman archer contingent, used to suppress and eventually penetrate the Saxon shield wall through massed plunging fire.

Caliber
Not applicable
Weight
Approximately 1-2 lbs (bow only); arrows approximately 1-1.5 oz each
Range
Maximum approximately 150-200 yards; effective suppressive range against shielded formation significantly shorter
Rate Of Fire
Approximately 6-12 aimed shots per minute for a trained archer
Crew
1 (individual archer)
Ammunition
Bodkin-point and broadhead arrows, typically 24-36 per archer carried into battle
Manufacturer
Craft-produced; no single manufacturer
Years Produced
Technology in use across medieval Europe; Norman variant in use through 11th-12th centuries
Nickname
Short bow (modern descriptive term; no period nickname confirmed)

Danish War Axe (Dane Axe)

The signature weapon of the Anglo-Saxon huscarl, a two-handed axe capable of devastating cavalry horses and splitting shields, which made the Saxon shield wall acutely dangerous at close quarters.

Caliber
Not applicable
Weight
Approximately 3-5 lbs (axe head and shaft combined); axe head alone approximately 1-2 lbs
Range
Melee; effective reach approximately 4-6 feet with full shaft
Rate Of Fire
Not applicable; limited by fatigue and engagement distance
Crew
1 (requires two hands; huscarl therefore fought without a shield while swinging)
Ammunition
Not applicable
Manufacturer
Craft-produced by blacksmiths; Scandinavian design tradition adopted in England
Years Produced
Scandinavian design in use from approximately 9th century; peak Anglo-Saxon use 10th-11th centuries
Nickname
Dane axe, long axe, bearded axe (broad category; specific period terms vary by source)

Norman Kite Shield

The distinctive elongated shield of the Norman knight, providing protection from shoulder to knee for a mounted soldier and visible throughout the Bayeux Tapestry as a defining image of the conquest.

Caliber
Not applicable
Weight
Approximately 10-15 lbs; constructed of wood covered with leather and often fitted with an iron boss
Range
Not applicable
Rate Of Fire
Not applicable
Crew
1
Ammunition
Not applicable
Manufacturer
Craft-produced
Years Produced
Kite shield design developed approximately late 10th century; primary use 10th-12th centuries
Nickname
Kite shield (modern descriptive term)

Norman Iron Mail Hauberk

The body armor of the Norman knight, a knee-length coat of riveted iron rings that provided substantial protection against cutting weapons while remaining flexible enough to allow mounted combat.

Caliber
Not applicable
Weight
Approximately 20-30 lbs for a full hauberk; with helmet and other equipment the total load could reach 45-55 lbs
Range
Not applicable
Rate Of Fire
Not applicable
Crew
1
Ammunition
Not applicable
Manufacturer
Skilled armorers (mailmakers); a major craft industry in 11th-century northern France and England
Years Produced
Mail as a technology in use since antiquity; Norman-pattern hauberk as a type c. 9th-12th centuries
Nickname
Byrnie (Old English/Old Norse term); hauberk (from Old French)

Anglo-Saxon Round Shield (Shield Wall Configuration)

The interlocked round shields of the Saxon infantry and huscarls formed the shield wall that defined English defensive tactics at Hastings, providing a nearly impenetrable barrier when maintained with discipline.

Caliber
Not applicable
Weight
Approximately 10-15 lbs; constructed of wood with iron boss and often leather or iron rim reinforcement
Range
Not applicable; purely defensive
Rate Of Fire
Not applicable
Crew
1 per shield; effectiveness multiplied by formation density
Ammunition
Not applicable
Manufacturer
Craft-produced; shield-making was a widespread craft across Anglo-Saxon England
Years Produced
Round shield tradition in use from early medieval period through 11th century in England
Nickname
Linden shield (from common wood; Old English poetic tradition); boss shield

Norman Cavalry Lance

The primary shock weapon of the Norman knight, used either couched under the arm for a full charge or wielded overhand as a thrusting weapon during melee, delivering the kinetic impact that made heavy cavalry dangerous against infantry formations.

Caliber
Not applicable
Weight
Approximately 3-5 lbs; wooden shaft (ash or similar hardwood) with iron or steel head
Range
Melee to approximately 10 feet effective reach when couched or thrust
Rate Of Fire
Not applicable; single-use per charge in couched position; repeated thrusts possible in sustained melee
Crew
1
Ammunition
Not applicable
Manufacturer
Craft-produced
Years Produced
Lance as cavalry weapon in continuous development; couched lance technique developing in 11th century
Nickname
Not applicable
Photo
Pending

William I of England (William the Conqueror; William, Duke of Normandy)

Duke of Normandy (1035-1087); King of England (1066-1087)

Unit: Norman army center division, overall commander

William was born approximately 1028, the illegitimate son of Robert I, Duke of Normandy, and a woman named Herleva, variously described in sources as the daughter of a tanner or an embalmer. His bastardy — he was known derisively as 'William the Bastard' by contemporaries — shaped his early political life: his father's death in 1035 left him duke at approximately age seven, and the years of his minority were marked by baronial instability and multiple assassination attempts against him. He survived and, by his mid-teens, was actively fighting to secure his duchy. Verified major events of his life include his victory over French forces at the Battle of Val-ès-Dunes (1047) with the assistance of King Henry I of France, his marriage to Matilda of Flanders (c. 1051-1053, despite initial papal objection), his military campaigns to consolidate Normandy through the 1050s, and the claim to the English throne that followed Edward the Confessor's death in January 1066. The nature and reliability of Edward's alleged promise of the throne to William is contested; it rests primarily on Norman sources. At Hastings, William commanded from the center and, according to Norman sources including William of Poitiers, had at least one horse killed under him during the battle. A moment described in multiple sources — William lifting his helmet to show his face to troops who believed he had been killed, in order to stop a rout — is recorded by William of Poitiers and is consistent with the feigned retreat episode, though the precise details cannot be verified. His survival of the battle was itself consequential: had he died, the invasion would almost certainly have collapsed. He ruled England until his death on 9 September 1087, following injuries sustained in the burning of Mantes during a campaign against King Philip I of France. His body was reportedly poorly treated after death — chroniclers describe it swelling and bursting during the funeral — a detail that ancient and modern writers alike have noted with some relish as an undignified end for so commanding a figure. He was buried at the Abbey of Saint-Étienne in Caen, Normandy, though his tomb was later disturbed multiple times. Only a single thigh bone is believed to survive and is currently interred there.

Photo
Pending

Harold II (Harold Godwinson)

King of England (January - October 1066); previously Earl of Wessex

Unit: Anglo-Saxon royal army, overall commander

Harold Godwinson was the most powerful nobleman in England before becoming its king. The son of Godwin, Earl of Wessex, he was approximately forty years old at Hastings, experienced in warfare, and had demonstrated capable generalship at Stamford Bridge nineteen days before. His claim to the throne rested on the deathbed designation of Edward the Confessor and the confirmation of the Witan (the Anglo-Saxon royal council), both of which are recorded in English sources. His coronation took place on 6 January 1066, the day of Edward's burial. The oath Harold is said to have sworn to William — depicted in the Bayeux Tapestry — is one of the most studied and disputed events of the period. Norman sources treat it as a solemn binding oath on holy relics to support William's claim; English sources do not confirm this or treat the oath as binding under the circumstances. The truth cannot be established from surviving evidence. Harold's decision to advance rapidly south after Stamford Bridge rather than rest and rebuild has been evaluated by historians as either sound (maintaining initiative, preventing William from consolidating his position in Sussex) or reckless (advancing with a tired and understrength force). His choice of position at Senlac ridge was tactically sound; the ground favored defense. His death at Hastings is confirmed; the manner of death — arrow wound, cavalry attack, or both — is disputed in the sources (see tradition/disputed notes). His body was identified after the battle, though the accounts of how it was identified vary. He was apparently buried at Waltham Abbey, which he had founded, though the precise location of his grave is uncertain and has been debated.

Photo
Pending

Harald Hardrada (Harald Sigurdsson)

King of Norway

Unit: Norwegian invasion force

Harald Sigurdsson, known as Hardrada ('hard ruler'), was King of Norway from 1046 to 1066. A formidable military figure who had served as a Varangian Guard in Byzantium before seizing the Norwegian throne, he invaded England in September 1066 in support of a dynastic claim rooted in earlier Danish-Norwegian arrangements with the English crown. His invasion force landed at the Humber and defeated an English force at Fulford Gate (20 September 1066) before being destroyed by Harold at Stamford Bridge (25 September 1066), where Hardrada was killed. His invasion is relevant to Hastings primarily because it consumed Harold's strategic reserves and forced the rapid southward march that left the English army tired when it faced William.

Photo
Pending

Alan Rufus (Alan the Red)

Count; later Count of Richmond

Unit: Breton cavalry contingent, Norman left wing

Alan Rufus was a Breton nobleman who commanded the Norman left wing at Hastings. He was a relative of Duke Alan III of Brittany and fought alongside William during the invasion. After the conquest he received extensive lands in England, particularly in Yorkshire and the northeast, and became Count of Richmond. His role at Hastings is noted in secondary sources; the precise nature of his command during the left wing's retreat — whether he initiated or controlled the movement — is not recoverable from primary sources. He died c. 1093.

Battle of Hastings

14 October 1066

The Battle of Hastings was fought on 14 October 1066 between the Norman invasion army of Duke William of Normandy and the Anglo-Saxon royal army of King Harold II. It was the decisive engagement of the Norman Conquest of England. Harold chose a defensive position on Senlac Ridge, a commanding piece of ground that forced any attacker to advance uphill. William's army advanced in three divisions with archers, infantry, and cavalry in successive echelons.

The battle lasted approximately nine hours. Saxon huscarls and fyrdmen held the ridge through repeated Norman cavalry charges and archery attacks. A collapse of the Norman left wing — whether genuine rout or deliberate feint — drew pursuing Saxons off the ridge and allowed Norman cavalry to cut them down in open ground. This tactical exchange shortened the Saxon line and set the pattern for the afternoon's fighting.

By late afternoon, elevated Norman archery fire and continued cavalry pressure had depleted Harold's force. Harold was killed — the exact manner remaining disputed — and with the fall of the king and the royal standard, organized Saxon resistance collapsed. William's victory ended Anglo-Saxon rule in England and set the stage for the most thorough transformation of English society since the Roman occupation.

Positions are approximate, based on published accounts.

Sources & Further Reading

ARCHIVE

The Bayeux Tapestry. Embroidered linen, c. 1066-1083 (most scholarly estimates). Musée de la Tapisserie de Bayeux, Bayeux, France. The primary visual record of the Norman Conquest, depicting the invasion, battle, and death of Harold. Commissioned from a Norman perspective; treated as a primary source with acknowledged bias.

BOOK

William of Poitiers. Gesta Guillelmi (The Deeds of William). Written c. 1071-1077. Edited and translated by R. H. C. Davis and Marjorie Chibnall. Oxford: Clarendon Press (Oxford Medieval Texts), 1998. Primary Norman chronicle; written from within William's court and presents the Norman perspective throughout.

ARCHIVE

The Anglo-Saxon Chronicle. Multiple manuscript versions (C, D, E) covering the events of 1066. Various editions; standard modern edition: Dorothy Whitelock, David C. Douglas, and Susie I. Tucker, eds., The Anglo-Saxon Chronicle: A Revised Translation. London: Eyre and Spottiswoode, 1961. English perspective; terse on battle details.

BOOK

Orderic Vitalis. Historia Ecclesiastica. Written c. 1114-1141. Edited and translated by Marjorie Chibnall, 6 vols. Oxford: Clarendon Press (Oxford Medieval Texts), 1969-1980. Later chronicle with significant detail on the conquest and aftermath; written at increasing temporal distance from 1066.

BOOK

William of Malmesbury. Gesta Regum Anglorum (The History of the English Kings). Written c. 1125. Edited and translated by R. A. B. Mynors, R. M. Thomson, and M. Winterbottom. Oxford: Clarendon Press (Oxford Medieval Texts), 1998. Important early 12th-century chronicle; further from the events but synthesizing earlier sources.

BOOK

Davis, R. H. C. 'The Carmen de Hastingae Proelio.' English Historical Review 93 (1978): 241-261. Scholarly article debating the authorship and dating of the Carmen, attributed to Guy of Amiens.

BOOK

Douglas, David C. William the Conqueror: The Norman Impact upon England. London: Eyre and Spottiswoode, 1964; reissued University of California Press, 1967. Standard scholarly biography; still widely cited.

BOOK

Gravett, Christopher. Hastings 1066: The Fall of Saxon England. Oxford: Osprey Publishing (Campaign Series 13), 1992. Military history of the battle with detailed tactical analysis.

BOOK

Lawson, M. K. The Battle of Hastings 1066. Stroud: Tempus Publishing, 2002. Detailed scholarly study of the battle examining all primary sources critically.

BOOK

Morillo, Stephen, ed. The Battle of Hastings: Sources and Interpretations. Woodbridge: Boydell Press, 1996. Collection of primary sources and scholarly interpretations; useful for understanding the historiographical debate.

BOOK

White, Lynn, Jr. Medieval Technology and Social Change. Oxford: Oxford University Press, 1962. Influential and contested study of the stirrup's military and social impact; relevant to the analysis of Norman cavalry tactics.

BOOK

Howarth, David. 1066: The Year of the Conquest. New York: Viking Press, 1977. Accessible narrative history drawing on primary and secondary sources.

MUSEUM

English Heritage. Battle Abbey and Battlefield, Battle, East Sussex. The site includes the remains of Battle Abbey, the battlefield grounds, and interpretive exhibits on the battle. https://www.english-heritage.org.uk/visit/places/1066-battle-of-hastings-abbey-and-battlefield/

BOOK

Rex, Peter. Harold II: The Doomed Saxon King. Stroud: Tempus, 2005. Biography of Harold with critical assessment of the events of 1066 from an English perspective.