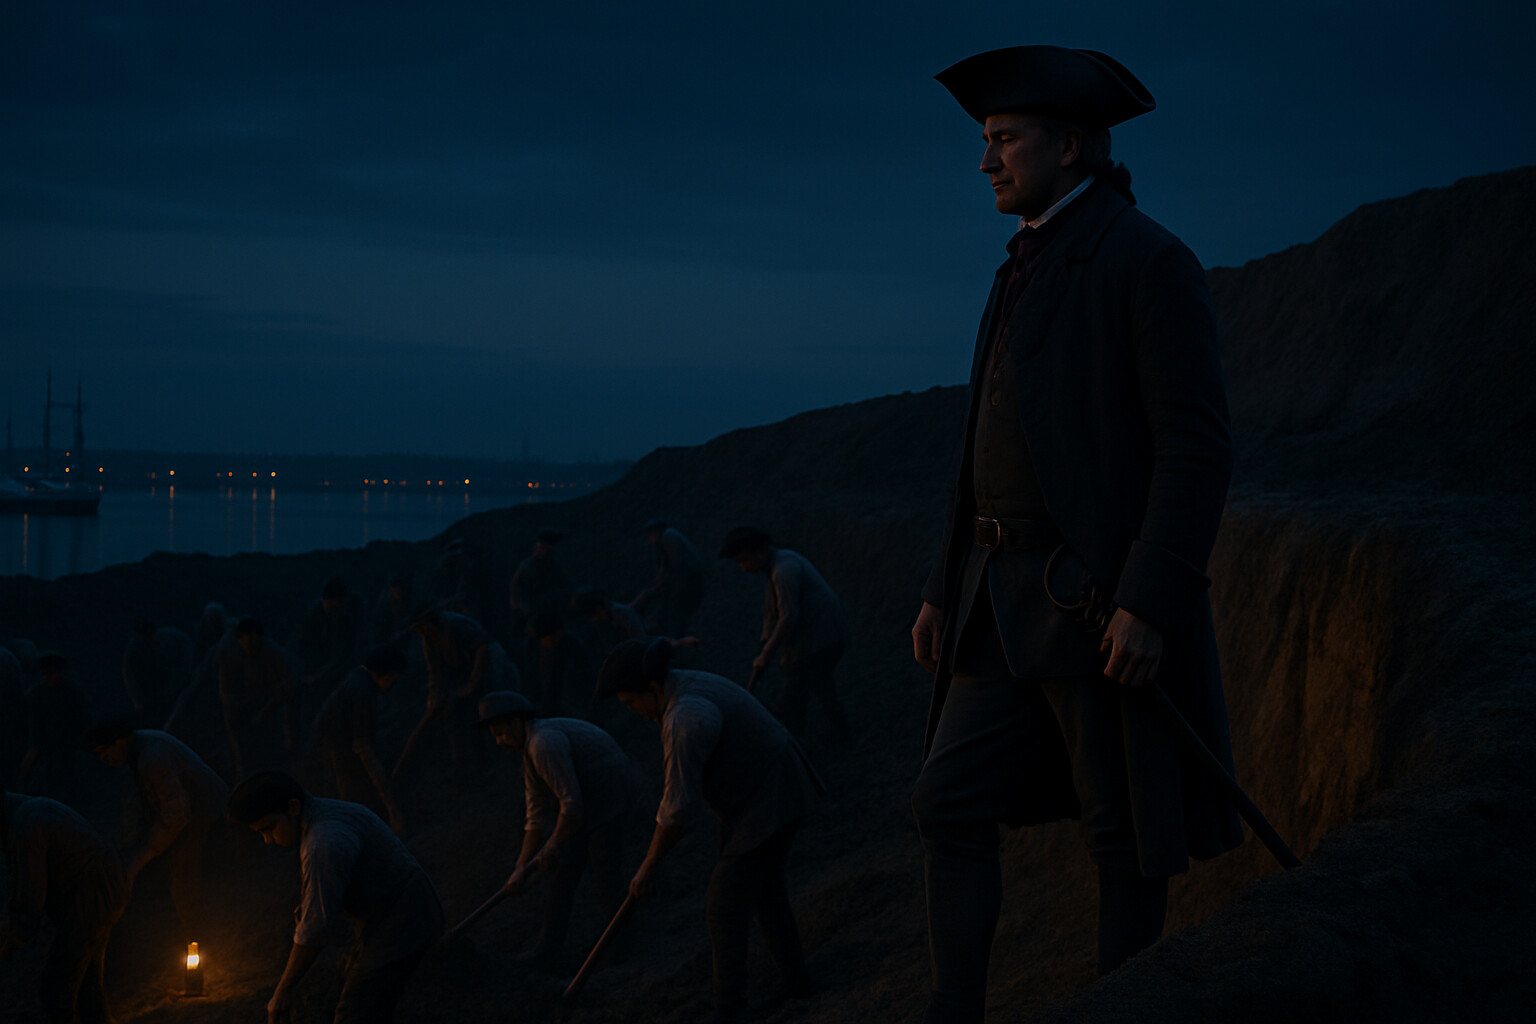
The night was warm and clear when the men put their shovels into the earth.
It was past midnight on June 17, 1775, and somewhere behind them the lights of Boston flickered across the harbor. Ahead, on the dark high ground of the Charlestown peninsula, Colonel William Prescott of the Massachusetts militia walked the perimeter of what was being scratched out of the hillside — a rough earthen redoubt, chest-high in places, barely started, the soil not yet tamped firm. The men worked quietly. The British warships riding at anchor in the harbor below were close enough that a man who paused could hear the water against their hulls. HMS Lively was less than a quarter-mile away.
By the time the June sky began to lighten, Prescott's men had raised a roughly six-sided earthwork approximately 160 feet on a side, with walls around six feet high at the front. They had done it in darkness, under extraordinary pressure, with basic entrenching tools. It would be their ground for the next fourteen hours — and for some of them, their last.
---
The man at the center of that effort was forty-nine years old and had not held a military command in two decades.
William Prescott was born in Groton, Massachusetts, on February 20, 1726. He had served in the colonial militia during King George's War and in the French and Indian War, seeing action in both. By 1775 he was a farmer and a public figure in the colony — respected enough to be given command of a regiment when the Provincial Congress began organizing its forces after Lexington and Concord in April. Contemporary accounts describe him as physically imposing. By all accounts he was composed under pressure. He was not a professional soldier in the European sense. Neither were most of the men under him.
The assignment Prescott had been given the night before reflected both the ambition and the disorder of the colonial cause. The Provincial Congress wanted a fortified position on the high ground north of Boston — either Bunker Hill, the dominant terrain feature at the neck of the Charlestown peninsula, or the lower, more forward slope now known as Breed's Hill. Accounts differ as to why the fortification went up on Breed's Hill rather than the more defensible Bunker Hill, and that question has not been definitively resolved. Competing explanations include a navigation error in darkness, a deliberate choice to occupy the more aggressive position, and miscommunication of orders. What is on the record is the result: an earthwork on the wrong hill, closer to the British guns, with less room for error.

The colonial forces on the peninsula that morning numbered somewhere between 1,200 and 1,500 men, though the accounting is imprecise. In addition to Prescott's regiment, elements from other Massachusetts regiments were present, along with a contingent from Connecticut under Captain Thomas Knowlton and New Hampshire troops under Colonel John Stark, who would arrive during the battle and take up a critical position on the left. Overall command of the colonial forces nominally belonged to General Israel Putnam, though the actual command authority on Breed's Hill remained with Prescott throughout the fight — a point of historical debate, given that both men were senior officers on the field simultaneously.
---
The British woke to the redoubt at dawn.
At approximately 4:00 in the morning, the crew of HMS Lively spotted the earthwork that had not existed the night before. The ship opened fire almost immediately. The cannonade continued through the morning as word reached British headquarters. General Thomas Gage, commanding Crown forces in Boston, convened a council of war. His options were limited. A properly garrisoned redoubt on that hill, supplied with artillery, could bring cannon fire to bear on Boston Harbor and much of the town. It had to be taken. The only serious tactical disagreement among his officers was whether to land troops below the neck and cut off the peninsula, or to mount a direct frontal assault. Major General William Howe, the most experienced field commander in Boston, favored a combined approach: land on the eastern shore of the peninsula, fix the colonial position from the front, and roll up the flank.
What Howe and his colleagues did not fully account for was the ground. The Charlestown peninsula in 1775 was irregular and cluttered — stone walls, rail fences, a beach shoreline that turned soft and broken at the northern end, and a slope leading up to the redoubt that channeled attacking infantry directly into whatever fire the defenders could put up. They also underestimated the men behind those walls.
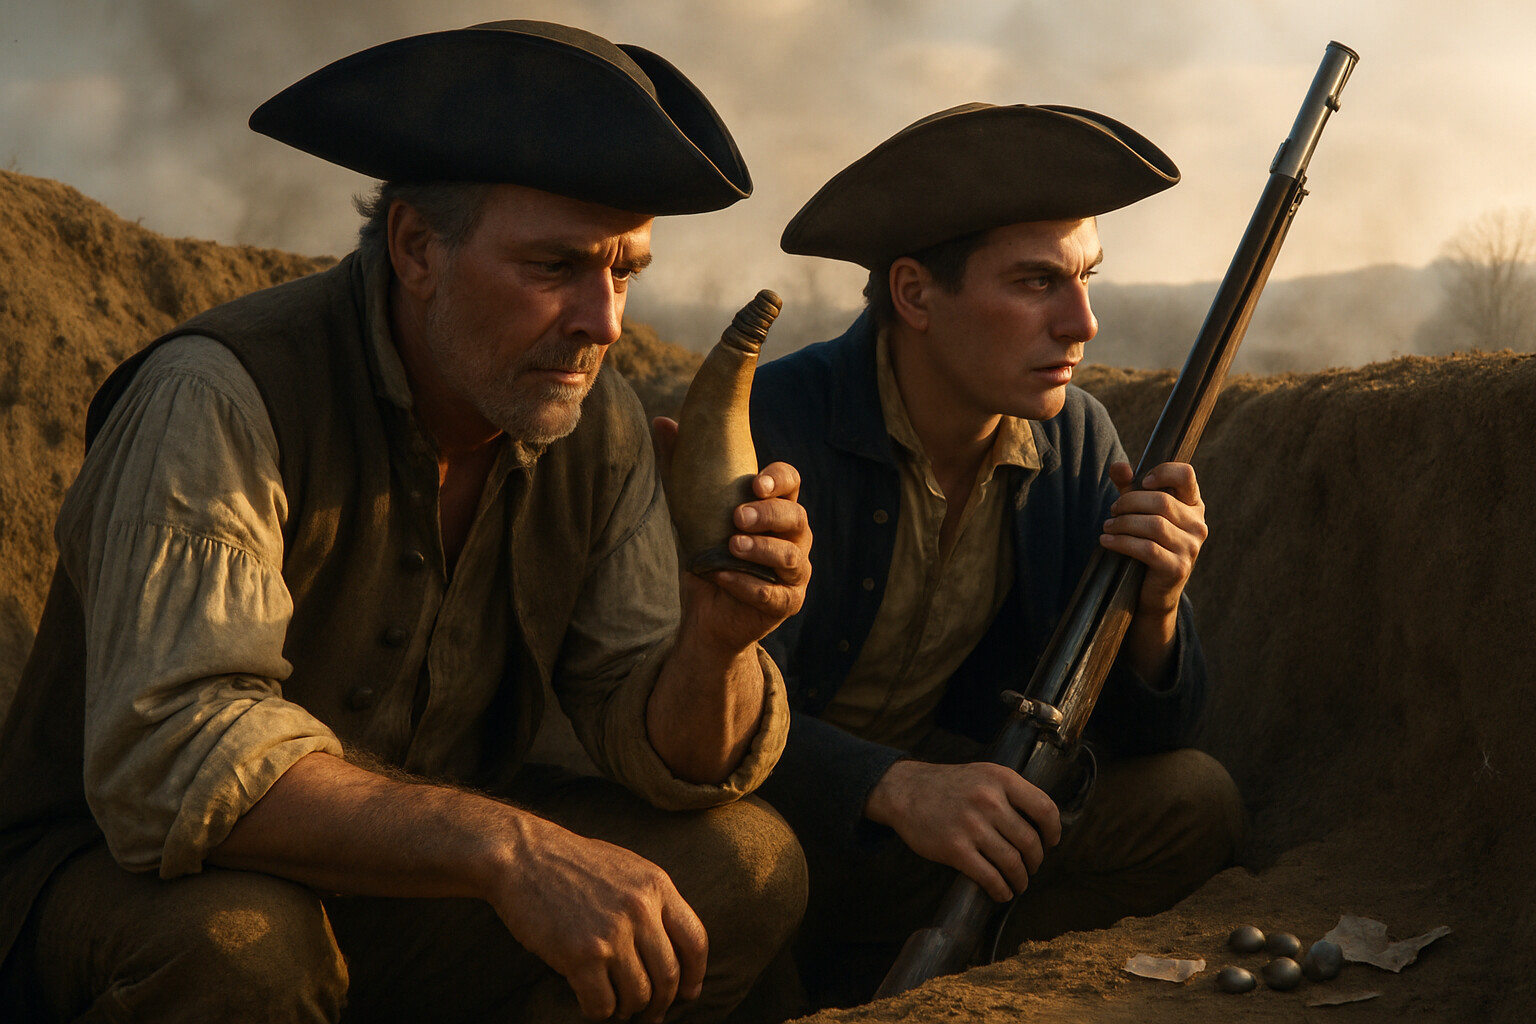
The colonial soldiers who held the redoubt and its associated positions were armed almost entirely with smoothbore flintlock muskets — the standard weapon of the colonial militiaman. Many carried the Long Land Pattern Brown Bess, the same arm used by British regulars, though colonial forces also carried a variety of private arms of different makes and bore sizes. These were not precision instruments. The flintlock musket of the 1770s was effective at roughly 50 to 75 yards in combat conditions. Theoretical ranges of 150 yards or more were rarely achieved in the field, given windage, fouling, and the stress of battle. Loading required biting the cartridge, pouring powder into the pan, pouring the remainder down the barrel, seating the ball with a ramrod, and returning the ramrod to its housing — a process a trained soldier could repeat perhaps three or four times per minute under ideal conditions. Under fire, in heat, with smoke obscuring vision and the ground shaking from artillery, the rate dropped considerably.
Powder was the single most critical resource the colonists had, and they did not have enough. Each man carried a finite number of pre-made cartridges. The supply train for the colonial forces was dangerously thin — requests for additional powder and ammunition sent back during the morning went largely unfulfilled. Some accounts note that barrels of powder sent forward were found defective or insufficient. This shortage would ultimately decide the outcome of the battle more completely than any tactical decision made on either side.

---
The British landing began in the early afternoon.
Howe came ashore on the eastern shore of the peninsula near Morton's Point with roughly 1,500 men in the first wave — the 5th, 38th, 43rd, and 52nd Foot among others, professional soldiers equipped and drilled in the linear tactics that had dominated European warfare for a generation. They carried the same basic musket as their opponents but with one decisive addition: socket bayonets. A 17-inch blade fitted over the muzzle, locking in place with a Z-shaped slot that left the barrel clear for firing. With bayonet mounted, the Brown Bess became a short pike roughly six feet in reach. Many colonial militiamen lacked bayonets entirely or had never been drilled in their use. That gap mattered less when the colonists had powder. It would matter enormously when they did not.
Light artillery pieces accompanied the infantry — 6-pounder field guns intended to suppress the redoubt during the assault. But the terrain made stable gun positions difficult to establish, and multiple accounts, including Howe's own, record that the supply train had delivered 12-pound balls to guns built for 6-pound shot. [Note: the artillery ammunition error is documented in several period and secondary accounts, but direct verification against original British ordnance records is recommended before treating this as fully confirmed.] The guns were reduced to canister — effective at close range but unable to reach the parapet during the approach. The artillery that was supposed to keep defenders' heads down during the advance largely failed to do so.
Howe's plan called for the main effort against the colonial left, where Knowlton's Connecticut men and Stark's New Hampshire troops had extended the defensive line along a rail fence running roughly north from the redoubt toward the Mystic River beach. Simultaneously, a secondary effort would press the redoubt itself from the front. Stark's men had reinforced the fence line with cut hay and added a low stone wall along the beach — a position that would prove far more dangerous to the British than either side had anticipated.
---
The first assault went forward sometime after 3:00 in the afternoon.
Howe formed his regulars and advanced across the slope. The colonial defenders held their fire. The instruction — repeated in multiple accounts, though the exact words and the officer who issued them are contested — was to wait until the attacking infantry was close. The reasoning was not theatrical. With limited ammunition and weapons effective only at short range, expending a volley at 150 yards would accomplish little except empty cartridge boxes that could not be refilled. So the defenders waited.
When the regulars crossed inside effective range, the colonial fire struck with concentrated effect. The right wing of Howe's advance, moving toward the fence line and the beach, walked into musket volleys from Stark's New Hampshire men and Knowlton's Connecticut soldiers firing at close range from behind prepared positions. The British line wavered, took casualties in numbers that contemporary British accounts described as shocking, and fell back. The frontal push against the redoubt met the same result. The assault broke.
British officers dressed the lines. The men reformed. The second assault went forward across the same ground, past the same fallen.
The colonial fire held them again. Accurate casualty accounting for each individual assault is difficult at this distance — British after-action accounts were not always consistent — but what is beyond dispute is that by the time the second assault failed, Howe's command had suffered heavily. Officers were disproportionately among the casualties, a function of their visible position at the front of advancing columns and, on the colonial side, of a deliberate or informal practice of targeting conspicuous figures. British regular infantry were trained to close ranks and continue advancing over fallen comrades. Even for well-trained troops, doing that twice in succession across the same broken, fire-swept slope was a test of extraordinary discipline.
Howe reformed for a third assault. He made tactical adjustments: he stripped his men of the heavy packs that had slowed movement across the broken ground, tightened the column, and concentrated the effort more directly on the redoubt rather than the fence line, which had proved nearly impenetrable. Light infantry and grenadiers were brought forward. The assault went up the slope.
---
Inside the redoubt, the situation had fundamentally changed.
The defenders were running out of powder. Some men had already fired their last cartridge. Others were stretching what remained by using reduced charges — less powder per shot, which cut range and impact. A few accounts describe men throwing rocks or wielding muskets as clubs when ammunition was exhausted, though this detail appears in some period accounts but has not been confirmed across multiple independent primary sources and should be treated as uncertain reconstruction. The precise moment at which the powder gave out across the line is not recoverable. It was not simultaneous, but it was rapid. The rate of fire from the redoubt fell. The slope below was still full of advancing infantry.
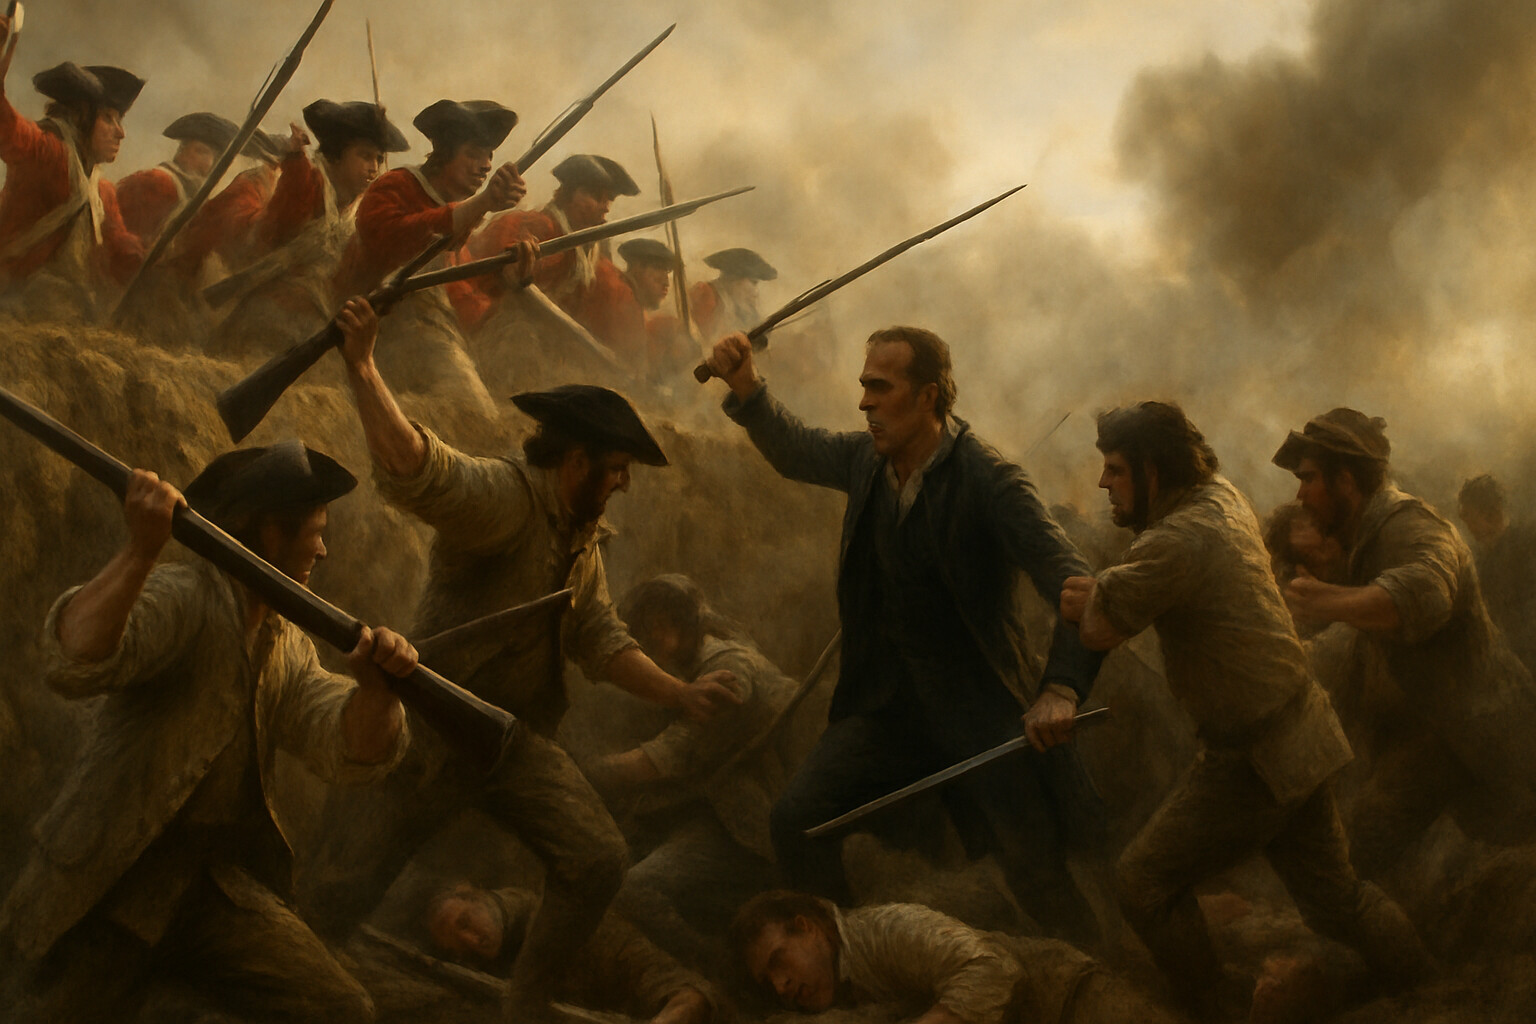
The third assault reached the walls.
British infantry climbed the parapet in multiple places almost simultaneously. With bayonets fixed and numbers on their side, they drove into the redoubt. The fighting at the wall was short and close. Prescott, according to multiple contemporary accounts, was still present on the parapet during this phase — accounts describe him in the fighting, though specific details vary and later retellings show signs of elaboration that cannot be fully verified. What is consistent across the accounts is that he did not leave early.
The colonial retreat across the peninsula was not organized. Bunker Hill, behind the redoubt, offered some cover, and elements of the colonial force there provided a degree of rearguard presence. But the withdrawal was under fire and took additional casualties.
Among the men killed during the retreat or in the final moments of the redoubt's defense was Dr. Joseph Warren — a physician, president of the Massachusetts Provincial Congress, and one of the most prominent political figures in the colony. Warren had arrived at Breed's Hill that morning as a volunteer, declining to exercise command despite holding the rank of major general by commission. He was thirty-four years old. The exact circumstances of his death — whether he was shot at the parapet or during the retreat — are not definitively established across primary sources. British officers reportedly confirmed his identity on the field. His death struck the colonial cause as a serious loss, and it was treated as such in the dispatches and letters that followed.
Also killed in the assault was Major John Pitcairn of the Royal Marines — the officer who had commanded the British advance guard at Lexington in April, at the engagement that opened the war. Accounts conflict on whether he was shot at the parapet or shortly after reaching it. His son carried him from the field. He died of his wounds in Boston.
---
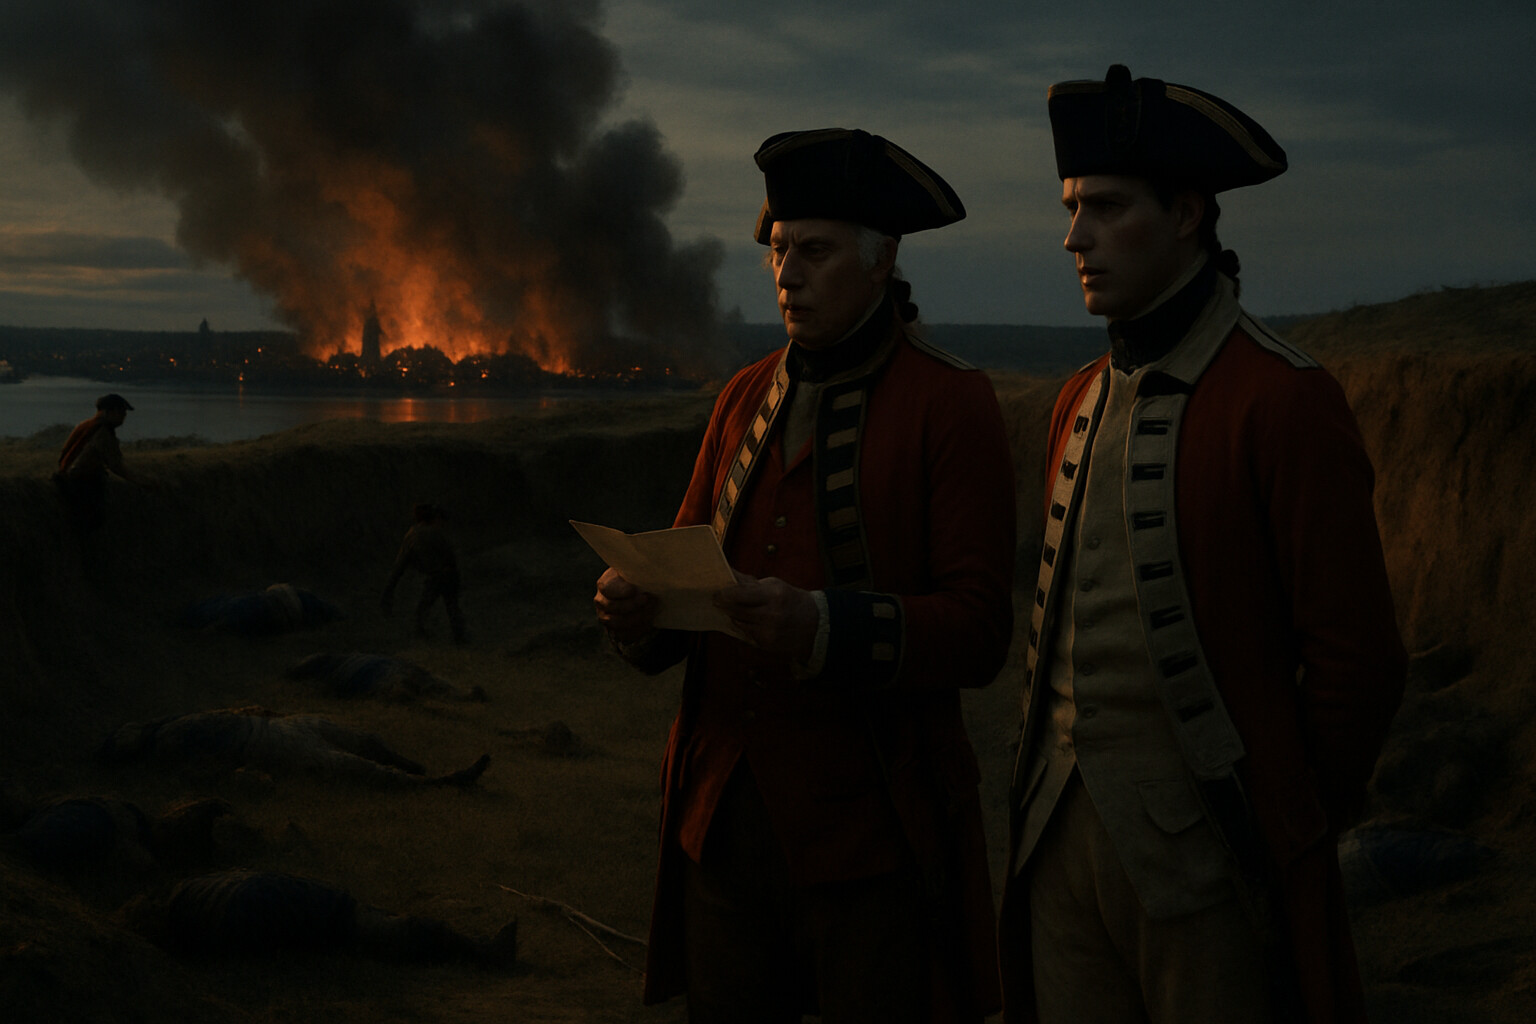
The British held the Charlestown peninsula by nightfall. The redoubt was theirs.
But the accounting of what taking it had cost was grim reading. British casualties at Bunker Hill totaled approximately 1,054 killed and wounded out of roughly 2,300 to 2,500 engaged — a casualty rate of roughly forty to fifty percent, making it one of the most costly engagements British forces would experience anywhere in the Revolutionary War. Among the dead was a significant number of junior officers, the cadre of experienced men who proved harder to replace than enlisted ranks. Howe's own dispatch to London was subdued. He described an action in which trained British regiments had been repulsed twice before succeeding on a third attempt against a partially fortified earthwork built by amateurs overnight.
Colonial casualties were also substantial — estimated at 400 to 450 killed and wounded, with the precise figure uncertain given incomplete records and the disorganized nature of the withdrawal. The colonists had lost the ground. They had not lost the battle's meaning.
---
Prescott withdrew with his men. He was not captured, not seriously wounded according to surviving records, and resumed his duties with the Massachusetts forces. He continued to serve through parts of the war, including at Saratoga in 1777, though Bunker Hill remained the defining engagement associated with his name.
No formal military decoration or award from the Continental Army or the Massachusetts Provincial Congress for his actions on June 17 has been confirmed in standard historical records. The Continental Army's system of military honors was not yet the formalized structure it would become, and no verified citation for Prescott has been identified in the research underlying this account. His service and conduct are documented in regimental records, the journals of the Massachusetts Provincial Congress, and in the subsequent accounts of those who were present on the field.
---
The tactical story of June 17, 1775 has a straightforward reading: a colonial militia force, inadequately supplied and lacking the bayonets and artillery that would have been needed to hold the position indefinitely, inflicted severe losses on a professional army before the fundamental asymmetry of resources forced a withdrawal.
The strategic story is more consequential.
General Gage's report to London was not the account of a victory. He described an action in which his professional regiments had been driven back twice before carrying a partially built earthwork on a third attempt, and at a cost that had no precedent in his experience of the colonial forces. The assumption that sustained British pressure would quickly collapse colonial resistance — an assumption that some in London had invested in deeply since Lexington — did not survive the afternoon of June 17. The colonial troops had demonstrated that disciplined fire from behind cover could neutralize the tactical advantages of professional infantry, that the men who built the earthwork in the dark could hold it through two assaults, and that they would do so without breaking.
When George Washington arrived in Cambridge in early July 1775 to take command of the newly designated Continental Army, he inherited a force whose officers and men had shown at Breed's Hill that they could fight, absorb punishment, and inflict it in return. Washington's first challenge was organizing and disciplining that force. The harder problem — convincing men that standing in a redoubt while British regulars advanced with bayonets was survivable — had already been addressed.
The Continental Congress received word of the battle and the casualty figures. Numbers told a story that arguments could not. Whatever the debates in Philadelphia about reconciliation versus independence, the arithmetic of Bunker Hill shifted the conversation in ways that are traceable through the documents of that summer: a professional army had paid in blood to retake ground from farmers and tradesmen, and it had needed three attempts to do it.
The observation circulated after the battle — attributed in various forms to various figures, and not reliably sourced to any single speaker — was that if the Americans had had sufficient powder, the British might not have taken the hill at all. That is the counterfactual historians wrestle with and can never fully resolve. It points to the real story beneath the tactical account: that what stopped the colonists was not British valor or British tactical skill, but a supply chain that had failed to get cartridges to men who were ready to use them.
---
Prescott returned to his farm when the war was over. He died on February 13, 1795, in Pepperell, Massachusetts, the town where his family had relocated. He did not write a memoir. He left relatively little personal documentation of his experience at Bunker Hill — his personal papers from the period are sparse, and whether additional first-person documentation survives in private family collections or regional archives has not been fully established.
What remains are the records of others: officers who served alongside him, witnesses who described his bearing on the parapet, and the accounts filed by British commanders who found that the morning's earthwork cost them more than a day's work to take back.
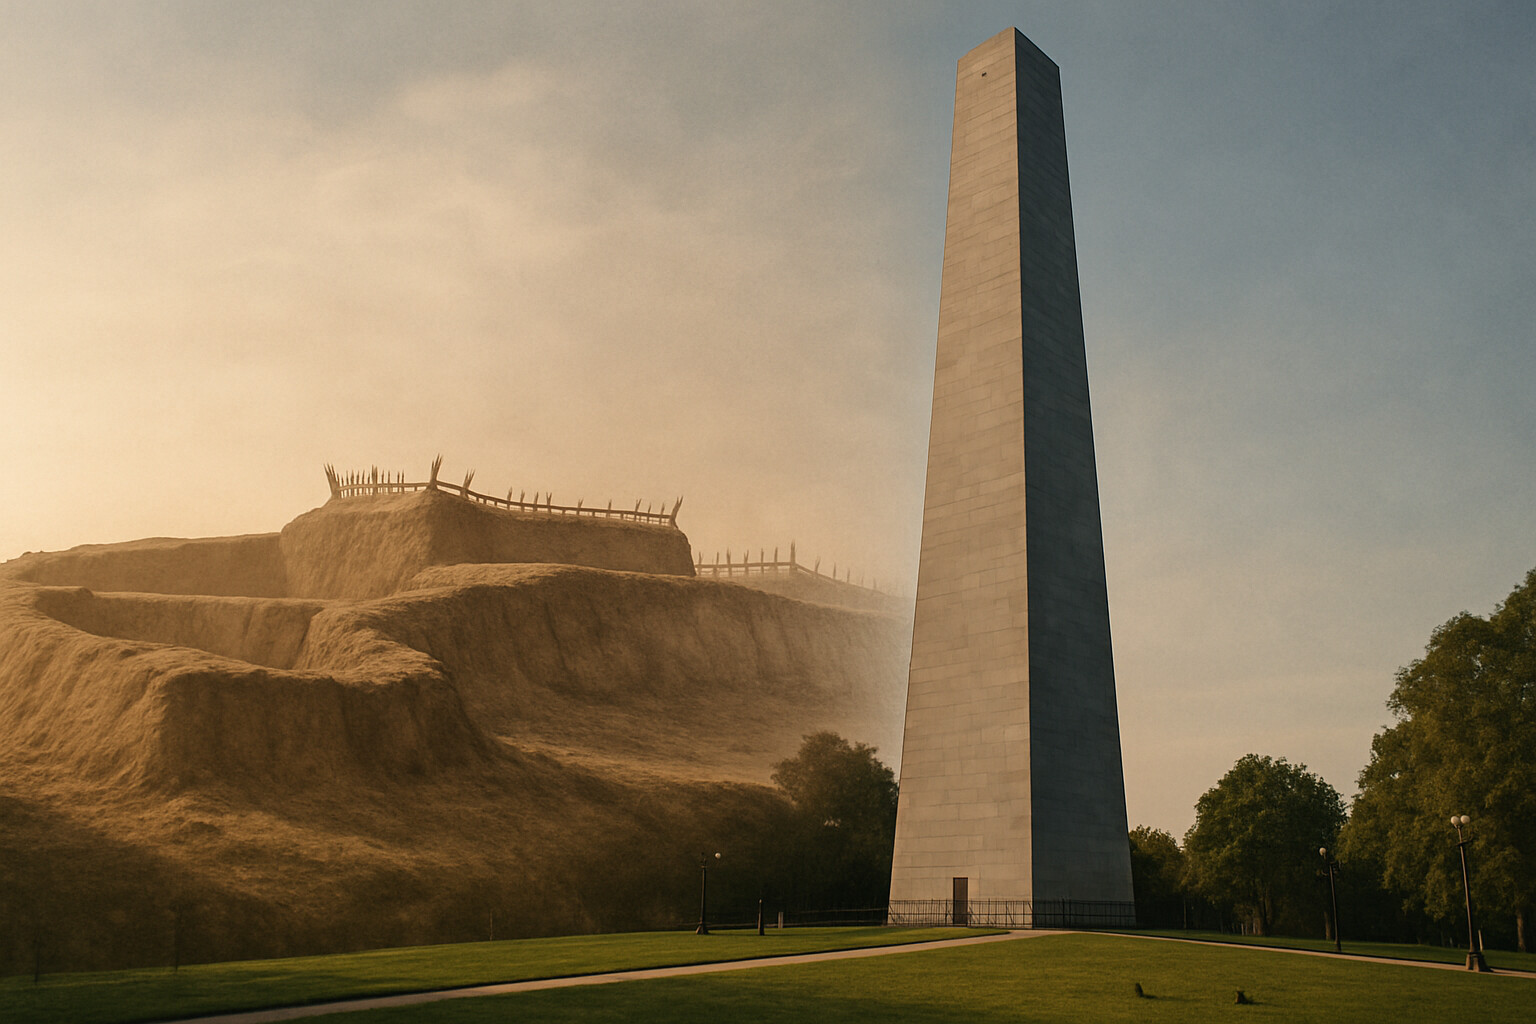
The redoubt itself was gone by nightfall — a temporary earthwork on contested ground. The hill it stood on carries the wrong name, attached by a naming convention that misidentified the terrain in the weeks after the battle and never fully corrected itself. The Bunker Hill Monument that rises from the site today marks ground that was Breed's Hill, not Bunker Hill — a small historical irony that the surviving records document clearly and that no subsequent monument has seen fit to fix.
The men who built the earthwork in the dark on the night of June 16 did not know what the next day would cost. They knew what the morning would bring — the warships below them made that clear enough — and they dug anyway. By the time the light came up over Boston Harbor, they had built something that three columns of British infantry would have to climb before the day was over. Two of those assaults they stopped cold. The third they could not stop, because the powder was gone.
That is what the record shows. A militia colonel who had been farming in Massachusetts two months earlier watched the slope below his unfinished earthwork, saw three columns of British infantry form for the assault, and held his ground until there was nothing left to hold it with.